
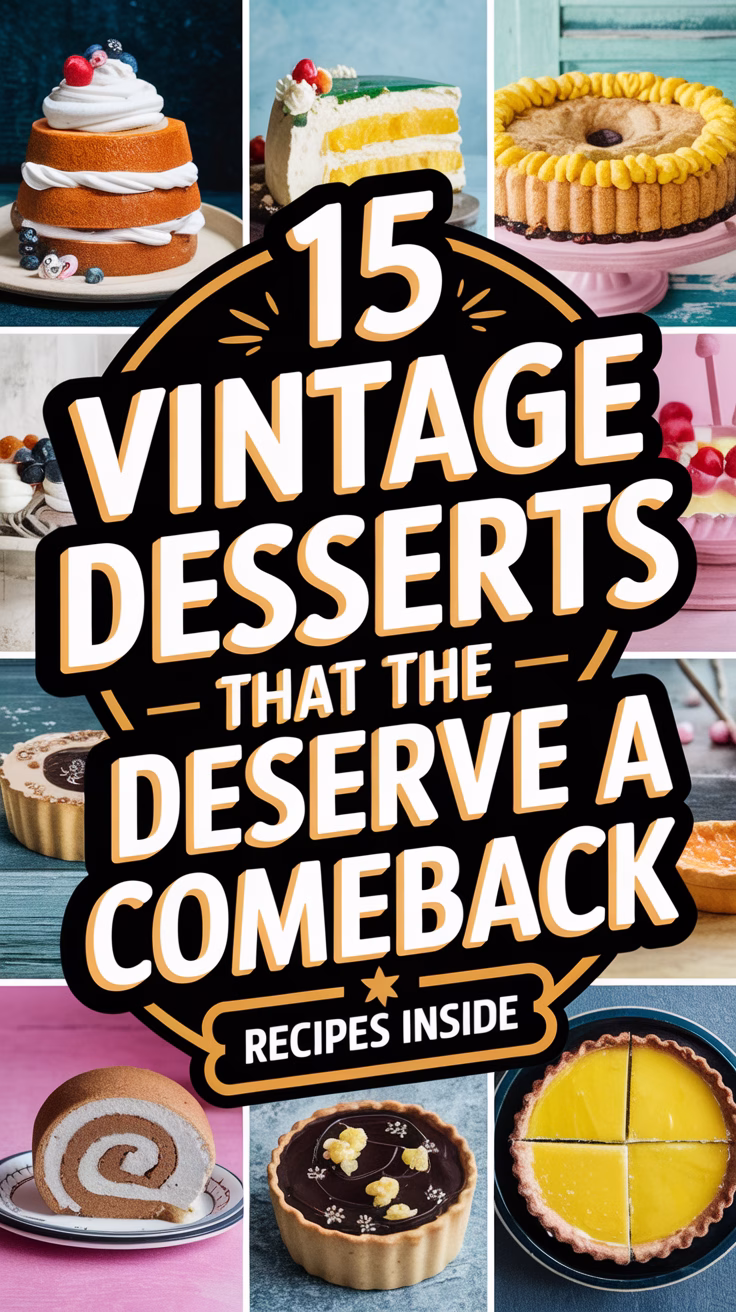
There’s something undeniably charming about vintage desserts—they evoke a sense of nostalgia, tradition, and homemade comfort that many modern sweets just don’t capture. Whether it’s the simple ingredients, time-honored techniques, or the memories they bring back, these classic treats deserve a second chance in today’s kitchens. That’s why we’re diving into 15 Vintage Desserts That Deserve a Comeback, featuring forgotten favorites that were once staples at family gatherings, potlucks, and celebrations.
This collection isn’t just about reminiscing over the past—it’s about bringing these desserts back to life. Whether you’re looking to recreate a family favorite, explore old-fashioned baking techniques, or simply try something new, these 15 vintage desserts are sure to spark inspiration. So, grab your mixing bowls and a little bit of nostalgia—it’s time to revive these sweet treasures and give them the appreciation they deserve!
Baked Alaska with Toasted Meringue
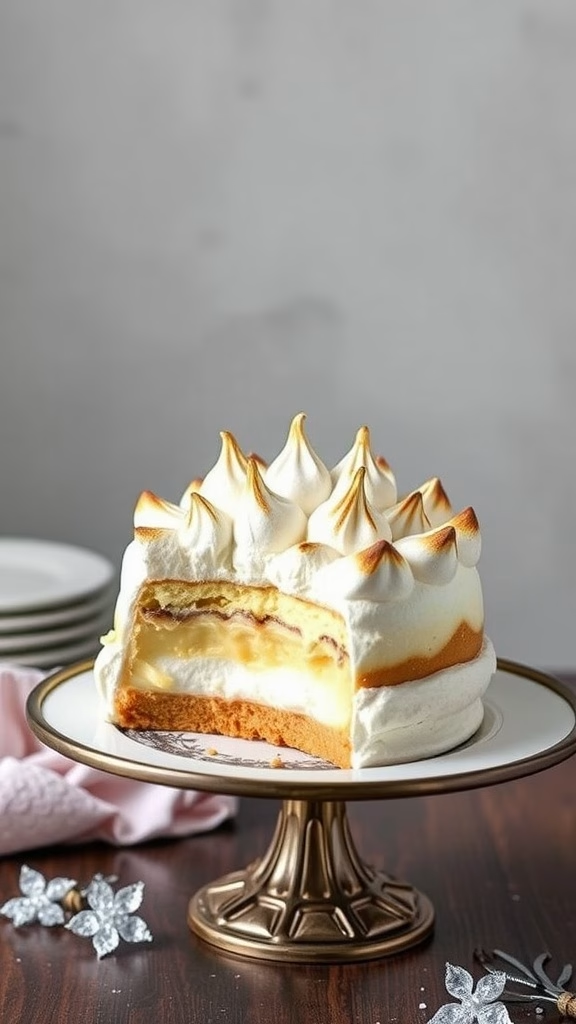
Baked Alaska is a classic dessert that brings together rich flavors and impressive presentation. Combining cake, ice cream, and a fluffy toasted meringue, it offers a delightful balance of textures and temperatures. The creamy ice cream contrasts beautifully with the warm, crispy meringue, creating a treat that feels both nostalgic and sophisticated.
This retro dessert is simpler to make than it seems! With a layer of cake at the base, your favorite ice cream in the center, and a generous topping of meringue, it’s a showstopper for any occasion. Perfect for those who love traditional desserts from the past, Baked Alaska definitely deserves a comeback!
Ingredients
- 1 store-bought or homemade sponge cake
- 4 cups ice cream (your choice of flavor)
- 4 large egg whites
- 1 cup granulated sugar
- 1 teaspoon vanilla extract
- 1/4 teaspoon cream of tartar
- 1/2 cup unsweetened cocoa powder (optional, for chocolate cake)
Instructions
- Prepare the Base: If using homemade sponge cake, bake and cool it according to your recipe. Place the cooled cake on a baking sheet lined with parchment paper.
- Layer the Ice Cream: Scoop the ice cream onto the cake, spreading it evenly. You can mix flavors or stick to one. Freeze until solid, about 2-3 hours.
- Make the Meringue: In a clean bowl, whisk the egg whites with cream of tartar until soft peaks form. Gradually add the sugar, continuing to whisk until stiff peaks form. Mix in the vanilla extract.
- Cover the Dessert: Remove the cake and ice cream from the freezer. Spread the meringue over the ice cream and cake, making sure to seal the edges well.
- Toast the Meringue: Preheat your oven to 425°F (220°C). Bake the Baked Alaska for 3-5 minutes, or until the meringue is golden brown. Keep a close eye to avoid burning!
- Serve: Let it cool slightly and slice into wedges to serve. Enjoy this nostalgic sweet treat!
Sponge Cake with Strawberry Glaze
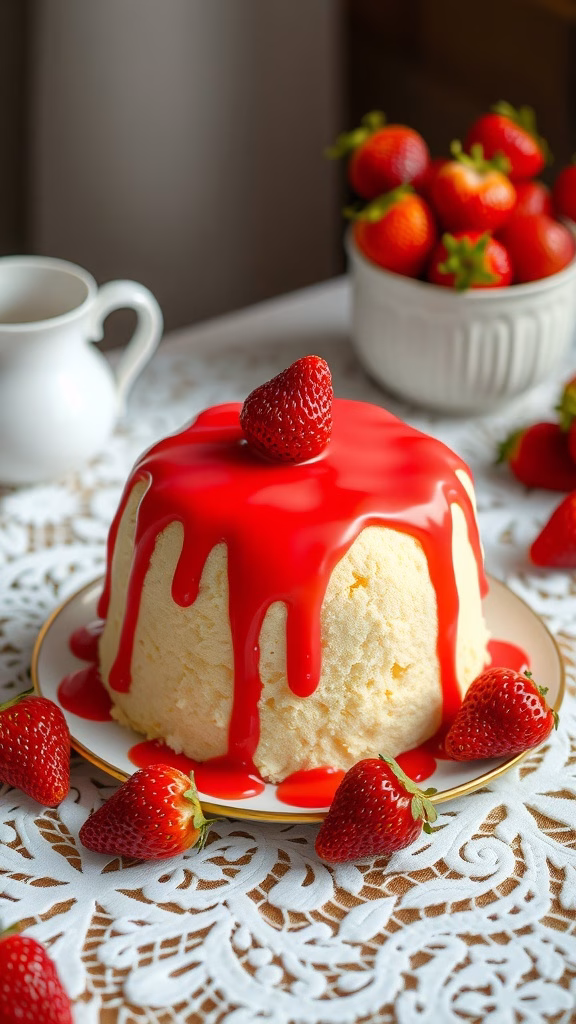
Sponge cake, light and airy, is a classic that brings a taste of nostalgia to any dessert table. Topped with a vibrant strawberry glaze, this treat is not just beautiful but also delightful. The cake is simple to make, requiring basic ingredients that you likely already have on hand, making it perfect for both beginners and seasoned bakers looking to revisit traditional desserts from the past.
The combination of fluffy sponge and sweet, fruity glaze offers a refreshing balance that’s ideal for warm days or special occasions. It’s a dessert that can easily transport you back to the 1920s and 1930s, reminding us of the lost vintage dessert recipes that deserve a comeback. Let’s not forget: nothing beats a slice of sponge cake adorned with a glossy strawberry glaze, enjoyed with family or friends!
Ingredients
- 1 cup all-purpose flour
- 1 teaspoon baking powder
- 1/2 teaspoon salt
- 4 large eggs
- 3/4 cup granulated sugar
- 1/4 cup unsalted butter, melted
- 1 teaspoon vanilla extract
- 1 cup fresh strawberries, pureed
- 1/2 cup powdered sugar
- 1 tablespoon lemon juice
Instructions
- Preheat your oven to 350°F (175°C) and grease a 9-inch round cake pan.
- In a bowl, whisk together flour, baking powder, and salt.
- In another bowl, beat the eggs and granulated sugar until light and fluffy, then mix in the melted butter and vanilla.
- Gradually add the dry ingredients to the wet mixture until just combined.
- Pour the batter into the prepared cake pan and bake for 25-30 minutes until a toothpick comes out clean.
- Let the cake cool completely before removing from the pan.
- For the glaze, combine the strawberry puree, powdered sugar, and lemon juice in a small bowl until smooth.
- Spread the glaze over the cooled sponge cake and let it set before serving.
Jell-O Salad with Fruits and Nuts
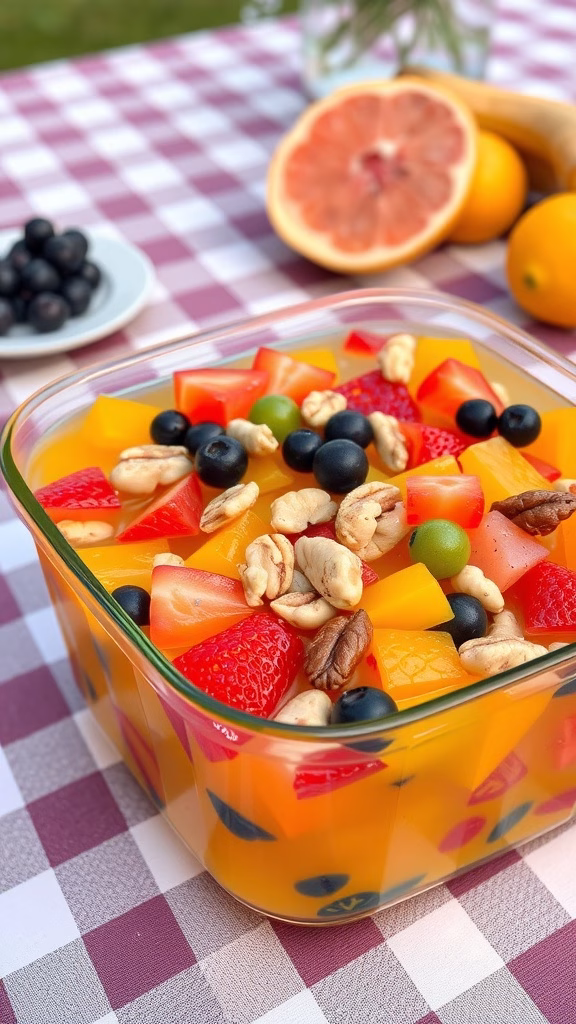
Jell-O salad is a fun and colorful dessert that combines sweet gelatin with fresh fruits and crunchy nuts, making it a hit at any gathering. The sweet and fruity flavors balance perfectly with the nutty crunch, offering a delightful texture that’s both refreshing and nostalgic.
Simple to make, this retro sweet treat can be prepared ahead of time, allowing for an easy addition to potlucks and family dinners. With its vibrant layers and fruity bites, it brings a touch of vintage charm to the table, reminiscent of classic desserts that need a comeback.
Ingredients
- 2 cups boiling water
- 1 package (3 ounces) flavored gelatin (any color)
- 1 cup cold water
- 1 cup diced fresh fruits (such as strawberries, peaches, and blueberries)
- 1/2 cup chopped nuts (like walnuts or pecans)
- 1 cup mini marshmallows (optional)
Instructions
- In a mixing bowl, dissolve the gelatin in boiling water, stirring until completely dissolved.
- Add cold water to the gelatin mixture and mix well.
- Pour half of the gelatin into a serving dish and refrigerate until slightly set, about 1 hour.
- Once the first layer is set, add the diced fruits and nuts, then pour the remaining gelatin over the top.
- Chill in the refrigerator until fully set, usually about 4 hours.
- For an extra touch, top with whipped cream before serving.
Raspberry Charlotte Russe

Raspberry Charlotte Russe is a delightful dessert that brings a touch of nostalgia to any table. This vintage treat boasts layers of light sponge cake, creamy raspberry filling, and a fluffy whipped topping. The combination of sweet and tart flavors makes it a refreshing option, perfect for warm days or special occasions.
Also known as a charlotte, this dessert is not just visually appealing but also simple to make. You can whip it up in no time, making it one of those classic desserts that need a comeback. So, if you’re looking to impress your friends and family with a retro sweet treat, look no further than this charming dish!
Ingredients
- 1 package ladyfinger cookies
- 2 cups fresh raspberries
- 1 cup heavy whipping cream
- 1/2 cup granulated sugar
- 1 tablespoon gelatin
- 1/4 cup cold water
- 2 cups raspberry puree
- 1 teaspoon vanilla extract
- Mint leaves for garnish (optional)
Instructions
- Prepare the Gelatin: In a small bowl, sprinkle gelatin over cold water and let it sit for 5 minutes to soften.
- Heat Raspberry Puree: In a saucepan, heat raspberry puree over low heat and stir in the softened gelatin until dissolved. Remove from heat and let it cool slightly.
- Whip the Cream: In a separate bowl, whip heavy cream with sugar and vanilla extract until soft peaks form.
- Combine Mixtures: Gently fold the raspberry mixture into the whipped cream until well combined.
- Assemble the Charlotte: Line a mold with ladyfinger cookies, pour half of the raspberry mixture over the cookies, add a layer of fresh raspberries, then top with the remaining raspberry mixture. Finish with another layer of ladyfingers.
- Chill: Cover and refrigerate for at least 4 hours or until set.
- Serve: To serve, carefully invert the Charlotte onto a serving plate, garnish with mint leaves and additional raspberries, and enjoy your taste of vintage goodness!
Banana Cream Pie with Meringue
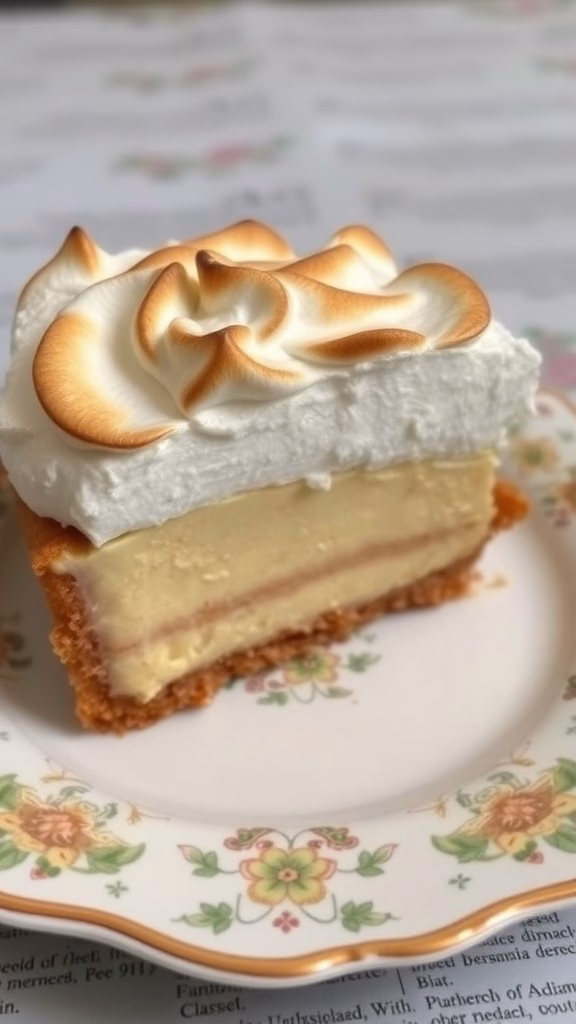
Banana Cream Pie with Meringue is a delightful vintage dessert that combines creamy banana pudding with a light, airy meringue topping. This classic treat has a smooth texture and a sweet, fruity flavor that’s simply irresistible. It’s a nostalgic sweet treat that brings back memories of family gatherings and potluck dinners.
Making this pie is easier than it seems! With a few simple ingredients, you can whip up a dessert that will impress everyone. The balance of the buttery crust, creamy filling, and fluffy meringue makes this a star on any dessert table.
Ingredients
- 1 prepared pie crust (store-bought or homemade)
- 1/3 cup granulated sugar
- 2 cups whole milk
- 3 tablespoons cornstarch
- 1/4 teaspoon salt
- 3 large egg yolks
- 3 tablespoons unsalted butter
- 1 teaspoon vanilla extract
- 2 ripe bananas, sliced
- 3 large egg whites
- 1/4 teaspoon cream of tartar
- 1/2 cup granulated sugar (for meringue)
Instructions
- Preheat your oven to 350°F (175°C).
- In a medium saucepan, combine 1/3 cup sugar, cornstarch, and salt. Gradually whisk in milk until smooth.
- Cook over medium heat, stirring constantly, until mixture thickens and begins to bubble. Remove from heat.
- In a small bowl, whisk the egg yolks. Slowly stir about a cup of the hot mixture into the yolks to temper them, then return to the saucepan. Cook for an additional 2 minutes, stirring constantly.
- Remove from heat and stir in butter and vanilla extract. Let cool for a few minutes.
- Layer the banana slices in the bottom of the pie crust. Pour the pudding mixture over the bananas.
- In a clean bowl, beat the egg whites and cream of tartar until foamy. Gradually add 1/2 cup sugar and beat until stiff peaks form.
- Spread the meringue over the pudding, making sure it touches the crust to prevent shrinkage. Use a spatula to create peaks.
- Bake for 10-12 minutes, or until the meringue is golden brown. Let cool before serving.
Ladyfinger Trifle with Custard
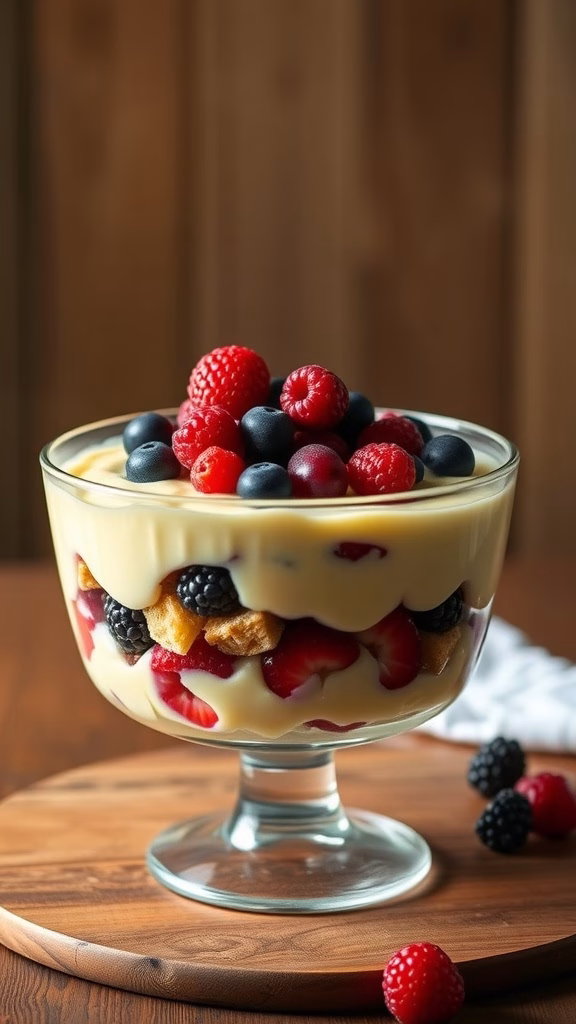
Ladyfinger trifle with custard is a delightful vintage dessert that layers the softness of ladyfingers with creamy custard and fresh fruits. This dessert is both light and satisfying, making it a perfect end to any meal. The combination of textures—from the spongy ladyfingers to the smooth custard and the burst of juicy berries—creates a lovely taste experience that feels nostalgic yet fresh.
Making a ladyfinger trifle is quite simple. You can prepare the components ahead of time, allowing you to assemble the trifle just before serving. This dessert not only showcases the best of vintage baking ideas but also encourages creativity with its layers, making it a fun project to dive into.
Ingredients
- 1 box ladyfingers
- 4 cups prepared custard (store-bought or homemade)
- 2 cups mixed berries (strawberries, blueberries, raspberries)
- 1 cup heavy cream, whipped
- 2 tablespoons powdered sugar
- 1 teaspoon vanilla extract
Instructions
- Prepare the Custard: If making custard from scratch, follow your favorite recipe until thickened. Allow it to cool.
- Layer the Ladyfingers: In a large trifle dish, arrange a layer of ladyfingers at the bottom. You can soak them briefly in a bit of fruit juice or liqueur for extra flavor.
- Add the Custard: Spoon a layer of the prepared custard over the ladyfingers, smoothing it out evenly.
- Repeat Layers: Continue layering with ladyfingers and custard until you reach the top, finishing with custard.
- Whip the Cream: In a bowl, combine heavy cream, powdered sugar, and vanilla extract. Whip until soft peaks form, then spread on top of the final custard layer.
- Garnish: Top with the mixed berries for a colorful finish. Chill the trifle in the refrigerator for at least 2 hours before serving to let the flavors meld.
Chocolate Mayonnaise Cake
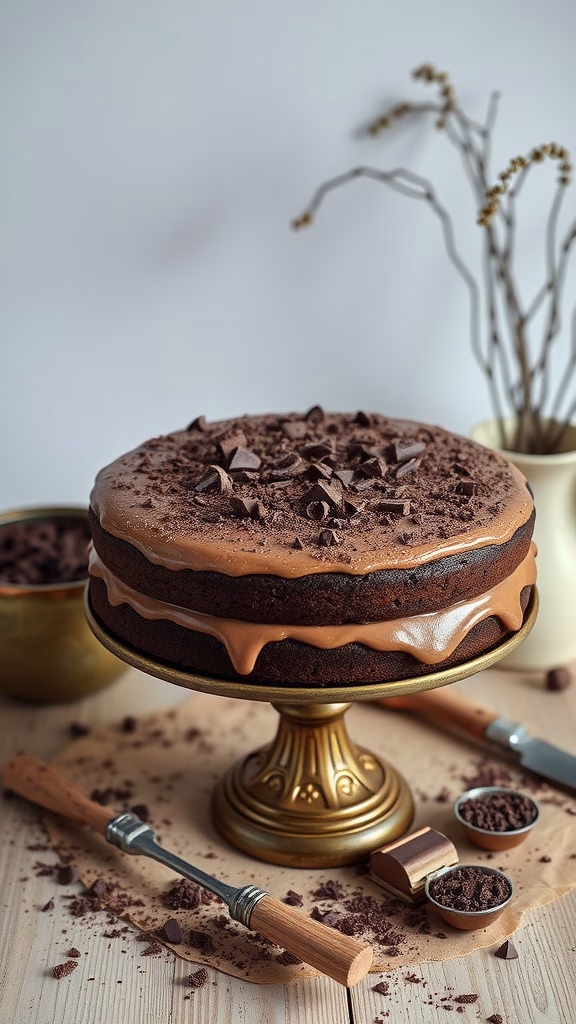
Chocolate Mayonnaise Cake is a delightful throwback to the 1920s and 1930s desserts that have seemingly faded from our modern baking repertoire. This unique recipe substitutes mayonnaise for traditional fats like butter or oil, resulting in a cake that’s incredibly moist and rich. The chocolate flavor shines through beautifully, making it a favorite for chocolate lovers.
Not only is it simple to make, but it also requires ingredients you likely already have in your pantry. The combination of mayonnaise and cocoa creates a luscious texture, reminiscent of classic desserts that need a comeback. Pair it with a glossy chocolate frosting for a truly nostalgic sweet treat that everyone will love.
Ingredients
- 1 cup mayonnaise
- 1 cup granulated sugar
- 1 cup all-purpose flour
- 1/2 cup unsweetened cocoa powder
- 1 teaspoon baking soda
- 1/2 teaspoon salt
- 1 teaspoon vanilla extract
- 1 cup hot water
Instructions
- Preheat your oven to 350°F (175°C). Grease and flour two 9-inch round cake pans.
- In a large mixing bowl, combine the mayonnaise, sugar, and vanilla extract.
- In another bowl, whisk together the flour, cocoa powder, baking soda, and salt.
- Gradually add the dry ingredients to the mayonnaise mixture, stirring until well blended.
- Slowly add the hot water and mix until the batter is smooth.
- Pour the batter evenly into the prepared cake pans.
- Bake for 30-35 minutes, or until a toothpick inserted in the center comes out clean.
- Allow the cakes to cool in the pans for 10 minutes before transferring them to a wire rack to cool completely.
- Frost with your favorite chocolate icing and enjoy this delicious blast from the past!
Creamsicle Ice Cream Pie
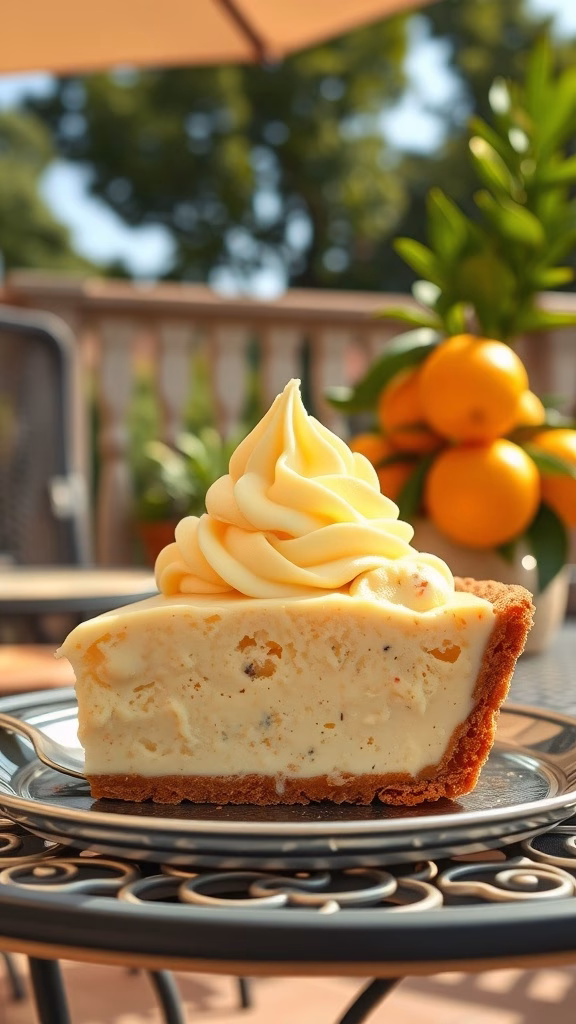
Creamsicle Ice Cream Pie is a delightful throwback to classic desserts that need a comeback. This dessert combines the bright, citrusy flavors of orange with the creamy, sweet goodness of vanilla ice cream, evoking memories of warm summer days. It’s a simple recipe that doesn’t require any baking, making it perfect for those looking for a nostalgic treat without a lot of fuss.
The pie is not only visually appealing with its vibrant orange hue, but it also has a smooth and creamy texture that melts in your mouth. With a buttery graham cracker crust, every bite is a lovely blend of flavors that brings joy and nostalgia. Perfect for any gathering or just a sweet treat at home, this pie is a reminder of the retro sweet treats that deserve a revival.
Ingredients
- 1 ½ cups graham cracker crumbs
- ½ cup unsalted butter, melted
- ¼ cup granulated sugar
- 2 cups vanilla ice cream, softened
- 1 cup orange sherbet, softened
- 1 cup whipped cream
- 1 teaspoon orange zest
- Fresh orange slices for garnish (optional)
Instructions
- Prepare the Crust: In a bowl, combine graham cracker crumbs, melted butter, and sugar. Mix until well combined. Press mixture into the bottom and up the sides of a 9-inch pie dish. Chill in the refrigerator for 30 minutes.
- Make the Filling: In a large bowl, fold together the softened vanilla ice cream and orange sherbet until blended. Add orange zest and mix gently.
- Fill the Crust: Spoon the ice cream mixture into the chilled graham cracker crust. Spread evenly and smooth the top with a spatula.
- Chill Again: Cover the pie with plastic wrap and freeze for at least 4 hours, or until firm.
- Serve: Before serving, top the pie with whipped cream and garnish with fresh orange slices if desired. Slice and enjoy your nostalgic dessert!
Lemon Chiffon Pie

Lemon Chiffon Pie is a delightful dessert that combines the bright, zesty flavor of lemons with a light and airy texture. This classic treat is perfect for those warm days when you crave something refreshing yet sweet. It’s surprisingly simple to whip up, making it a great choice for both seasoned bakers and those just starting out in the kitchen.
The creamy filling, set within a crisp crust, creates a delightful contrast that’s sure to impress. It’s a nostalgic sweet treat that brings back memories of family gatherings and sunny picnics, truly embodying the essence of vintage desserts that deserve a comeback. Let’s bring this historic dessert recipe to life!
Ingredients
- 1 pre-baked 9-inch pie crust
- 1 cup granulated sugar
- 1/4 cup cornstarch
- 1/4 teaspoon salt
- 1 cup water
- 3 large egg yolks, beaten
- 1/2 cup fresh lemon juice
- 1 tablespoon lemon zest
- 1 tablespoon unsalted butter
- 3 large egg whites
- 1/4 teaspoon cream of tartar
- 1/4 cup powdered sugar
- Whipped cream, for topping
Instructions
- Prepare the filling: In a saucepan, combine granulated sugar, cornstarch, and salt. Gradually stir in water. Cook over medium heat, stirring constantly, until thickened and bubbly.
- Mix in egg yolks, lemon juice, and lemon zest. Cook for another minute, then remove from heat and stir in butter until melted. Allow the mixture to cool slightly.
- In a separate bowl, beat egg whites and cream of tartar until soft peaks form. Gradually add powdered sugar, continuing to beat until stiff peaks form.
- Gently fold the cooled lemon mixture into the whipped egg whites until just combined. Carefully pour the filling into the pre-baked pie crust.
- Chill the pie in the refrigerator for at least 4 hours or until set. Before serving, top with whipped cream for an extra touch of sweetness.
Gingerbread Men Cookies

Gingerbread men cookies are a nostalgic treat that brings smiles to both young and old. With their distinct spiced flavor and delightful crunch, these cookies are perfect for any festive occasion or just a cozy afternoon at home. They are quite simple to make, allowing anyone to indulge in a bit of vintage baking fun.
The warmth of ginger, cinnamon, and molasses meld together to create a comforting aroma that fills your kitchen. Decorating these cookies adds an extra layer of joy, allowing for creativity and personal touches. Whether you find them in a holiday cookie swap or at a family gathering, gingerbread men are classic desserts that need a comeback.
Ingredients
- 3 cups all-purpose flour
- 1 teaspoon baking soda
- 1 tablespoon ground ginger
- 1 tablespoon ground cinnamon
- 1 teaspoon ground cloves
- 1/2 teaspoon salt
- 3/4 cup unsalted butter, softened
- 3/4 cup packed brown sugar
- 1/2 cup molasses
- 1 large egg
- Royal icing for decoration
- Colored candy decorations
Instructions
- Mix Dry Ingredients: In a bowl, combine flour, baking soda, ginger, cinnamon, cloves, and salt. Set aside.
- Cream Butter and Sugar: In a large bowl, cream together softened butter and brown sugar until fluffy. Add molasses and egg, mixing until well combined.
- Combine Mixtures: Gradually add the dry ingredients to the wet mixture, stirring until a dough forms. Refrigerate for at least 1 hour to firm up the dough.
- Preheat Oven: Preheat the oven to 350°F (175°C). Line baking sheets with parchment paper.
- Roll and Cut: On a floured surface, roll out the dough to about 1/4 inch thick. Use cookie cutters to cut out gingerbread men shapes and place them on the prepared baking sheets.
- Bake: Bake in the preheated oven for 8-10 minutes, or until the edges are crisp. Allow to cool on wire racks.
- Decorate: Once cooled, use royal icing and colored candies to decorate the gingerbread men as desired.
Pineapple Upside-Down Cake
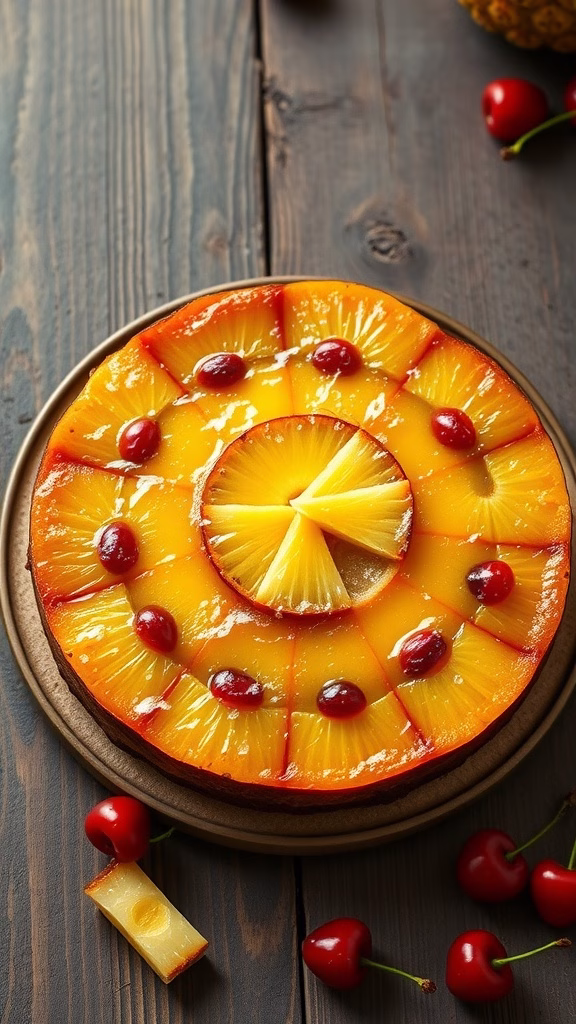
Pineapple Upside-Down Cake is a retro delight that brings a touch of nostalgia to any dessert table. This classic dessert features a sweet, buttery cake topped with caramelized pineapple slices and maraschino cherries, creating a mouthwatering combination of flavors. Its unique presentation, with the pineapples and cherries displayed beautifully on top, adds an appealing touch that makes it perfect for gatherings and celebrations.
What makes this cake so appealing is its simplicity. With just a few ingredients, you can whip up a treat that tastes like a slice of paradise. Whether enjoyed warm with a scoop of vanilla ice cream or at room temperature, it’s a dessert that everyone can appreciate. It’s a perfect example of the forgotten desserts from history that truly deserve a comeback!
Ingredients
- 1/4 cup unsalted butter
- 1/2 cup packed brown sugar
- 1 can (20 oz) sliced pineapple, drained
- Maraschino cherries (for garnish)
- 1 1/2 cups all-purpose flour
- 1 cup granulated sugar
- 1/2 cup milk
- 1/3 cup vegetable oil
- 2 large eggs
- 2 teaspoons baking powder
- 1 teaspoon vanilla extract
Instructions
- Preheat your oven to 350°F (175°C). In a 9-inch round cake pan, melt the butter in the oven. Once melted, sprinkle the brown sugar evenly over the butter.
- Arrange the pineapple slices on top of the brown sugar mixture, placing a cherry in the center of each pineapple ring and in any empty spaces.
- In a large bowl, combine the flour, granulated sugar, baking powder, milk, vegetable oil, eggs, and vanilla extract. Mix until smooth.
- Pour the batter over the pineapple and cherries in the cake pan, spreading it evenly.
- Bake for 30-35 minutes, or until a toothpick inserted in the center comes out clean. Allow the cake to cool for a few minutes before inverting it onto a serving plate to reveal the beautiful topping.
Coconut Cream Cake
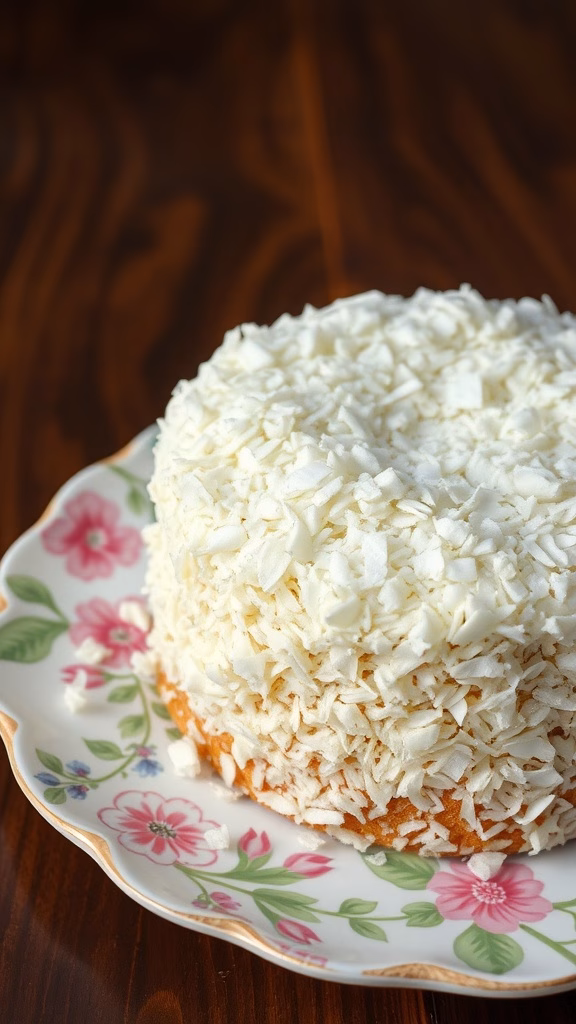
Coconut Cream Cake is a delightful throwback to vintage baking that combines the lightness of sponge cake with the creamy, sweet flavor of coconut. This dessert is not just a feast for the eyes; its fluffy layers and rich coconut frosting create a refreshing taste that transports you to sunny days. The cake is easy to make, making it perfect for both beginners and experienced bakers looking to bring back some old-fashioned charm.
This nostalgic treat deserves a place in your recipe collection alongside other classic desserts that need a comeback. Whether served at a family gathering or as a special dessert for a cozy evening at home, Coconut Cream Cake is sure to be a hit. Its simple, comforting flavors remind us of the traditional desserts from the past, making it a wonderful addition to any table.
Ingredients
- 1 3/4 cups all-purpose flour
- 1 1/2 teaspoons baking powder
- 1/2 teaspoon salt
- 1/2 cup unsalted butter, softened
- 1 cup granulated sugar
- 2 large eggs
- 1 teaspoon vanilla extract
- 1 cup coconut milk
- 1 1/2 cups shredded coconut
- 1 cup heavy cream
- 1/4 cup powdered sugar
Instructions
- Preheat the oven to 350°F (175°C). Grease and flour two 9-inch round cake pans.
- In a bowl, mix flour, baking powder, and salt. Set aside.
- In another bowl, beat the butter and sugar until light and fluffy. Add eggs, one at a time, then add vanilla extract.
- Gradually add the dry ingredients to the butter mixture, alternating with coconut milk. Mix until smooth and fold in shredded coconut.
- Divide the batter evenly between the prepared pans and bake for 25-30 minutes, or until a toothpick comes out clean.
- Allow the cakes to cool in the pans for 10 minutes before transferring them to wire racks to cool completely.
- In a separate bowl, whip the heavy cream and powdered sugar until stiff peaks form. Use this to frost the cooled cakes.
- Decorate with additional shredded coconut on top and around the sides of the cake. Serve and enjoy!
Salisbury Steak Pudding
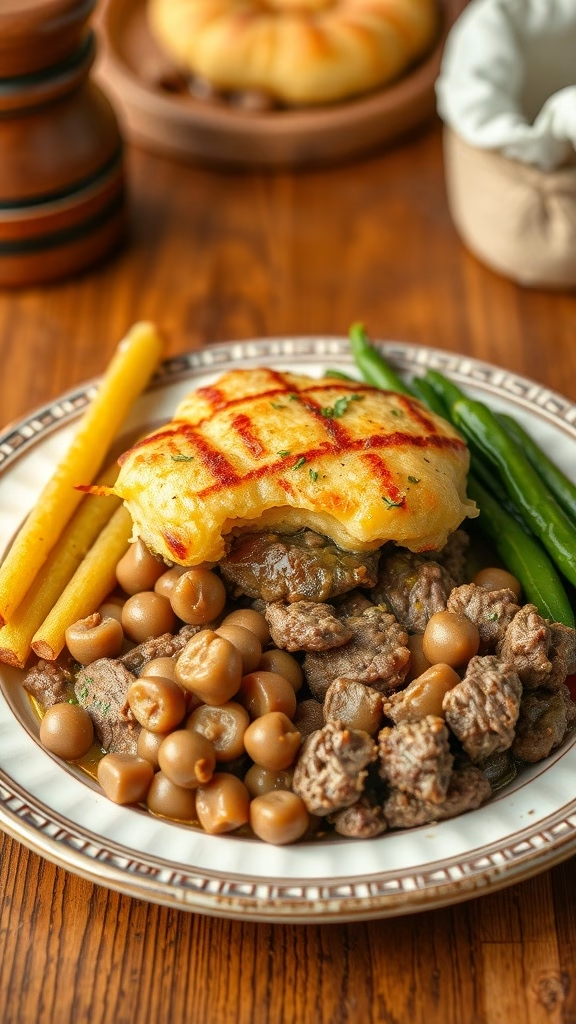
Salisbury steak pudding is a unique and tasty dish that combines savory ground beef with a fluffy cornbread topping. This vintage recipe brings together comforting flavors and a satisfying texture, making it a delightful choice for any meal. The steak itself is seasoned well, creating a rich taste that complements the slightly sweet cornbread.
This dish is not only easy to make but also perfect for a cozy dinner. It embodies the spirit of retro sweet treats while being a hearty option that will fill you up. Embrace this nostalgic treat that deserves a place in modern kitchens!
Ingredients
- 1 pound ground beef
- 1 small onion, finely chopped
- 1 cup breadcrumbs
- 1 egg
- 1 tablespoon Worcestershire sauce
- 1 teaspoon salt
- 1/2 teaspoon black pepper
- 1 cup beef broth
- 1 cup cornmeal
- 1 cup milk
- 1 tablespoon baking powder
- 1/4 cup melted butter
Instructions
- Preheat your oven to 350°F (175°C). In a large bowl, combine the ground beef, chopped onion, breadcrumbs, egg, Worcestershire sauce, salt, and pepper. Mix well and shape into patties.
- In a skillet over medium heat, brown the patties on both sides. Remove them and set aside.
- In the same skillet, add the beef broth and bring to a simmer. Return the patties to the skillet, then cover and cook for about 10 minutes.
- In another bowl, whisk together the cornmeal, milk, baking powder, and melted butter. Pour this mixture over the beef patties in the skillet.
- Transfer the skillet to the preheated oven and bake for 30-35 minutes, until the top is golden brown and a toothpick comes out clean. Serve warm and enjoy this forgotten vintage dessert!
Rice Pudding with Cinnamon
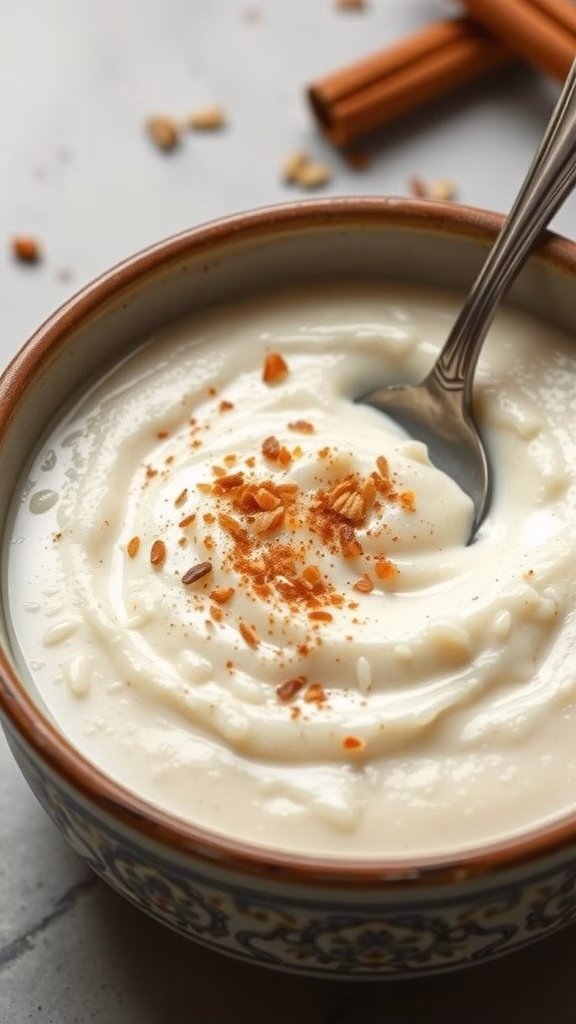
Rice pudding is a classic dessert that brings a warm, comforting feeling with every bite. This creamy treat, often infused with cinnamon, strikes the perfect balance between sweet and savory. It’s simple to make, requiring only a few basic ingredients like rice, milk, sugar, and spices, making it a nostalgic favorite for many.
The texture is smooth and velvety, while the taste is subtly sweet with a hint of spice, reminiscent of home-cooked meals. This vintage dessert is perfect for any occasion, and it’s a delightful way to reconnect with the traditional desserts from the past. It deserves a spot on your dessert table alongside other retro sweet treats like ambrosia salad and butterscotch pudding.
Ingredients
- 1 cup Arborio rice
- 4 cups whole milk
- 1/2 cup granulated sugar
- 1 teaspoon vanilla extract
- 1/2 teaspoon ground cinnamon
- 1/4 teaspoon salt
- 1/2 cup raisins (optional)
- Chopped nuts or additional cinnamon for garnish
Instructions
- Combine Ingredients: In a medium saucepan, combine rice, milk, sugar, vanilla extract, cinnamon, and salt. Stir well to combine.
- Cook: Bring the mixture to a gentle boil over medium heat, then reduce the heat to low. Simmer, stirring occasionally, for about 25-30 minutes or until the rice is tender and the mixture has thickened.
- Add Raisins: If using, stir in the raisins and cook for an additional 5 minutes.
- Serve: Remove from heat and let it cool slightly. Spoon into serving bowls and garnish with chopped nuts or a sprinkle of cinnamon.
- Enjoy: Serve warm or chilled, and savor the flavors of this forgotten vintage dessert!
Peanut Butter Pie with Chocolate Drizzle
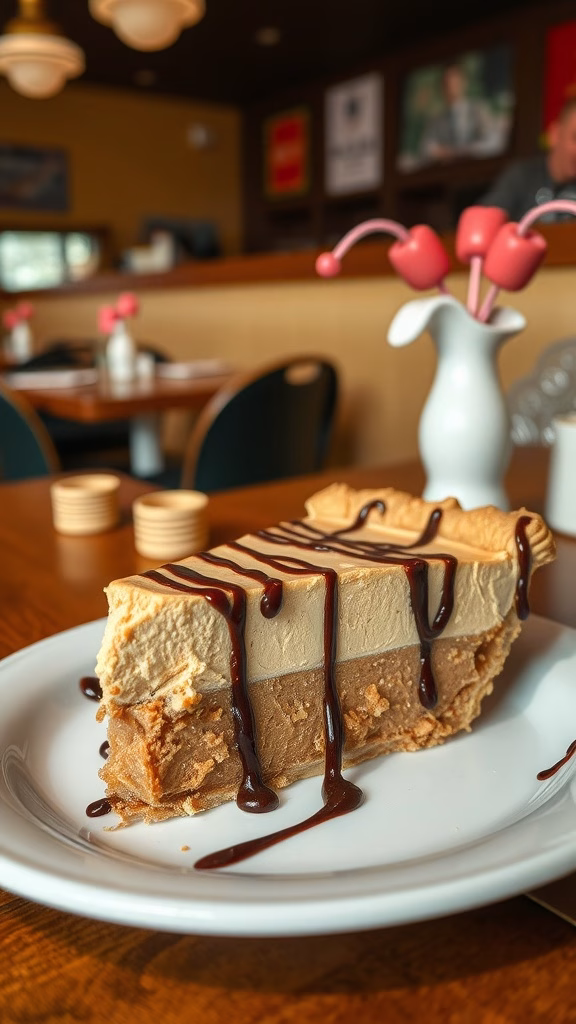
This peanut butter pie is a nostalgic treat that perfectly blends rich, creamy peanut butter with a delightful chocolate drizzle. It captures the essence of classic desserts that bring warmth and comfort, making it an easy addition to any gathering. The balance of sweet and savory flavors makes each bite a memorable experience.
Not only is this dessert simple to prepare, but it also appeals to those who cherish vintage baking ideas. With just a few ingredients, you can whip up a pie that feels like a trip back to simpler times, reminiscent of the best old-fashioned desserts. Don’t let this forgotten vintage dessert fade away!
Ingredients
- 1 pre-made graham cracker crust
- 1 cup creamy peanut butter
- 1 cup powdered sugar
- 1 cup whipped cream or whipped topping
- 1 teaspoon vanilla extract
- 1/2 cup chocolate chips
- 2 tablespoons unsalted butter
Instructions
- Prepare the Filling: In a mixing bowl, combine peanut butter, powdered sugar, and vanilla extract. Mix until smooth. Fold in the whipped cream until fully incorporated.
- Assemble the Pie: Spoon the peanut butter mixture into the pre-made graham cracker crust, spreading it evenly. Refrigerate for at least 2 hours to set.
- Make the Chocolate Drizzle: In a small saucepan, melt chocolate chips and butter over low heat, stirring until smooth. Allow it to cool slightly.
- Finish the Pie: Drizzle the melted chocolate over the chilled pie just before serving. Slice and enjoy this delightful retro sweet treat!
Find Vintage-Inspired Desserts Near You
If you’re craving classic desserts but don’t want to bake, check out our dessert directory to discover local bakeries offering nostalgic, old-fashioned treats. Supporting small businesses lets you enjoy authentic vintage recipes made with care and tradition.
For those who love reviving historic recipes, why not share your favorite vintage desserts? Submit your recipe here and join a community of bakers bringing time-honored confections back to life.
Vintage desserts are known for their elegant simplicity, comforting textures, and timeless flavors. Whether you’re whipping up a delicate Charlotte Russe, indulging in a slice of nostalgic baked Alaska, or rediscovering the magic of homemade jelly rolls, these forgotten favorites are worth a second look.
Show Off Your Love for Churros with Fun Apparel
If you’re passionate about desserts and culinary nostalgia, check out our collection of churro shirts, churro sweatshirts, and other food-themed apparel for men, women, kids, and babies. Whether you’re looking for a churro t-shirt to wear while baking or a cozy churro hoodie to lounge in, our unique designs are perfect for food lovers. Browse our shop and find the perfect foodie fashion statement today!
At Creme Filled Churros, we believe great desserts never go out of style. Try these 15 vintage desserts that deserve a comeback, and bring a little taste of history to your table!