
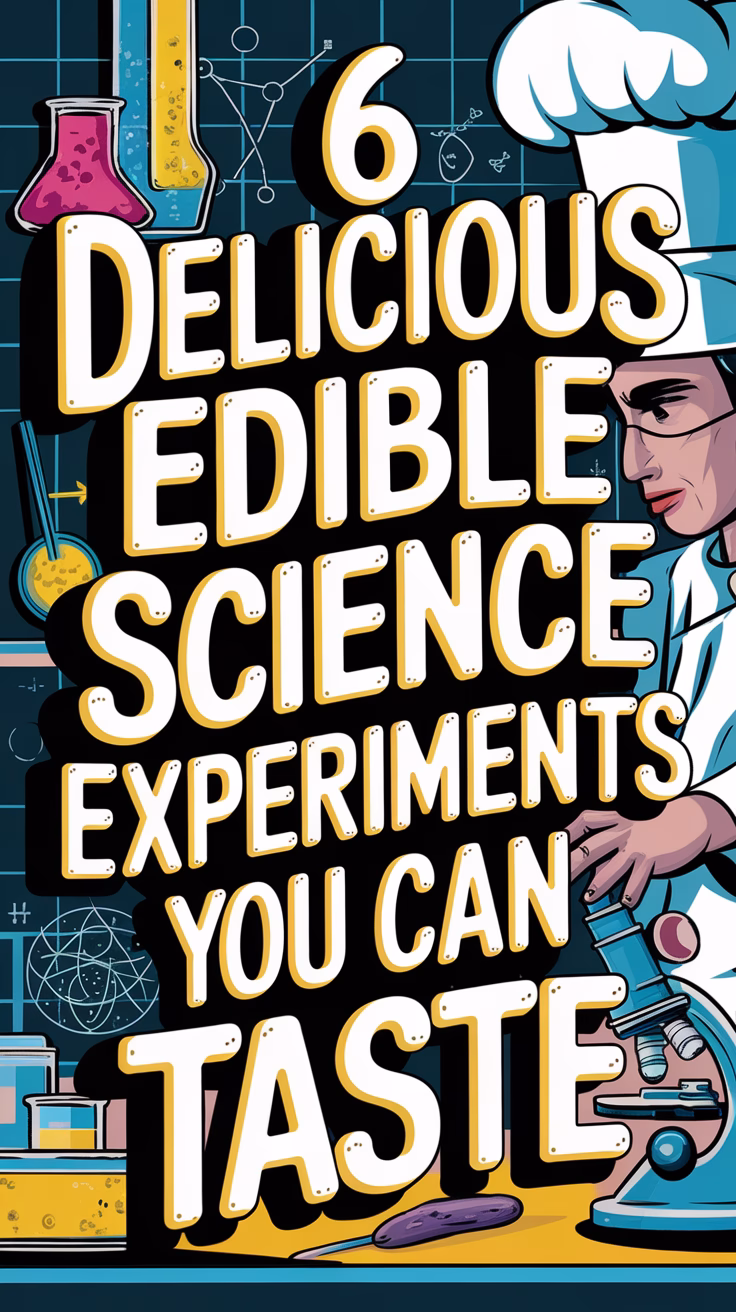
Get ready to mix science with a side of deliciousness! These 6 delicious edible science experiments you can taste bring fun and flavor to the kitchen, creating tasty treats that are as educational as they are enjoyable. Perfect for kids, curious adults, and anyone who loves experimenting with food, these simple recipes offer a hands-on way to explore science while indulging in delicious desserts. From making candy to transforming everyday ingredients into sweet creations, these experiments are guaranteed to spark creativity and curiosity. Get ready to taste the results of your scientific endeavors!
Homemade Ice Cream: The Science of Freezing

Homemade ice cream is not just a delicious treat; it’s also a fun way to explore kitchen science for kids. The process of making ice cream involves freezing a creamy mixture, which teaches about the science of freezing and how different ingredients interact. This recipe is simple and perfect for families looking to blend food with learning.
The taste of homemade ice cream is creamy and rich, especially when paired with your favorite mix-ins like fruits, candies, or chocolates. It’s a great activity to engage children in fun science experiments with food while creating a tasty dessert that everyone can enjoy.
Ingredients
- 2 cups heavy cream
- 1 cup whole milk
- 3/4 cup granulated sugar
- 1 teaspoon vanilla extract
- Pinch of salt
- Your choice of mix-ins (fruits, candies, etc.)
Instructions
- Mix Ingredients: In a large bowl, whisk together the heavy cream, whole milk, sugar, vanilla extract, and salt until the sugar is dissolved.
- Chill Mixture: Cover the bowl and refrigerate for at least 2 hours to ensure the mixture is cold.
- Churn: Pour the chilled mixture into an ice cream maker and churn according to the manufacturer’s instructions until it reaches a soft-serve consistency.
- Add Mix-Ins: Stir in your favorite mix-ins during the last few minutes of churning.
- Freeze: Transfer the ice cream to an airtight container and freeze for at least 4 hours or until firm.
Edible Slime: A Delicious Experiment
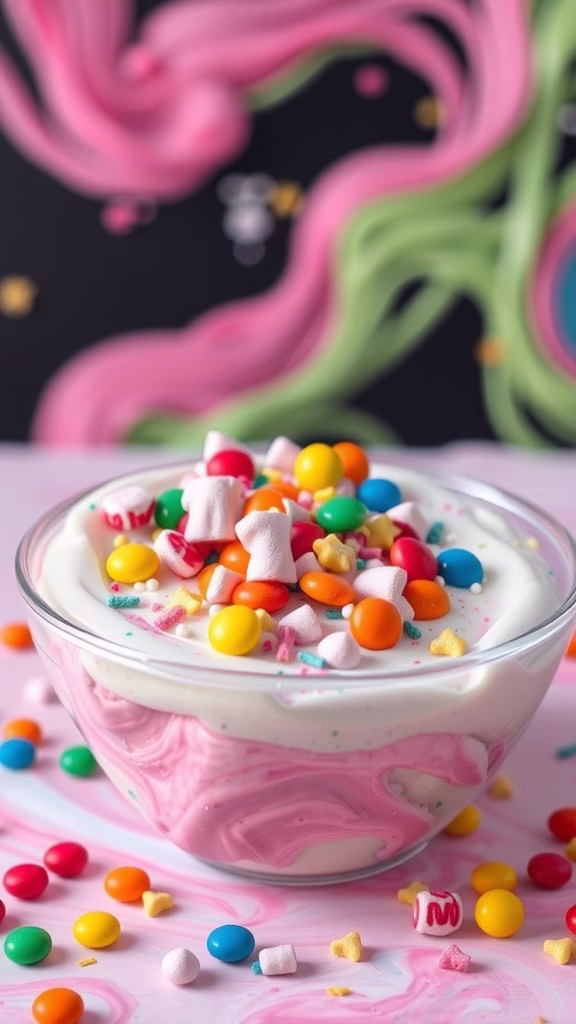
Making edible slime is a fun and tasty way to explore science with your family. This recipe blends the joy of cooking with a delightful treat that kids will love. The slime is stretchy, sweet, and perfect for playing with before enjoying a tasty snack. It’s simple to make, requiring just a few ingredients, and the flavor is a delightful mix of sweetness with a hint of tang.
This edible experiment not only satisfies your sweet tooth but also introduces kids to basic culinary techniques. It’s a great way to teach science concepts like mixing and chemical reactions in the kitchen. Gather some colorful toppings to enhance your slime, making it as visually appealing as it is delicious!
Ingredients
- 1 cup marshmallow fluff
- 1/2 cup cornstarch
- 1 tablespoon vegetable oil
- Food coloring (optional)
- Sprinkles and candy for topping
Instructions
- In a mixing bowl, combine the marshmallow fluff and vegetable oil. Stir until smooth.
- Add the cornstarch gradually, mixing until a dough-like consistency forms.
- If you want colorful slime, add a few drops of food coloring and mix until combined.
- Knead the mixture with your hands until it becomes stretchy. If it feels too sticky, add a bit more cornstarch.
- Transfer the slime to a bowl and top with sprinkles and candy. Enjoy playing with your creation before diving in for a tasty treat!
Chocolate-Covered Science: Exploring Temperatures
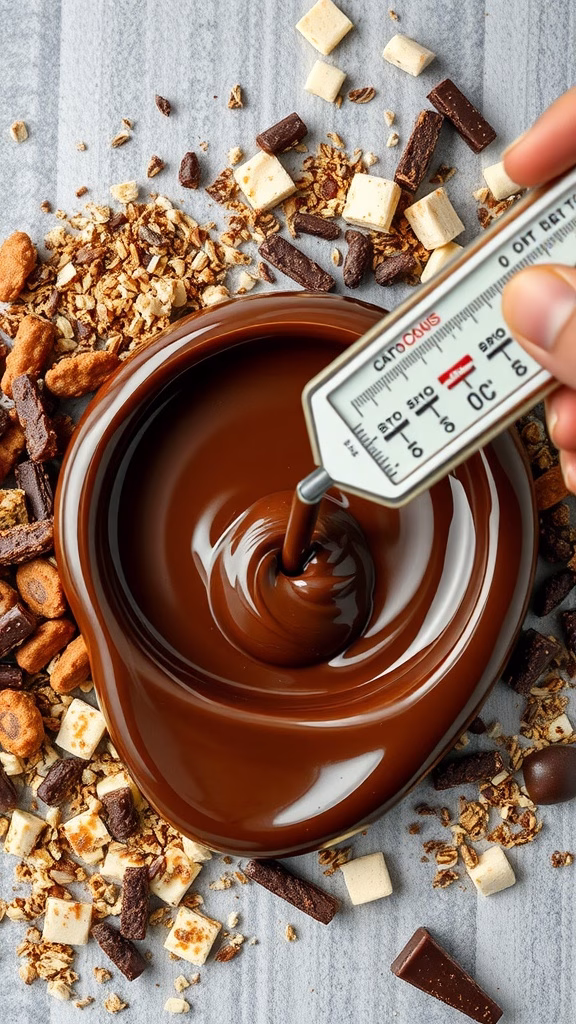
This is an easy edible science project perfect for families and classrooms. It allows kids to learn about baking as a science experiment while enjoying delicious results. Whether you’re making chocolate-covered fruits, pretzels, or marshmallows, this simple activity is a blast!
Ingredients
- 2 cups chocolate chips (milk, dark, or white)
- 1 tablespoon coconut oil (optional for smoothness)
- Assorted dipping items (fruits, pretzels, marshmallows, nuts)
- Toppings (sprinkles, crushed cookies, or sea salt)
Instructions
- Melt the Chocolate: In a microwave-safe bowl, combine chocolate chips and coconut oil. Microwave in 30-second intervals, stirring between each, until fully melted and smooth.
- Prepare the Dipping Items: While the chocolate cools slightly, arrange your assorted items on a baking sheet lined with parchment paper.
- Dip and Decorate: Dip each item into the melted chocolate, allowing excess to drip off. Place them back on the baking sheet and sprinkle with your chosen toppings.
- Let Set: Allow the chocolate to cool and harden at room temperature. For quicker results, place the baking sheet in the fridge for about 15 minutes.
- Serve and Enjoy: Once set, enjoy your tasty treats while discussing the science behind chocolate melting and cooling!
Candy Crystals: Sweet Science in Your Kitchen
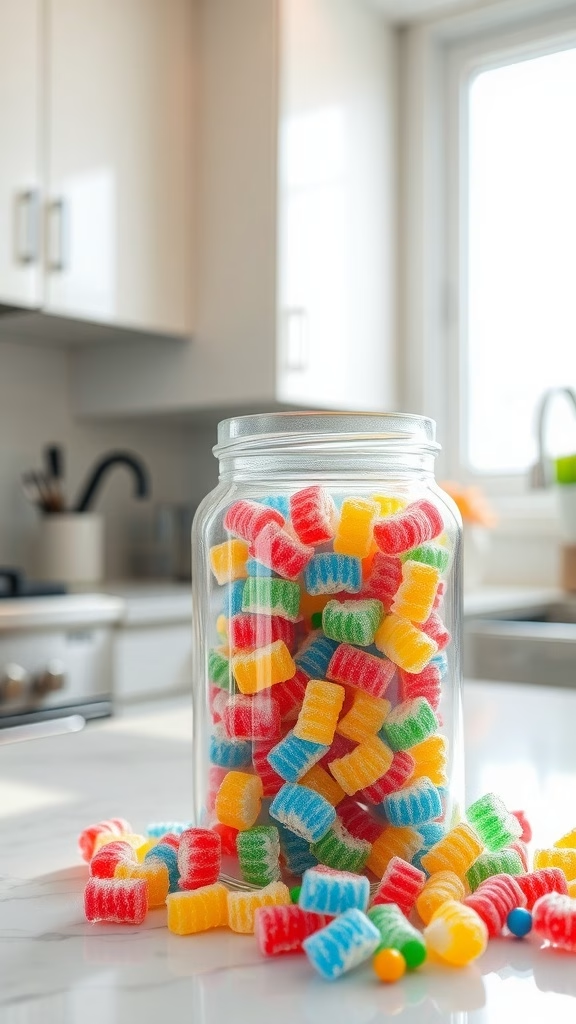
Candy crystals are not just a treat for your taste buds; they offer a fun way to learn about science in the kitchen. These colorful morsels are delicious and serve as a fantastic introduction to chemical reactions and crystallization. With a little patience and a few simple ingredients, you can create these delightful sugar crystals that are perfect for educational desserts for kids.
This recipe is a great way to combine tasty STEM projects with a bit of kitchen magic. The process of how to make edible crystals engages everyone, making it a fun science experiment to try with family or in classrooms. Perfect for teaching chemistry through hands-on experiences, these candy crystals will surely impress anyone who tries them.
Ingredients
- 2 cups granulated sugar
- 1 cup water
- 1/4 cup corn syrup
- Food coloring (optional)
- Flavoring extracts (like vanilla or mint, optional)
Instructions
- Prepare the Mixture: In a saucepan, combine water, sugar, and corn syrup. Stir the mixture over medium heat until the sugar completely dissolves.
- Add Color and Flavor: If you want to add food coloring or flavoring, do so once the sugar has dissolved, and mix well.
- Cool and Set: Remove the saucepan from heat and let the mixture cool for about 10 minutes. Then, pour it into a clean jar or glass, ensuring that it isn’t more than halfway full.
- Start Crystallization: Place a wooden skewer or string in the jar, making sure it doesn’t touch the bottom. This will serve as a surface for crystals to form.
- Let it Sit: Cover the jar with a coffee filter or cheesecloth and set it aside in a cool place. After a few days, you should see beautiful sugar crystals forming on the skewer or string.
Fruit Chemistry: Colorful pH Reactions
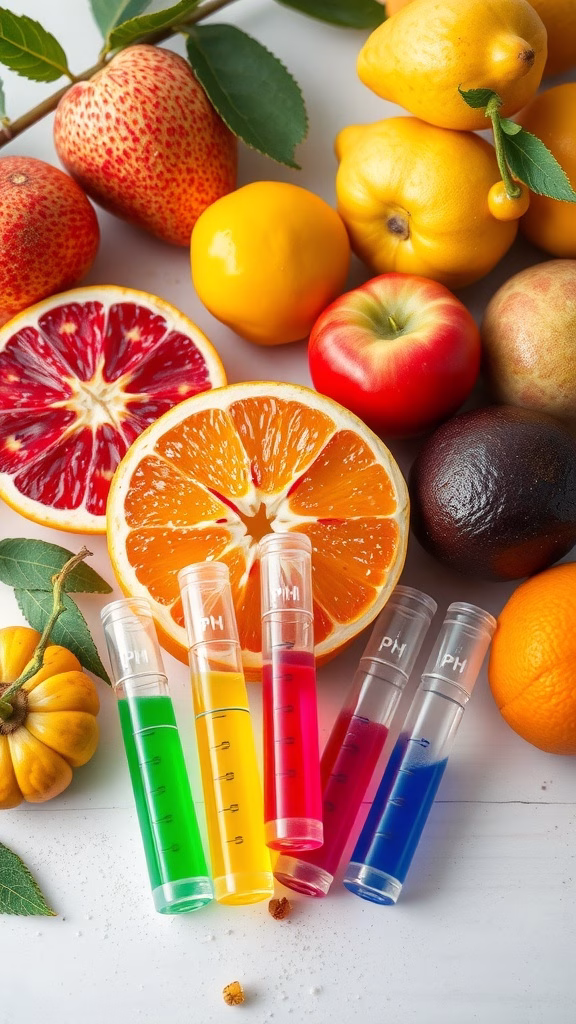
Get ready to mix science and tasty fun with a colorful pH reaction using fruits! This simple and engaging recipe lets you explore how different fruits interact with pH indicators. You’ll not only enjoy delicious flavors but also learn about acidity and alkalinity in a hands-on way. It’s perfect for kids and adults alike, making it one of those easy edible science projects you can try at home.
Using everyday fruits and some basic kitchen ingredients, you can create a rainbow of reactions right on your table. The taste is fresh and fruity, and the visual appeal is sure to impress. Plus, it’s a fantastic way to introduce science concepts in a fun and interactive way! Here’s how to create your own edible rainbow experiments.
Ingredients
- 1 cup of lemon juice
- 1 cup of lime juice
- 1 cup of beet juice (for red)
- 1 cup of cabbage juice (for blue)
- 1 cup of distilled water
- pH indicator strips (or red cabbage juice as an indicator)
- Assorted fresh fruits (like oranges, apples, and pears)
Instructions
- Prepare the Indicators: If using red cabbage, chop it and boil in water for about 10 minutes. Strain the liquid to get your pH indicator.
- Set Up Your Experiment: Pour the different fruit juices into separate clear cups or glass containers. Label each one with its corresponding pH level (if known) or just as “acidic” or “alkaline.”
- Add the Indicator: Using a dropper, add a few drops of your pH indicator (cabbage juice or strips) to each fruit juice. Watch as the colors change!
- Test Fresh Fruits: Cut your assorted fruits and dip them in each juice. Observe how the juice reacts with different types of fruit and note any color changes.
- Enjoy Your Experiment: Sample the fruits and juices together for a refreshing treat while discussing the science behind what you see!
Baking Soda Volcano: A Tasty Eruption

Making a baking soda volcano dessert is not only fun but also a great way to teach kids about science while satisfying their sweet tooth. This colorful cake mimics a volcano, complete with a frosted eruption that can be both visually appealing and delicious. The cake itself is fluffy and sweet, often filled with sprinkles or candy bits to add an extra layer of fun and taste.
This recipe is simple enough for kids to help with, making it a perfect project for family time or a classroom activity. It’s a delightful way to engage in kitchen science for kids, where they can see edible chemical reactions as the volcano erupts with a mix of baking soda and vinegar. Let’s dive into creating this interactive food experiment!
Ingredients
- 1 ½ cups all-purpose flour
- 1 cup granulated sugar
- 1 ½ teaspoons baking powder
- ½ teaspoon baking soda
- ½ teaspoon salt
- ½ cup unsalted butter, softened
- 1 cup milk
- 2 large eggs
- 1 teaspoon vanilla extract
- 1 cup rainbow sprinkles
- 1 cup blue frosting
- Candy straws for the eruption
- 1 tablespoon vinegar
- 2 teaspoons baking soda
Instructions
- Preheat the oven to 350°F (175°C). Grease a dome-shaped cake pan.
- In a large bowl, combine flour, sugar, baking powder, baking soda, and salt. Add the butter, milk, eggs, and vanilla. Mix until well combined.
- Fold in the rainbow sprinkles. Pour the batter into the prepared cake pan and smooth the top.
- Bake for 25-30 minutes or until a toothpick inserted in the center comes out clean. Let it cool completely.
- Once cooled, frost the cake with blue frosting to create a volcano look.
- For the eruption, place candy straws in the top of the cake. In a small bowl, mix baking soda and vinegar to create an eruption effect. Pour this mixture into the top of the volcano and watch it bubble!
Make Learning Fun and Tasty
If you’re looking for more inspiration for your next edible science experiment or want to try new ways to get creative in the kitchen, check out our dessert directory to find local dessert shops that may offer fun, science-inspired treats or ingredients. Supporting small businesses allows you to discover new ideas and explore local twists on global trends.
For those ready to dive into the world of food science at home, our collection of recipes offers simple, engaging ideas for creating tasty, edible experiments. Whether you’re mixing up homemade candy, exploring molecular gastronomy, or playing with flavors, our recipes make it easy to turn science into a delicious learning experience.
These experiments prove that learning and eating can go hand in hand! Imagine experimenting in your kitchen, creating edible treats, and learning about the science behind each step. Pairing these experiments with locally made desserts or sharing your results with family and friends will make for an unforgettable experience.
At Creme Filled Churros, we’re here to inspire your next food adventure. Explore these 6 delicious edible science experiments you can taste, and let us guide you through a world of fun and tasty treats that make science delicious!