
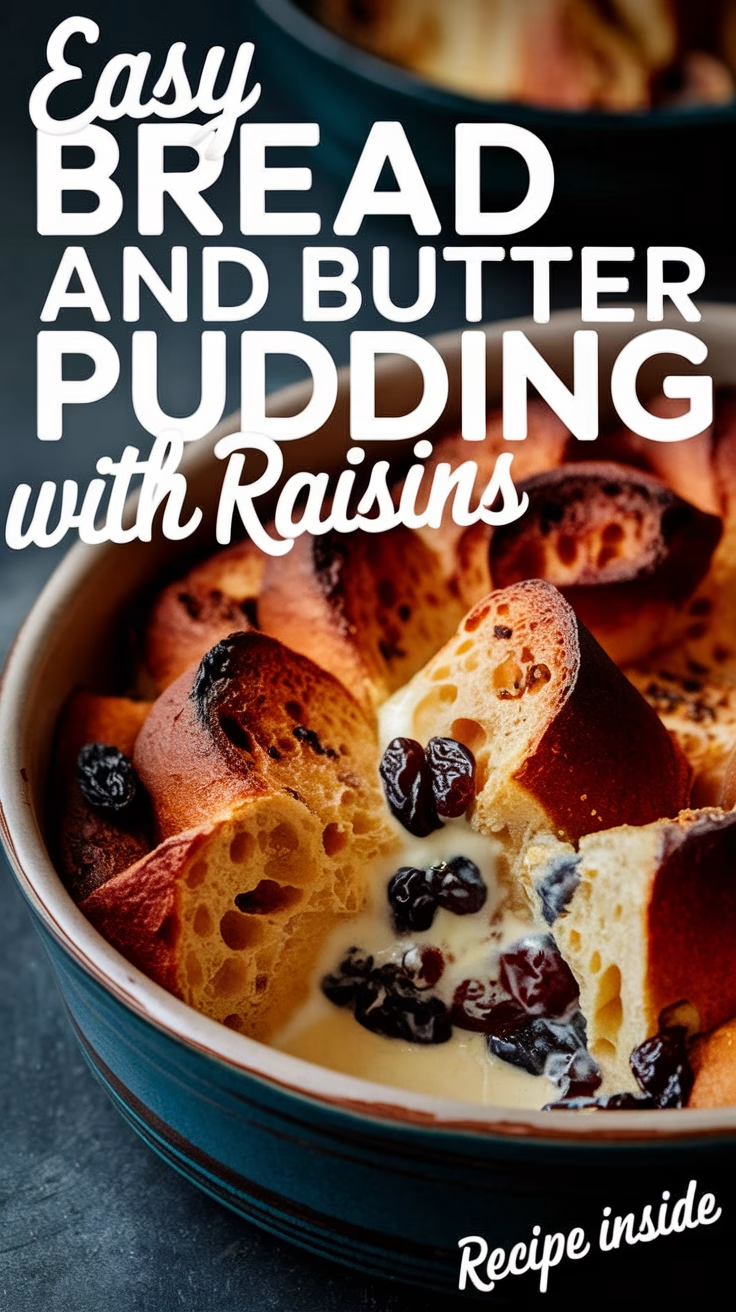
A timeless dessert with rich flavors and a comforting texture, bread and butter pudding with raisins is the perfect way to turn simple ingredients into something truly special. This classic dish brings together buttery, golden slices of bread soaked in a creamy, custard-like mixture, with bursts of sweetness from plump raisins in every bite.
One of the best things about this recipe is its effortless preparation—just a few minutes of layering and mixing, and the oven does the rest! Whether you prefer a touch of cinnamon, a splash of vanilla, or even a drizzle of caramel on top, this pudding is easy to customize to your taste.
Ideal for cozy family gatherings or as a delightful way to use up leftover bread, this dessert is always a crowd-pleaser. Ready to bake up some warm, nostalgic goodness? Let’s get started!
Easy Bread and Butter Pudding with Raisins
Equipment
Ingredients
- 6 slices white bread day-old, crusts removed
- 3 tbsp unsalted butter softened
- 0.5 cup raisins
- 2 cups whole milk
- 0.5 cup heavy cream
- 3 large eggs room temperature
- 0.5 cup granulated sugar
- 1 tsp vanilla extract
- 1 tsp ground cinnamon
- 0.25 tsp salt
Instructions
- Preheat oven to 350°F (175°C) and grease a 9×9 inch baking dish.
- Spread softened butter on both sides of each bread slice, then cut into triangles.
- Arrange half of the bread slices in the baking dish, sprinkle with half of the raisins, then repeat with remaining bread and raisins.
- In a mixing bowl, whisk together milk, heavy cream, eggs, sugar, vanilla extract, cinnamon, and salt until fully combined.
- Slowly pour the custard mixture over the bread, ensuring all pieces are soaked.
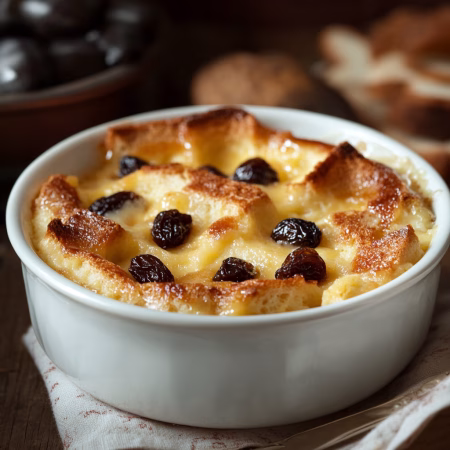
- Place in the oven and bake for 40-45 minutes, or until the top is golden brown and the custard is set.
- Let the pudding cool for 10 minutes before serving warm.
Notes
- Optional Equipment: A sieve can be used to dust powdered sugar on top before serving.
- Customization: Swap raisins for chocolate chips or dried cranberries.
- Storage: Store leftovers in the refrigerator for up to 3 days. Reheat in the oven at 300°F (150°C) for 10 minutes.
- Serving Tip: Serve with a drizzle of caramel sauce or a scoop of vanilla ice cream.
Nutrition
Introduction to a Classic British Dessert
Few desserts evoke the warmth and nostalgia of a classic British treat. This dish, with its rich history and comforting flavors, has been a staple in homes for centuries. Its origins trace back to the 18th century, where it was crafted as a thrifty way to use stale ingredients. Today, it remains a beloved favorite, especially on chilly evenings.
The warm, custardy texture of this dessert makes it perfect for cooler nights. It’s like wrapping yourself in a cozy blanket—each bite feels like a hug. I’ve made this dish countless times in my kitchen, and it never fails to bring smiles to the table. It’s simple, yet deeply satisfying.
What makes this bread pudding so approachable is its minimal ingredients and quick prep time. In just 10 minutes, you can have it ready for the oven. Every minute spent preparing it is worth it when you see the golden, bubbling result. It’s a dish that rewards effort with pure comfort.
Here’s a quick look at why this dessert stands out:
| Feature | Why It Matters |
|---|---|
| Heritage | Rooted in British culinary history, it’s a timeless classic. |
| Texture | The warm, custardy consistency is perfect for cozy evenings. |
| Simplicity | Minimal ingredients and quick prep make it accessible to all. |
| Versatility | Easily customizable with spices or dried fruits. |
Whether you’re a seasoned baker or just starting out, this bread pudding is a must-try. It’s a dish that brings people together and creates lasting memories. Let’s celebrate this British classic and make it a part of your kitchen traditions!
Essential Ingredients and Preparation Tips
Creating a perfect dessert starts with the right ingredients and a little know-how. The foundation of this dish lies in its simplicity—each component plays a crucial role in achieving that warm, comforting texture and flavor. Let’s break down what you’ll need and why it matters.
Selecting the Perfect Stale Bread
One of the secrets to this dish is using stale bread. Slightly dry slices soak up the custard mixture perfectly, creating a soft yet firm texture. If you don’t have day-old bread, lightly toast fresh slices to mimic the effect. This step ensures every bite is rich and satisfying.
Gathering Key Ingredients: Raisins, Milk, Butter, and Spices
Quality ingredients make all the difference. Start with fresh, plump raisins—they add a natural sweetness and chewy texture. Whole milk provides a creamy base, while softened butter enhances richness. Don’t forget the warmth of cinnamon and the subtle sweetness of sugar—they bring the dish to life.
When measuring, use a standard cup for accuracy. This ensures the custard has the right consistency. For more tips on perfecting your baking techniques, check out these pastry hacks that every home baker should know.
“The right ingredients, combined with a little patience, create a dessert that’s both comforting and unforgettable.”
With these essentials in hand, you’re ready to craft a dessert that’s as delightful to make as it is to eat. Let’s move on to the next step—bringing it all together!
Bread and Butter Pudding with Raisins recipe: A Step-by-Step Guide
Ready to transform simple ingredients into a show-stopping treat? Let’s get started! This guide will walk you through each step, ensuring your dessert turns out tender, custardy, and utterly delicious.
Preparing the Bread and Butter Layers
Begin by buttering your bread slices generously. This step adds richness and helps the layers stick together. Arrange the slices in a baking dish, overlapping slightly for even coverage. Sprinkle a handful of raisins between each layer for bursts of sweetness.
Pro Tip: Press down gently on the layers to compact them. This ensures every piece absorbs the custard mixture evenly, creating a cohesive texture.
Mixing the Custard and Assembling the Dish
Next, whisk together eggs, milk, and a pinch of cinnamon in a bowl. This mix forms the heart of your dessert—its creamy, velvety base. Pour the custard slowly over the bread layers, ensuring every slice is soaked. Let it rest for 20-30 minutes to allow the flavors to meld.
As the dish bakes, the custard will set, transforming the bread into a tender, golden masterpiece. The aroma of warm spices will fill your kitchen, signaling that something special is on its way.
| Step | Key Tip |
|---|---|
| Buttering Bread | Use softened butter for even coverage. |
| Layering | Press down gently to compact the slices. |
| Pouring Custard | Go slow to ensure even soaking. |
| Resting | Wait 20-30 minutes for optimal absorption. |
Follow these steps closely, and you’ll have a dessert that’s as satisfying to make as it is to eat. Trust me, the effort is worth every bite!
Baking Techniques and Temperature Insights
Mastering the art of baking starts with understanding your oven. The right settings and careful monitoring can make all the difference in achieving that perfect golden crust. Let’s dive into the details to ensure your dessert turns out beautifully every time.
Oven Settings and Monitoring for a Golden Finish
Preheating your oven to the correct temperature is crucial. For this dish, set your oven to 350°F. This ensures even baking and helps the custard set perfectly. A properly preheated oven is the foundation of a golden brown finish.
Once your dessert is in the oven, keep an eye on it. Bake until the edges are crisp and the top turns a rich golden brown. This usually takes about 35-40 minutes. If you’re unsure, insert a knife into the center—if it comes out clean, it’s done!
Timing is key. Overbaking can dry out the custard, while underbaking leaves it too soft. Follow these guidelines, and you’ll achieve a dessert that’s both tender and beautifully golden.
| Step | Tip |
|---|---|
| Preheating | Set oven to 350°F for even baking. |
| Monitoring | Watch for a golden brown top and crisp edges. |
| Timing | Bake for 35-40 minutes, checking doneness with a knife. |
Mastering these techniques will lead to a dessert that’s as stunning as it is delicious. For more baking tips, check out this guide to perfect pastries. Happy baking!
Enhancing Flavor with Spices and Dried Fruits
Adding spices and dried fruits can transform a simple dessert into a flavor-packed masterpiece. The right combination of ingredients can elevate the dish, making it uniquely yours. Let’s explore how to infuse your creation with warmth and creativity.
Using Cinnamon, Nutmeg, and Apple Pie Spice
Cinnamon is a star in this dish—its warm, aromatic notes create a cozy, inviting flavor. I always add a pinch of nutmeg for a subtle depth, and apple pie spice brings a delightful complexity. These spices work together to enhance the dessert’s richness without overpowering it.
Pro Tip: Start with a small amount of spice and adjust to taste. This ensures the flavors complement the dish perfectly.
Creative Alternatives: Prunes, Candied Ginger, and More
Why stick to the usual when you can experiment? I’ve tried prunes for a deeper sweetness and candied ginger for a zesty kick. Both add a unique twist that keeps the dish exciting. Dried figs are another fantastic option—they bring a natural sweetness and chewy texture. For more ideas, check out these unique desserts with dried figs.
Here’s how to balance your flavors:
- Use warming spices like cinnamon to elevate the dish’s profile.
- Try dried fruits such as prunes or candied ginger for a creative twist.
- Adjust spice and fruit quantities to suit your taste.
- Ensure the spices complement, not overpower, the dish.
- Invite readers to experiment and make the recipe uniquely theirs.
Small changes can create a whole new experience. Whether you’re a seasoned baker or just starting out, this is your chance to get creative. Trust me, the results are worth it!
Serving Suggestions and Dessert Presentation
The best part of baking is the moment you get to serve your creation. For this dish, I always recommend enjoying it warm, straight from the oven. The warmth enhances the flavors, making every bite feel like a cozy embrace.
To take it to the next level, pair it with a scoop of ice cream. The contrast between the warm custard and the cold, creamy ice cream is simply divine. Alternatively, a dollop of whipped cream adds a light, airy touch that complements the richness perfectly.
Presentation matters too! A dusting of cinnamon on top adds a pop of color and a hint of spice. Fresh fruit, like berries or sliced bananas, makes for a vibrant garnish. These small touches turn a simple dish into a showstopper.
Don’t be afraid to get creative. A drizzle of caramel sauce or a sprinkle of chopped nuts can add texture and depth. For more inspiration, check out these delicious dessert pairings that elevate any meal.
Thoughtful serving not only enhances the taste but also the visual appeal. It’s your chance to impress guests and make the experience memorable. So, take your time, have fun, and let the dish’s natural charm shine!
Nutritional Facts and Serving Considerations
Understanding the nutritional profile of your favorite dessert can make indulgence even more satisfying. Knowing what’s in each bite helps you enjoy it responsibly while staying mindful of your overall diet. Let’s break down the nutrition facts and explore how this treat fits into your daily routine.
Breaking Down the Key Nutritional Facts
This dessert is rich in flavor but also packs a range of nutrients. A standard serving contains approximately 683 calories, 30.5g of fat, and 71.2g of carbohydrates. It also provides 16.8g of protein, making it a surprisingly balanced option for a sweet treat.
Here’s a detailed look at the nutrition facts per serving:
| Nutrient | Amount | Daily Value (%) |
|---|---|---|
| Calories | 683 kcal | 34% |
| Total Fat | 30.5g | 39% |
| Carbohydrates | 71.2g | 24% |
| Protein | 16.8g | 34% |
Understanding Daily Values and Portion Control
The daily value percentages show how a serving contributes to your overall nutritional needs. For example, the 34% daily value for protein means this dessert provides a significant portion of your daily requirement. This makes it a great option for those looking to add more protein to their diet.
Portion control is key. Enjoying a smaller serving can reduce calorie intake while still satisfying your sweet tooth. Pairing it with fresh fruit or a light salad can also balance the meal.
By understanding the nutrition facts, you can make informed choices that align with your health goals. Indulgence doesn’t have to mean compromise—it’s all about balance!
User Tips, Variations, and Experimentation Ideas
Experimenting with flavors and ingredients can make this dessert uniquely yours. Whether you’re catering to dietary needs or just feeling creative, small tweaks can lead to exciting results. Let’s explore how to customize this dish to suit your preferences.
Substituting Ingredients for Dietary Preferences
If you’re avoiding dairy, try using almond or oat milk instead of whole milk. For a keto-friendly version, swap sugar with monk fruit or stevia. Even the egg can be replaced with a flaxseed mix for a vegan twist. These changes ensure everyone can enjoy this treat.
Here’s a quick guide to substitutions:
| Ingredient | Substitution |
|---|---|
| Milk | Almond, oat, or soy milk |
| Sugar | Monk fruit, stevia, or honey |
| Egg | Flaxseed mix or chia seeds |
Creative Variations for Extra Flavor
Add a splash of liqueur like rum or bourbon for a grown-up twist. Spices like cardamom or ginger can bring warmth and depth. For a fruity touch, try dried apricots or cranberries instead of raisins. The possibilities are endless!
Pro Tip: When reheating leftovers, drizzle a caramel sauce or top with whipped cream ice for a fresh take. Even small changes can make a delightful difference.
Here are some ideas to inspire you:
- Use different spices like cardamom or ginger.
- Swap raisins for dried apricots or cranberries.
- Add a splash of liqueur for extra flavor.
- Top with cream ice cream or a drizzle of sauce.
Remember, experimentation is part of the fun. Trust your instincts and make this dessert your own!
Conclusion
There’s nothing quite like the joy of crafting a dessert that feels like home. This timeless treat brings warmth and comfort to any table. With just a few simple ingredients and a little time, you can create something truly special.
Follow the steps closely, and you’ll have a dish that’s both tender and indulgent. A slice of quality bread, a dash of ground spices, and a creamy custard base come together in the most delightful way. It’s a dessert that’s as nourishing as it is delicious.
Don’t be afraid to get creative! Swap in your favorite fruit or try a drizzle of cream for a fresh twist. This recipe is your foundation—experiment and make it uniquely yours. For more inspiration, check out this pistachio cream recipe to pair with your creation.
Every minute spent in the kitchen is worth it when you see the smiles it brings. So, gather your bowl, roll up your sleeves, and let the magic happen. Happy baking!
FAQ
Can I use fresh bread instead of stale bread?
Yes, you can, but stale works better because it absorbs the custard mixture more effectively, giving you a richer texture.
What’s the best way to enhance the flavor of this dessert?
Adding spices like cinnamon or nutmeg and dried fruits like prunes or candied ginger can elevate the taste beautifully.
How do I know when the dish is perfectly baked?
Look for a golden brown top and a custard that’s set but still slightly wobbly in the center.
Can I make this recipe ahead of time?
Absolutely! Assemble it a few hours before baking, or even the night before, and keep it refrigerated until ready to bake.
What’s the ideal serving size for this dessert?
A standard serving is about one cup per person, but it’s so delicious, you might want to make extra!
Can I substitute ingredients for dietary needs?
Definitely! Use plant-based milk and butter for a vegan version, or swap sugar for a low-calorie sweetener if needed.
What’s the best way to serve this dish?
Warm it up and pair it with a scoop of vanilla ice cream or a dollop of whipped cream for an indulgent treat.
How do I store leftovers?
Keep them in an airtight container in the fridge for up to three days. Reheat in the oven or microwave before serving.
Such a clever twist on a classic favorite