
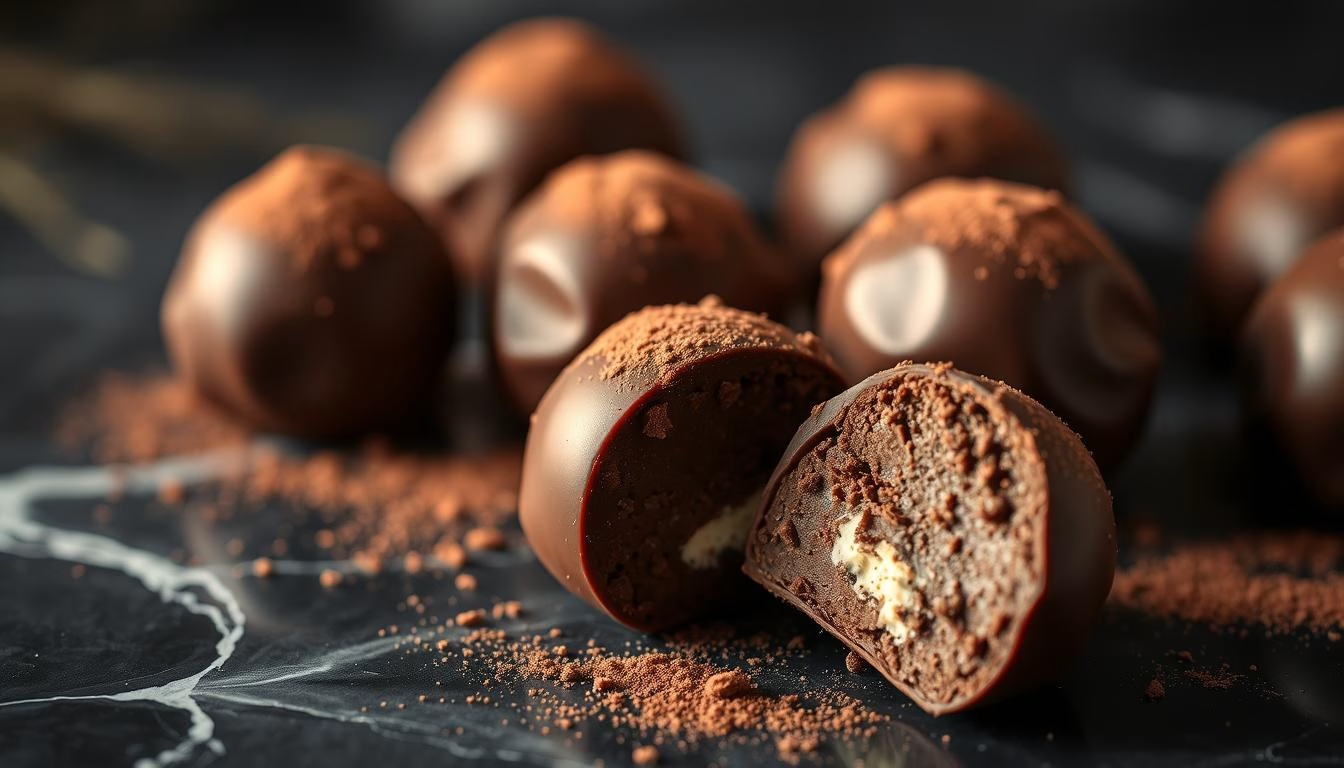
There’s nothing quite like the combination of rich chocolate and smooth cream cheese in a bite-sized, melt-in-your-mouth treat. This No Bake chocolate cream cheese truffles recipe is the perfect balance of indulgence and simplicity, making it a go-to for any occasion. Whether you’re looking for a homemade gift, a sweet party treat, or just a little something to satisfy your chocolate cravings, these truffles deliver in both flavor and elegance.
What sets this recipe apart is its effortless preparation. With just a handful of ingredients—cream cheese, melted chocolate, powdered sugar, and a dusting of cocoa powder—you can create a decadent dessert that tastes like it came straight from a gourmet chocolatier. The smooth texture of the cream cheese blends beautifully with the deep, rich chocolate, creating an irresistible bite that’s creamy on the inside and perfectly coated on the outside.
The best part? You don’t need any fancy equipment or baking skills to make these truffles. Simply mix, roll, and coat them in your favorite toppings—whether it’s cocoa powder, crushed nuts, shredded coconut, or even a drizzle of melted chocolate for an extra touch of luxury. They’re not only easy to make but also customizable, so you can experiment with flavors and textures to suit your taste.
So, if you’re ready to make a batch of these chocolate cream cheese truffles, let’s dive into the step-by-step process and create a treat that’s as fun to make as it is to eat!

Chocolate Cream Cheese Truffles
Equipment
- Electric mixer for blending ingredients
- Baking sheet lined with parchment paper
- Refrigerator for chilling truffles
- Spoon or cookie scoop for portioning truffles
Ingredients
- 8 oz cream cheese softened
- 2 cups powdered sugar sifted
- 1 cup semi-sweet chocolate chips melted and cooled
- 1 tsp vanilla extract
- 0.5 cup cocoa powder for coating
- 0.5 cup crushed nuts optional, for coating
- 0.5 cup sprinkles optional, for coating
Instructions
- In a mixing bowl, beat the softened cream cheese until smooth using an electric mixer.
- Mix in the melted chocolate and vanilla extract until well combined.
- Gradually add the powdered sugar, mixing until a smooth, thick mixture forms.
- Cover the mixture and refrigerate for at least 1 hour to firm up.
- Using a spoon or cookie scoop, portion the mixture into 1-inch balls. Roll them between your hands to shape them.
- Roll each truffle in your choice of coating: cocoa powder, crushed nuts, or sprinkles.
- Place the coated truffles on a parchment-lined baking sheet and refrigerate until set, about 15 minutes.
- Enjoy chilled or at room temperature.
Notes
- Optional Equipment: A double boiler can be used to melt the chocolate gently.
- Customization: Experiment with flavored extracts like peppermint or almond for a twist.
- Storage: Keep truffles in an airtight container in the refrigerator for up to a week.
- Serving Tip: Serve with fresh berries or a drizzle of chocolate sauce for an elegant presentation.
Nutrition
Introduction to These Decadent Truffles
Creating desserts that bring joy is one of my greatest passions. My love for truffles began years ago when I first experimented with combining rich flavors and smooth textures. The result? A delightful treat that’s both indulgent and easy to make.
Background and Inspiration
I’ve always been drawn to the simplicity of no-bake desserts. This recipe was inspired by my desire to create something that balances the richness of dark chocolate with the tanginess of cream cheese. The first time I made these, I knew I had stumbled upon something special.
What sets these truffles apart is the perfect mixture of ingredients. Using high-quality semi-sweet chocolate chips and a touch of vanilla extract, the flavors come together beautifully. The process is straightforward, and the results are always impressive.
What Makes These Truffles Unique
Unlike traditional recipes, these truffles don’t require any cooking. Just a few minutes of mixing and chilling, and you’re ready to roll. The key is getting the mixture consistency just right. A little extra beating can make all the difference in achieving that smooth, velvety texture.
Tools like a baking sheet and an airtight container are essential for success. They ensure the truffles set properly and stay fresh. I also love how versatile this recipe is—whether you’re adding a sprinkle of nuts or a dusting of cocoa powder, there’s room for creativity.
From a nutrition perspective, these treats are a balanced indulgence. While they’re rich in flavor, they’re also portion-controlled, making them a guilt-free delight. Storing them in the refrigerator for up to a week ensures they stay fresh and ready to share.
If you’re looking for another no-bake treat, try my Churro Cheesecake Cookies. They’re just as easy to make and perfect for any occasion.
Chocolate Cream Cheese Truffles recipe: The Ultimate Guide
Every bite of these truffles tells a story of balance and indulgence. They’re a perfect blend of rich and tangy flavors, making them a standout treat. Whether you’re a seasoned baker or a beginner, this guide will help you master the art of creating these delightful candies.
Understanding the Flavor Profile
The magic of these truffles lies in their flavor harmony. The richness of melted chocolate pairs beautifully with the tanginess of cream cheese. A touch of powdered sugar adds sweetness, while cocoa powder brings depth. The result? A velvety texture that melts in your mouth.
What sets this recipe apart is the balance of ingredients. Each component plays a role in creating the perfect mixture. The vanilla extract enhances the aroma, and the teaspoon measures ensure consistency. It’s a blend of science and art.

Why This Recipe Stands Out
This recipe is designed for both simplicity and creativity. Unlike traditional versions, it doesn’t require complex techniques. Just mix, chill, and roll into ball shapes. The use of a baking sheet and an airtight container ensures the truffles stay fresh and perfectly shaped.
Here’s a quick comparison to highlight its uniqueness:
| Aspect | Standard Truffles | This Recipe |
|---|---|---|
| Texture | Dense and heavy | Smooth and velvety |
| Flavor | Overly sweet | Balanced and rich |
| Preparation | Time-consuming | Quick and easy |
As I perfected this recipe, I realized how small tweaks can make a big difference. For example, chilling the mixture for an hour ensures it’s easy to handle. Rolling the truffles in cocoa powder adds a final touch of elegance.
“The best recipes are those that combine simplicity with a touch of creativity. These truffles are a testament to that.”
Whether you’re making them for a special occasion or just because, these truffles are sure to impress. With this ultimate guide, you’ll have all the tips and tricks to create a treat that’s as unique as it is delicious.
Essential Ingredients and Their Roles
The foundation of any great dessert lies in its ingredients. Each component in this recipe plays a specific role, from creating texture to enhancing flavor. Let’s break down the key elements and how they contribute to the final result.
Cream Cheese, Chocolate, and Sweeteners
Cream cheese is the star here, providing a tangy richness that balances the sweetness. It also helps bind the mixture, making it easy to roll into smooth balls. For the best results, use full-fat cream cheese at room temperature.
Melted chocolate adds depth and a velvety texture. I recommend using high-quality semi-sweet chocolate chips for a balanced flavor. Powdered sugar sweetens the mixture without making it overly sugary, while a touch of cocoa powder enhances the chocolatey richness.
Optional Add-Ins for Extra Flavor
While the base ingredients are essential, optional add-ins can elevate the flavor and texture. Crushed walnuts or almonds add a satisfying crunch, while a splash of vanilla extract enhances the aroma. For a festive touch, consider rolling the truffles in crushed candy or sprinkles.
Here’s a quick comparison of mandatory and optional ingredients:
| Type | Ingredients | Role |
|---|---|---|
| Mandatory | Cream cheese, melted chocolate, powdered sugar | Base flavor and texture |
| Optional | Nuts, extracts, candy decorations | Flavor and visual enhancement |
Quality matters when it comes to ingredients. Using high-quality chocolate chips and fresh cream cheese ensures a rich, complex flavor. If you’re looking for another indulgent treat, try my White Chocolate Cream-Filled Churros. They’re just as easy to make and perfect for any occasion.
Step-by-Step Preparation Process
Mastering the art of making these delightful treats is easier than you think! With a few simple steps, you’ll create a smooth and indulgent dessert that’s perfect for any occasion. Let’s dive into the process.
Mixing and Blending Techniques
Start by placing softened cream cheese in a large bowl. Add powdered sugar and vanilla extract, then beat until the mixture is creamy. This step ensures a smooth base for your truffles.
Next, melt high-quality chocolate chips and gradually fold them into the mixture. Use a spatula to mix everything evenly. The result should be a dark, velvety blend that’s easy to handle.
Chilling, Rolling, and Coating Methods
Once the mixture is ready, refrigerate it for about 30 minutes. This step is crucial for achieving the right consistency. When it’s firm, scoop small portions and roll them into ball shapes using your hands.
For the coating, prepare a baking sheet lined with parchment paper. Roll each ball in cocoa powder or confectioner sugar for a polished finish. You can also use crushed nuts for added texture.
Finally, store the truffles in an airtight container and keep them in the refrigerator for up to a week. This ensures they stay fresh and ready to enjoy whenever you crave a sweet treat.
“The key to perfect truffles lies in patience and precision. Take your time, and the results will be worth it!”
If you’re looking for another creamy delight, try my pistachio cream recipe. It’s just as easy to make and adds a unique twist to your dessert collection.
Expert Tips & Equipment Insights
Perfecting the art of making truffles requires the right tools and techniques. Over the years, I’ve learned that small adjustments in equipment and timing can make a big difference. Here’s how to ensure your truffles turn out smooth, consistent, and delicious every time.
Using the Right Tools for Best Results
Having the right equipment is essential for success. A sturdy bowl and a reliable mixer are must-haves for achieving a smooth mixture. I also recommend using a silicone baking sheet for easy cleanup and even coating.
For dipping and rolling, invest in quality dipping tools. They help maintain the shape and texture of your truffles. An airtight container is another essential for storing them in the refrigerator for up to a week.
Techniques for Consistent Texture
Consistency is key when making truffles. Start by ensuring your cream cheese is at room temperature. This makes it easier to beat and mix with other ingredients like powdered sugar and vanilla extract.
Chilling the mixture for at least 30 minutes before rolling helps achieve the perfect texture. When rolling, work quickly to avoid overhandling the mixture, which can lead to uneven shapes.
Time Management and Temperature Tips
Timing and temperature play a crucial role in the process. Melt your chocolate chips slowly to avoid burning, and keep the mixture at a consistent temperature throughout. This ensures a smooth, velvety texture.
Here’s a quick guide to essential tools and their roles:
| Tool | Role |
|---|---|
| Sturdy Bowl | Mixing ingredients evenly |
| Silicone Baking Sheet | Easy cleanup and coating |
| Airtight Container | Maintaining freshness |
| Dipping Tools | Shaping and coating truffles |
By following these tips and using the right tools, you’ll create truffles that are not only delicious but also visually stunning. Happy baking!
Customization Ideas and Serving Suggestions
One of the best parts of baking is the freedom to experiment and make each treat uniquely yours. This recipe is a fantastic base for creativity, allowing you to add your own twist to every bite. Let’s explore some fun ways to customize and serve these delightful treats.
Flavor Variations and Decorative Finishes
Start by playing with flavor extracts. Swap out vanilla for almond or peppermint for a refreshing twist. A hint of citrus zest can add a bright, tangy note that complements the richness of the mixture.
For decorative finishes, roll your truffle balls in crushed nuts, sprinkles, or even finely chopped candy. Dusting them with extra powdered sugar or cocoa powder adds a classic touch. If you’re feeling adventurous, try a drizzle of melted chocolate chips for a glossy finish.

Pairing Truffles with Beverages
These treats pair beautifully with a variety of beverages. A cup of hot coffee enhances their richness, while a glass of dessert wine adds a sophisticated touch. For a cozy treat, serve them with a mug of hot cocoa.
Here’s a quick guide to pairing options:
| Beverage | Pairing Notes |
|---|---|
| Coffee | Balances sweetness with bold flavor |
| Dessert Wine | Adds a luxurious contrast |
| Hot Cocoa | Perfect for a cozy evening |
Storing your creations is just as important as making them. Use an airtight container to keep them fresh and ready to share. Whether you’re making them for daily treats or holiday gifting, these ideas will inspire you to create something truly special.
Now It’s Your Turn: Go Make Some Amazing Chocolate Cream Cheese Truffles!
Making these indulgent treats at home is simpler than you might think! With just a few quality ingredients and careful attention to detail, you can create something truly special. The blend of rich flavors and smooth textures makes every bite unforgettable.
Using precise measurements, like a teaspoon of vanilla extract, ensures consistency. Chilling the mixture in the refrigerator for the right amount of time helps achieve the perfect texture. Rolling the ball shapes and coating them with cocoa powder adds a professional touch.
Don’t forget to store your creations in an airtight container to keep them fresh. This recipe is not just about the final product—it’s about the joy of creating something delicious from scratch. I hope you feel inspired to try it and make it your own!
Thank you for joining me on this sweet journey. With a little patience and passion, you can master this treat and enjoy it with friends and family. Happy baking!
FAQ
Can I use dark cocoa powder instead of regular cocoa powder?
Absolutely! Dark cocoa powder adds a richer, deeper flavor. Just keep in mind it might slightly alter the sweetness balance, so adjust powdered sugar if needed.
How long do these truffles last in the fridge?
Stored in an airtight container, they stay fresh for up to a week. For longer storage, you can freeze them for up to a month.
Can I substitute semi-sweet chocolate chips for the melted chocolate?
Yes, semi-sweet chips work well. Melt them gently for a smooth texture, and they’ll blend perfectly with the cream cheese mixture.
What’s the best way to roll the truffles into smooth balls?
Chill the mixture thoroughly first. Then, use a small cookie scoop or your hands lightly dusted with cocoa powder to shape them evenly.
Can I add nuts or other mix-ins to the recipe?
Definitely! Chopped nuts, crushed cookies, or even a splash of vanilla extract can add extra texture and flavor. Just fold them into the mixture before chilling.
How do I prevent the truffles from melting at room temperature?
Keep them refrigerated until serving. If you’re serving them at a party, place them on a chilled baking sheet or tray to maintain their shape.
Can I use confectioner’s sugar instead of powdered sugar?
Yes, they’re essentially the same thing. Confectioner’s sugar will blend smoothly into the mixture, ensuring a creamy texture.
What’s the best way to coat the truffles for a professional finish?
Roll them in cocoa powder, powdered sugar, or even dip them in melted chocolate for a glossy, candy-like coating. Let them set on parchment paper for a clean finish.
A solid dessert recipe. Simple to make and very enjoyable.