
Tired of processed snacks packed with hidden sugars and mystery ingredients? Imagine creating your own delicious and healthy snacks right in your kitchen, bursting with natural fruit flavor. For years, I’ve been hooked on the simple magic of homemade fruit leather, and trust me, it’s a game-changer! Not only is it incredibly easy to make fruit leather, but it’s also a fantastic way to enjoy a naturally sweet treat without any of the guilt.
Making DIY fruit snacks like fruit leather and dried fruit puts you in complete control. Say goodbye to those store-bought options loaded with added sugars, artificial colors, and questionable preservatives. Plus, it’s the perfect, planet-friendly solution for using up that bounty of seasonal fruit – think vibrant berries, crisp apples, juicy mangoes, and more! Whether you’re using an oven for fruit leather or a dedicated fruit dehydrator, transforming fresh fruit into chewy, flavorful snacks is surprisingly straightforward.
Ready to unlock the secrets of making fruit leather at home and create your own batch of irresistible dried fruit recipes? All you need is your favorite fruit, a little time, and either your oven or a dehydrator. We’ll walk you through each step – from pureeing your fruit to spreading it thinly and achieving that perfect chewy texture. Get ready to discover how easy and rewarding it is to make your own nutritious, homemade fruit snacks that are perfect for lunchboxes, hikes, or satisfying those sweet cravings the healthy way! Trust me, once you taste the homemade difference, you’ll ditch the store-bought stuff for good!
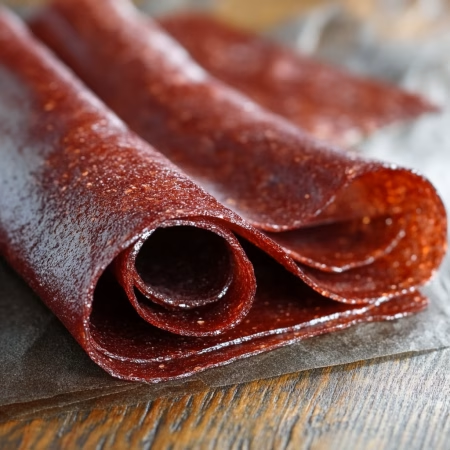
Fruit Leather
Equipment
- Blender for pureeing fruit
- Baking sheet lined with parchment paper or a silicone mat
- Oven set to the lowest temperature (around 140°F-170°F)
- Spatula for spreading fruit puree evenly
- Knife for slicing fruit leather into strips
Ingredients
- 4 cups fresh fruit such as strawberries, mango, or apples, chopped
- 2 tbsp honey or sweetener of choice, optional
- 1 tbsp lemon juice for preserving color and adding flavor
Instructions
- In a blender, combine chopped fruit, honey, and lemon juice. Blend until smooth and no chunks remain.
- Pour the fruit puree onto a parchment-lined baking sheet. Use a spatula to spread it evenly, about 1/8 to 1/4 inch thick.
- Set the oven to its lowest temperature (140°F-170°F). Dry the fruit puree in the oven for 6-8 hours or until the fruit leather is no longer tacky to the touch.
- Allow the fruit leather to cool completely. Peel it off the parchment and use a knife to cut it into strips.
- Roll each strip in parchment paper and store in an airtight container. Enjoy as a healthy snack!
Notes
- Optional Equipment: A dehydrator can also be used for a more energy-efficient drying method.
- Customization: Mix different fruits for unique flavor combinations.
- Storage: Store fruit leather in an airtight container at room temperature for up to 1 week.
- Serving Tip: Great for lunchboxes, hiking snacks, or a healthy dessert.
Nutrition
Introduction to Homemade Fruit Snacks
Looking for a healthier snack option that’s both fun and easy to make? Homemade fruit snacks are the perfect solution! They’re not only delicious but also a great way to use up extra produce like strawberries, peaches, and mangoes. I’ve spent years experimenting with different recipes, and I can confidently say that making your own snacks is a game-changer.
One of the best parts about creating your own treats is the control you have over the ingredients. You can skip the added sugars and preservatives found in store-bought options. For example, a simple blend of fresh strawberries and a touch of lemon juice can create a naturally sweet and tangy puree. It’s all about finding the right balance!
Using a dehydrator or oven, you can transform this puree into a chewy, flavorful snack. The process is straightforward: spread the mixture thinly on parchment paper, let it dry, and roll it up for easy storage. It’s a fantastic way to promote healthier eating habits for both kids and adults.
If you’re new to this, don’t worry! The minimal time required to start is worth it. Plus, it’s a great way to introduce your family to a variety of fruits. For more inspiration, check out these irresistible blueberry dessert recipes that showcase the versatility of fresh produce.
Ready to dive in? Let’s explore how you can create your own homemade snacks with ease. Trust me, once you try it, you’ll never go back to store-bought versions!
Understanding Fruit Leather/Dried Fruit: What and Why
Discover the fascinating journey of transforming simple ingredients into a nutritious snack. Fruit leather has been a staple for centuries, offering a chewy, leathery texture that’s both satisfying and portable. Traditionally, people relied on sun-drying to preserve their harvests, but today, modern tools like dehydrators make the process faster and more efficient.
What makes this snack so special? It’s packed with natural energy and nutrients, without the need for added sugar. The base of fruit puree ensures a concentrated burst of flavor, while the drying process locks in freshness. I’ve experimented with various combinations, from tangy lemon to sweet apple, and each batch brings a unique twist to the table.
History and Benefits
Historically, sun-drying was the go-to method for preserving food. Families would spread thin layers of puree on trays and let the sun work its magic over several days. While this method is still used in some places, modern dehydrators have revolutionized the process, reducing drying time to just a few hours.
The benefits of making your own fruit leather are numerous:
- Energy-boosting: Perfect for a quick pick-me-up during busy days.
- Nutritional: Retains vitamins and minerals from fresh produce.
- Customizable: Control the ingredients and flavors to suit your taste.
One of my favorite recipes involves blending apples with a hint of lemon for a balanced, tangy flavor. It’s a simple yet delicious way to enjoy a healthy snack. Plus, making it at home is environmentally friendly and cost-effective.
If you’re curious about other creative ways to use fresh produce, check out these irresistible longan fruit dessert recipes. They’re a great way to explore new flavors and techniques!
Choosing the Right Ingredients and Tools
Ever wondered how to pick the best ingredients for your homemade snacks? The secret to perfect fruit leather lies in selecting the freshest produce and the right equipment. Let’s dive into what you’ll need to get started!
Selecting Fresh Fruit and Purees
Ripe or slightly overripe produce is ideal for making puree. The natural sweetness of ripe fruits like blueberries and mangoes reduces the need for added sugar. I’ve found that raw fruit works best for preserving flavor and nutrients, though cooked fruit can also yield great results.
Here’s a quick guide to choosing the right fruits:
- Blueberries: Packed with antioxidants and natural sweetness.
- Mangoes: Adds a tropical twist and creamy texture.
- Strawberries: Perfect for a tangy, vibrant flavor.
For a balanced taste, I often add a splash of lemon juice to enhance the natural flavors. If you’re looking for more inspiration, check out these easy peach cobbler recipes that showcase the versatility of fresh produce.
Essential Kitchen Equipment and Dehydrator Options
Having the right tools can make the process smoother and more efficient. A dehydrator is my go-to for consistent results, but an oven works well too. Here’s what you’ll need:
| Tool | Purpose |
|---|---|
| Dehydrator | Ensures even drying at precise temperatures. |
| Parchment Paper | Prevents sticking and makes cleanup easier. |
| Baking Sheets | Great for oven drying if you don’t have a dehydrator. |
Investing in quality equipment not only saves time but also ensures your fruit leather turns out perfectly every time. Whether you’re a beginner or a seasoned pro, these tools are a must-have for your kitchen.
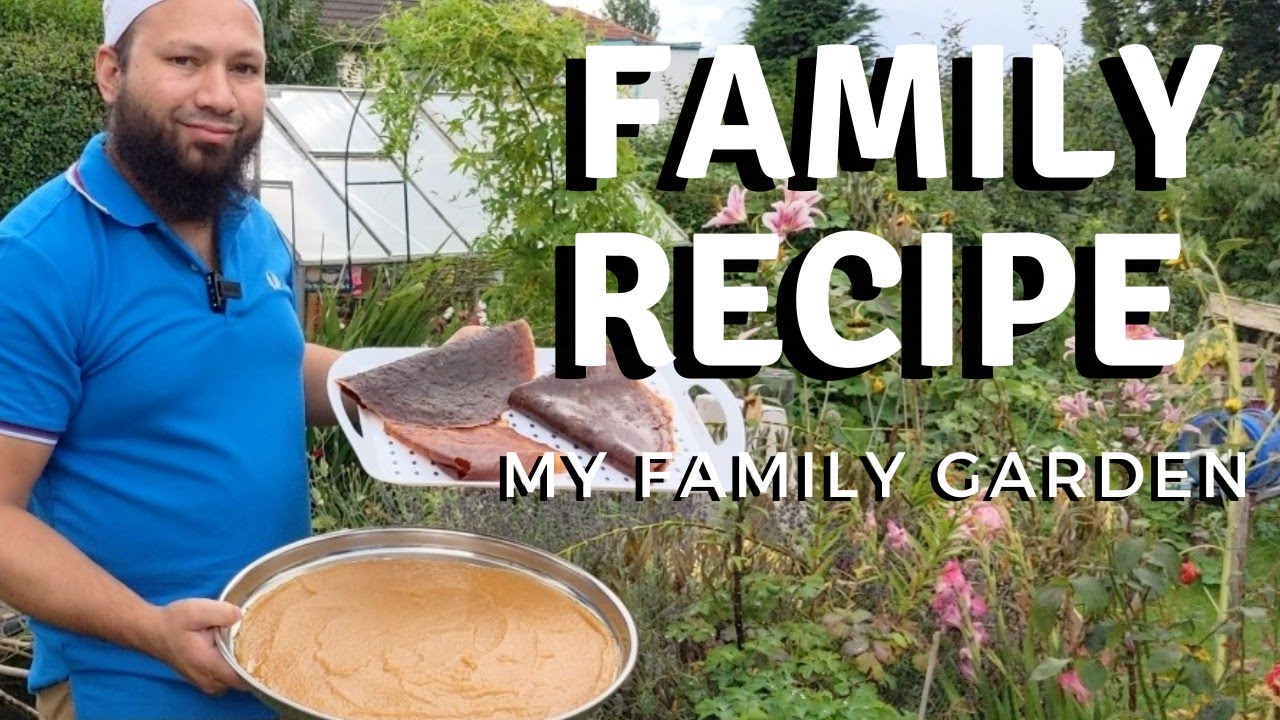
Step-by-Step Guide to Making Fruit Leather
Ready to transform fresh produce into a delicious, chewy snack? Making fruit leather is easier than you think! With just a few simple steps, you can create a healthy, portable treat that’s perfect for any time of day. Let’s dive into the process!
Preparing and Cooking the Fruit
Start by selecting ripe or slightly overripe fruit for the best flavor. Wash and chop your chosen produce into small pieces. For a peach or apple recipe, cook the fruit with a splash of water over low heat until softened. This step helps break down the fibers and makes blending easier.
If you prefer a sweeter taste, add a tablespoon of sugar during cooking. Alternatively, a squeeze of lemon juice can enhance the natural tanginess. Once cooked, let the mixture cool slightly before moving to the next step.

Mashing and Pureeing Techniques
Transfer the cooked fruit to a blender or food processor. Blend until you achieve a smooth, lump-free puree. For a chunkier texture, use a potato masher instead. The goal is to create a consistency that spreads evenly on your drying tray.
If the puree is too thick, add a bit of water or juice to thin it out. Conversely, if it’s too runny, simmer it on the stove for a few minutes to reduce the liquid. This ensures your fruit leather dries evenly and holds its shape.
Drying Methods: Oven, Dehydrator, and Sun Drying
Now it’s time to dry your puree! Spread it thinly (about ⅛ inch) on a parchment paper-lined tray or baking sheet. Here are the three main drying methods:
- Dehydrator: Set the temperature to 135°F and dry for 6-8 hours. This method ensures even drying and consistent results.
- Oven: Preheat to 170°F and bake for 6-8 hours. Keep the oven door slightly open to allow moisture to escape.
- Sun Drying: Place the tray in direct sunlight for 1-2 days. Cover with a mesh screen to keep insects away.
To test for doneness, gently press the leather. It should feel dry and peel easily from the paper. Once ready, let it cool completely before rolling or cutting into strips.
For more creative dessert ideas, check out this delicious jackfruit ice cream recipe. It’s a perfect way to explore new flavors!
Expert Tips for Perfect Texture and Flavor
Want to take your homemade snacks to the next level? Here’s how to nail the perfect texture and flavor every time! Over the years, I’ve fine-tuned my techniques to ensure that every batch of fruit leather turns out just right. Whether you’re a beginner or a seasoned pro, these tips will help you achieve professional-quality results.
Balancing Sweetness, Lemon Juice, and Spices
Getting the sweetness right is key. While natural sugars in fruit are usually enough, a touch of sugar can enhance the flavor. I recommend adding it gradually and tasting as you go. A squeeze of lemon juice not only brightens the taste but also helps preserve the vibrant color of your puree.
Spices like cinnamon and nutmeg can add depth without overpowering the natural flavor. For a seasonal twist, try a pinch of pumpkin pie spice. These small adjustments can transform your fruit leather into a gourmet treat!
Adjusting Consistency for Ideal Dryness
The consistency of your puree is crucial. If it’s too thick, it won’t spread evenly; if it’s too runny, it will take forever to dry. I’ve found that a smooth, pourable texture works best. If needed, add a splash of water or simmer the mixture to reduce excess liquid.
Drying time and temperature also play a big role. Using a dehydrator at 135°F or an oven at 170°F ensures even drying. Check the texture periodically—it should be dry but still pliable. If it’s sticky, give it a bit more time.
For more creative flavor ideas, check out these delicious ways to pair vanilla with seasonal. It’s a great way to experiment with new combinations!
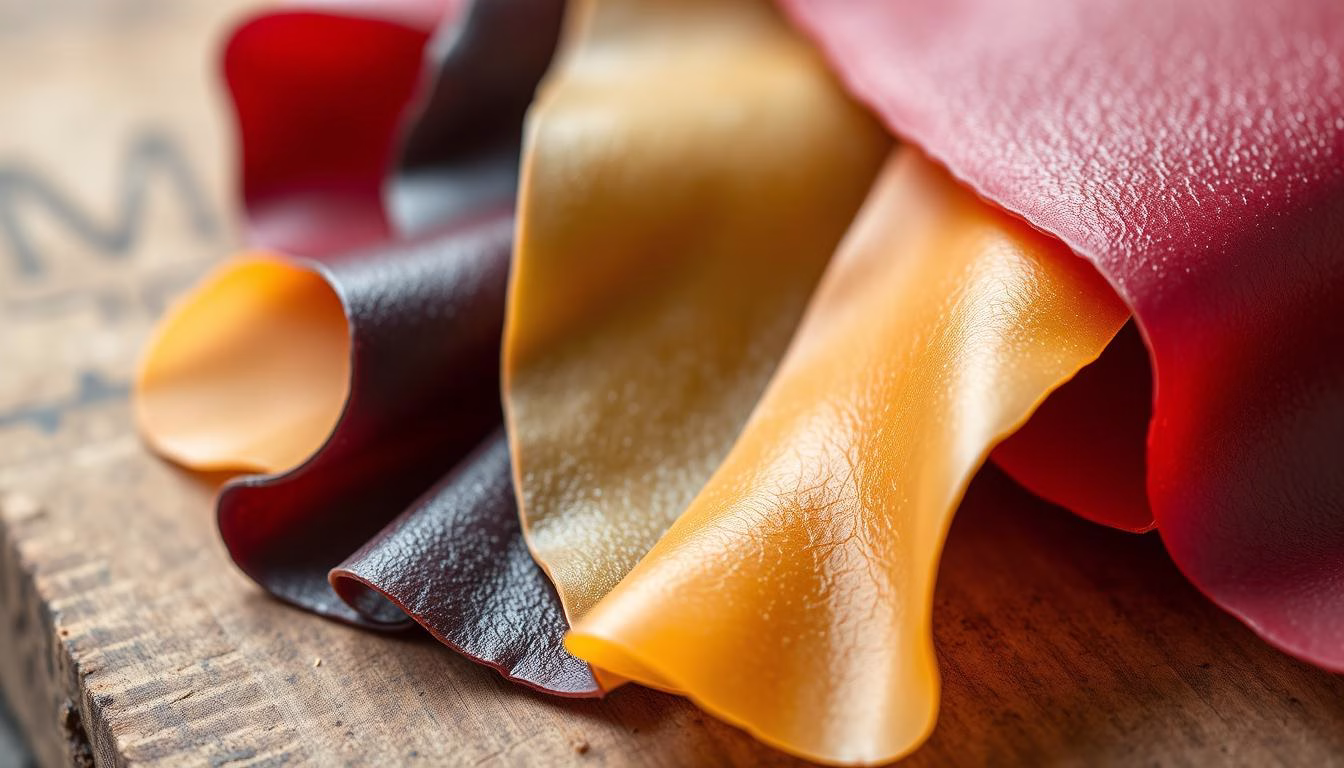
Creative Variations and Flavor Combinations
Experimenting with different flavors and textures can elevate your homemade snacks to a whole new level. One of the best parts of making fruit leather is the endless possibilities for creativity. By mixing various fruits and adding fun toppings, you can create unique combinations that suit your taste perfectly.

Mixing Different Fruits and Puree Blends
Combining different fruits can result in exciting new flavors. For example, blending strawberries with cherries creates a sweet and tangy mix, while apricots paired with ground almonds add a nutty richness. I’ve found that mixing raspberries, strawberries, and a hint of peach creates a vibrant and delicious puree.
Here’s a quick guide to some of my favorite combinations:
| Fruit Blend | Flavor Profile |
|---|---|
| Strawberry + Cherry | Sweet and tangy |
| Apricot + Almond | Nutty and rich |
| Raspberry + Strawberry + Peach | Vibrant and fruity |
Adding Fun Toppings and Garnishes
Toppings can add extra texture and flavor to your fruit leather. Sprinkle shredded coconut or granola for a crunchy twist, or drizzle a bit of honey for added sweetness. For a decadent treat, try melting some chocolate and drizzling it over the top before rolling.
Here are some creative ideas to try:
- Shredded coconut for a tropical vibe
- Chopped nuts for a crunchy texture
- Granola for a hearty bite
- Melted chocolate for a sweet finish
Small adjustments like these can transform your snack into something truly special. For more inspiration, check out these romantic dessert recipes that pair beautifully with creative fruit combinations.
Remember, the key is to have fun and experiment. Whether you’re making these for kids or guests, the possibilities are endless. Enjoy the process and let your creativity shine!
Proper Storage and Shelf Life
Storing your homemade snacks properly ensures they stay fresh and delicious for months. Whether you’ve made a batch of fruit leather or dried fruit, knowing the best storage methods can make all the difference. Let’s explore how to keep your treats in perfect condition!
Room Temperature, Refrigeration, and Freezing Options
There are three main ways to store your fruit leather: at room temperature, in the fridge, or in the freezer. Each method has its benefits, depending on how long you want to keep your snacks fresh.
| Storage Method | Duration | Pros |
|---|---|---|
| Room Temperature | Up to 1 month | Convenient and easy access |
| Refrigeration | Up to 6 months | Extends freshness significantly |
| Freezing | Up to 1 year | Longest shelf life |
For room temperature storage, roll the fruit leather in parchment paper and place it in an airtight container. This keeps it dry and prevents it from absorbing moisture. If you choose to refrigerate or freeze it, wrap it tightly in plastic wrap before placing it in a container to avoid freezer burn.
Packaging Techniques to Preserve Freshness
Proper packaging is key to maintaining the flavor and texture of your fruit leather. Here are some tips to ensure your snacks stay fresh:
- Use parchment paper to wrap each piece individually. This prevents sticking and makes it easy to grab a snack on the go.
- Store in an airtight container to keep out moisture and air, which can cause spoilage.
- Label your containers with the date to keep track of freshness.
“Proper storage not only extends the shelf life of your snacks but also preserves their quality and flavor.”
From my experience, keeping a consistent temperature is crucial. Avoid storing your fruit leather in areas with fluctuating temperatures, like near a stove or window. This helps prevent moisture reabsorption, which can ruin the texture.
With these techniques, you can enjoy your homemade snacks for months without compromising on taste or quality. Happy snacking!
Conclusion
Creating your own healthy snacks at home is easier than you think! From selecting fresh produce to achieving the perfect texture, making fruit leather is a rewarding process. It’s not just delicious—it’s packed with natural energy and nutrients, without the need for added sugar.
Whether you use a dehydrator or oven, the steps are simple: prepare the puree, spread it thin, and let it dry. The result is a chewy, flavorful treat that’s perfect for on-the-go snacking. Plus, you can store it at room temperature or in an airtight container for long-lasting freshness.
Don’t be afraid to experiment with flavors! Mixing different fruits or adding a touch of lemon juice can create unique combinations. It’s a fun way to enjoy a healthy, homemade snack that everyone will love.
Thank you for joining me on this journey into homemade snacks. I hope you feel inspired to try it out in your own kitchen. Happy snacking!
FAQ
What’s the best way to prepare fresh fruit for making snacks?
Start by washing and peeling your chosen produce. Remove any seeds or pits, then chop it into smaller pieces for easier blending. Cooking it slightly with a bit of water or juice can help soften it for a smoother puree.
Can I use frozen fruit for this process?
Absolutely! Frozen options work just as well. Thaw them first, then drain any excess liquid before blending. This ensures your mixture isn’t too watery, which can affect drying time.
How do I know when my homemade snack is ready?
It should feel slightly tacky but not sticky. When you touch it, it shouldn’t leave residue on your fingers. If using an oven or dehydrator, check after 4-6 hours, depending on thickness.
What’s the ideal temperature for drying in the oven?
Set your oven to the lowest setting, usually around 140°F to 170°F. Keep the door slightly open to allow moisture to escape, ensuring even drying without cooking the mixture.
How long can I store these snacks, and what’s the best way?
Properly stored in an airtight container, they can last up to a month at room temperature. For longer freshness, refrigerate or freeze them, and they’ll stay good for several months.
Can I add sweeteners or spices to enhance the flavor?
Yes! A touch of honey, maple syrup, or sugar can balance tartness. Spices like cinnamon or nutmeg add warmth, while a splash of lemon juice brightens the taste.
What’s the best way to roll and cut the finished product?
Once cooled, place it on parchment paper and roll it up tightly. Use scissors or a knife to cut it into strips or bite-sized pieces for easy snacking.
Can I mix different fruits for unique flavors?
Definitely! Combining options like strawberry and mango or blueberry and peach creates exciting blends. Experiment with ratios to find your favorite mix.
Is it possible to make these snacks without a dehydrator?
Yes, an oven works just fine. Spread the puree on a baking sheet lined with parchment paper and dry at a low temperature. Sun drying is another option in warm, dry climates.
How do I prevent my homemade snack from sticking to the tray?
Always line your tray or baking sheet with parchment paper or a silicone mat. This ensures easy removal and keeps your creation intact.