
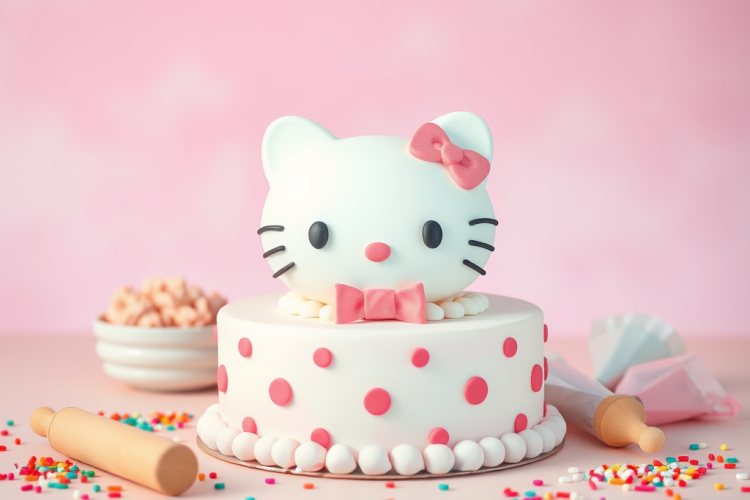
The iconic Hello Kitty cake has captured hearts across generations since the beloved character’s debut. These charming confections transform ordinary celebrations into magical moments with their whimsical design and nostalgic appeal. The adorable white cat with no mouth but plenty of personality has maintained its status as a cultural phenomenon for nearly five decades, making Hello Kitty-themed baked goods a staple at birthday parties and special events.
Creating a Hello Kitty cake allows bakers of all skill levels to express creativity while delivering a treat that generates genuine delight. The combination of delicious flavors and cute aesthetics proves irresistible to both children and adults alike. Whether you’re planning a birthday surprise or simply want to bring a smile to someone’s face, this iconic dessert delivers joy in every slice and remains a favorite choice for those seeking both visual appeal and delicious taste.
Creating a professional-looking Hello Kitty cake requires more than just basic baking skills. The truth is, crafting these detailed character cakes demands proper training and technique. We’ve been honing our cake decorating abilities through Cakeflix, an invaluable online resource offering comprehensive video tutorials for decorators of all skill levels. With their step-by-step guidance for creating everything from simple character toppers to elaborate fondant figures, even beginners can achieve impressive results. Cakeflix offers a 7-day free trial that allows you to explore their extensive library of cake decorating videos before committing—it’s been the secret behind our successful character cakes and continued skill development.

Hello Kitty Cake
Equipment
- 9-inch cake pans
- Oven
- Cake Turntable
- Piping Bags
- Fondant Roller
Ingredients
- 2 1/2 cups all-purpose flour
- 2 1/2 tsp baking powder
- 1/2 tsp salt
- 1 cup unsalted butter softened
- 1 3/4 cups granulated sugar
- 4 large eggs
- 1 tbsp vanilla extract
- 1 cup whole milk
- 2 cups buttercream frosting white, for decorating
- 1 sheet black fondant for Hello Kitty’s eyes and whiskers
- 1 sheet yellow fondant for Hello Kitty’s nose
- 1 sheet pink fondant for Hello Kitty’s bow
Instructions
- Preheat the oven to 350°F (175°C) and grease two 9-inch cake pans.
- In a mixing bowl, whisk together the flour, baking powder, and salt.
- In another bowl, beat the softened butter and sugar until light and fluffy.
- Add the eggs one at a time, beating well after each addition. Mix in the vanilla extract.
- Gradually add the dry ingredients and milk alternately, mixing until just combined.
- Divide the batter evenly between the prepared cake pans and smooth the tops.
- Bake for 28-30 minutes, or until a toothpick inserted in the center comes out clean.
- Let the cakes cool in the pans for 10 minutes before transferring to a wire rack to cool completely.
- Frost the cooled cakes with white buttercream frosting, smoothing the top and sides.
- Roll out the black fondant and cut out Hello Kitty’s eyes and whiskers. Place them on the frosted cake.
- Roll out the yellow fondant and cut a small oval for Hello Kitty’s nose. Place it below the eyes.
- Roll out the pink fondant and shape it into Hello Kitty’s bow. Position it on the upper left side of the cake.
- Chill the cake for 20 minutes before slicing and serving.
Notes
- Storage: Store in an airtight container at room temperature for up to 3 days or refrigerate for up to 5 days.
- Customization: Use food coloring to tint the frosting or add sprinkles for extra decoration.
- Decorating Tip: If you don’t have fondant, pipe the details using colored frosting instead.
Nutrition
The Enduring Charm of Hello Kitty Cakes
Hello Kitty, created by designer Yuko Shimizu for Japanese company Sanrio in 1974, quickly rose to become a global symbol of cuteness. Initially appearing on a simple coin purse, the character has since graced everything from clothing to household items, eventually making her way into the culinary world. The Hello Kitty cake trend emerged naturally as fans sought creative ways to incorporate their beloved character into celebrations.
The appeal of these cakes goes beyond mere appearance. They represent a fusion of pop culture nostalgia and baking artistry that resonates across different age groups. While children are drawn to the recognizable character, adults often experience a rush of nostalgic joy that connects them to cherished memories. This multi-generational appeal explains why Hello Kitty cakes remain consistently popular decades after the character’s creation.
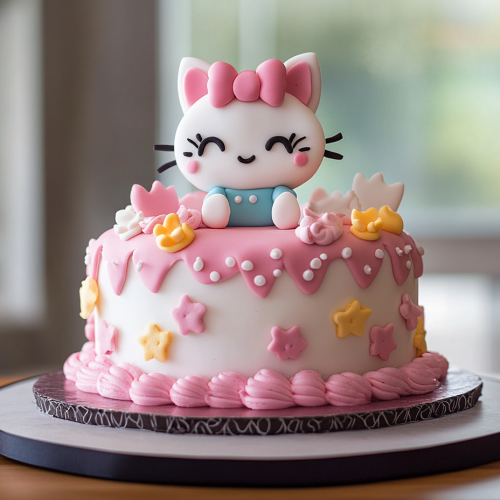
Over the years, Hello Kitty cakes have evolved from simple designs to intricate edible masterpieces. Modern versions often feature advanced techniques like fondant sculpting, airbrushing, and hand-painted details. The trend shows no signs of slowing down, with bakers constantly developing new methods to capture Hello Kitty’s essence in increasingly creative ways. Similar to watercolor birthday cake decorating, the artistic possibilities continue expanding.
Want to make a cake just like this one? Try CakeFlix free today and start creating your own masterpiece!
Essential Ingredients and Equipment
Before diving into creating your perfect Hello Kitty cake, gather these essential ingredients:
- 2⅓ cups cake flour (for a light, tender crumb)
- 1½ teaspoons baking powder
- ½ teaspoon baking soda
- ½ teaspoon salt
- 1 tablespoon skim milk powder (for richness)
- 1 cup unsalted butter (room temperature)
- 1¾ cups granulated sugar
- 2 large eggs
- 4 large egg whites
- ½ cup buttermilk
- 1 teaspoon vanilla extract
- 1½ cups fresh strawberries (finely chopped)
- Pink food coloring (gel preferred for vibrant color)
For the buttercream frosting, you’ll need:
- 1 cup unsalted butter (room temperature)
- 4 cups confectioner’s sugar, sifted
- 2 teaspoons vanilla extract
- 2 tablespoons milk
- Food coloring in pink, yellow, and black
The right equipment makes creating your Hello Kitty cake significantly easier:
- Hello Kitty cake pan (the foundation of your design)
- Electric mixer (stand or hand-held)
- Several mixing bowls of different sizes
- Flour sifter
- Piping bags
- Star-shaped piping tips (various sizes)
- Offset spatula (for smooth frosting application)
- Cooling rack
- Food scale (for precise measurements)

Step-by-Step Hello Kitty Cake Instructions
Preparation (30 minutes): Preheat your oven to 350°F (175°C). Grease your Hello Kitty cake pan thoroughly with butter, then dust with flour to prevent sticking. In a medium bowl, sift together the cake flour, baking powder, baking soda, salt, and skim milk powder. Mix well and set aside. In a separate small bowl, combine the buttermilk and vanilla extract.
In a large mixing bowl, beat the butter until creamy using an electric mixer on medium speed (about 1 minute). Gradually add the sugar and continue beating until the mixture becomes pale and fluffy (approximately 3-4 minutes). This step incorporates air into the batter, contributing to a lighter cake texture. Add the eggs and egg whites one at a time, mixing thoroughly after each addition.
Add the flour mixture to the butter mixture in three additions, alternating with the buttermilk mixture and beginning and ending with the flour. Mix on low speed just until combined after each addition – overmixing develops gluten, resulting in a tough cake. Divide the batter evenly between two bowls. Add pink food coloring to one portion until you achieve the desired shade, then fold in the diced strawberries between both bowls.
Spoon dollops of both pink and white batters into your prepared Hello Kitty pan, creating a marbled effect throughout. Smooth the top gently with an offset spatula. Tap the pan gently on the counter several times to remove any air bubbles. Bake for approximately 50-60 minutes, or until a toothpick inserted into the center comes out clean or with a few moist crumbs.
Allow the cake to cool in the pan for 10 minutes before transferring to a wire cooling rack. Let it cool completely before decorating – rushing this step can melt your frosting. Meanwhile, prepare your buttercream by beating the butter until light and fluffy (about 2-3 minutes). Add the vanilla extract and mix until combined. Gradually add the confectioner’s sugar, beating on low speed initially to avoid a sugar cloud, then increasing to medium-high for 3-5 minutes until the frosting becomes light and pillowy.
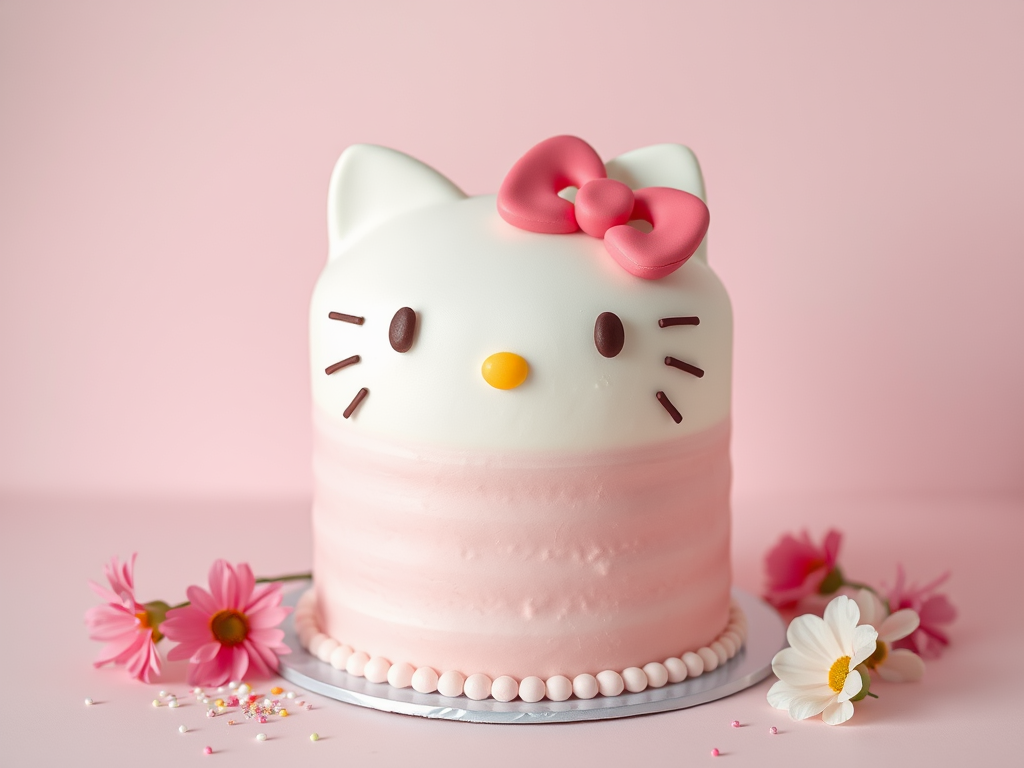
Divide the buttercream into four portions. Leave the largest portion white, then color the others pink, yellow, and black. Transfer each color to separate piping bags fitted with star tips. Begin decorating by applying a thin layer of white buttercream as a crumb coat over the entire cake. Refrigerate for 15-20 minutes to set. Add a second, thicker layer of white buttercream. Use the colored frostings to pipe Hello Kitty’s distinctive features—pink bow, yellow nose, and black whiskers and eyes. If you enjoy festive baking, this technique can be adapted for creating Easter desserts for family fun too.

Complete Hello Kitty Cake Recipe
Prep Time: 45 minutes
Cook Time: 60 minutes
Cooling Time: 2 hours
Decorating Time: 45 minutes
Total Time: 4 hours
Servings: 12-16 slices
Calories: 385 per slice
Nutritional Information (per slice):
Calories: 385
Protein: 4g
Fat: 19g (Saturated Fat: 11g)
Carbohydrates: 51g
Sugar: 36g
Fiber: 1g
Sodium: 185mg
Cholesterol: 75mg
Recipe Notes: For optimal results, ensure all refrigerated ingredients reach room temperature before beginning. The marbling technique creates visual interest when the cake is sliced. If fresh strawberries aren’t available, frozen (thawed and drained) work as an acceptable substitute. The cake can be prepared a day in advance and stored in an airtight container before decorating.
Creative Variations and Expert Tips
While the classic Hello Kitty cake features strawberry and vanilla flavors, numerous delicious variations exist. Try a chocolate cake base with chocolate buttercream for a richer flavor profile. Lemon cake with citrus buttercream offers a refreshing alternative for summer celebrations. Matcha-flavored cake with white chocolate buttercream provides a sophisticated Japanese-inspired tribute to this iconic character, similar to how Easter gooey butter cookies can be adapted with different flavors.
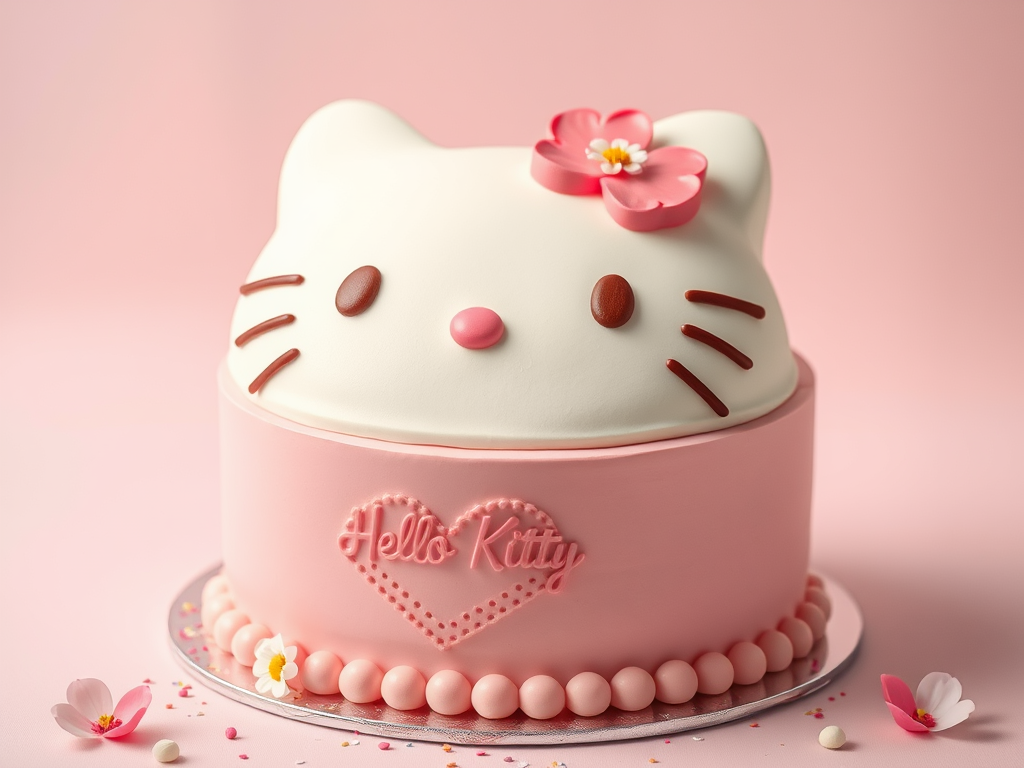
For decorating, fondant creates a smoother, more polished appearance than buttercream. Roll out white fondant to approximately ¼-inch thickness and carefully drape it over your cooled cake. Smooth gently with your hands or fondant smoothers. Create Hello Kitty’s features using colored fondant cut with small cookie cutters or hand-shaped. Edible markers can add fine details like whiskers and facial expressions.
If you’re new to character cakes, start with a simpler design approach. Consider creating a round cake with Hello Kitty’s face on top rather than a shaped cake. Gradually build your skills before attempting more complex designs. A face-only design still captures the character’s charm while being more achievable for beginners.
Incorporate texture by using different piping tips for various elements. Star tips create fur-like texture, while round tips work well for outlines. Edible glitter or sprinkles add sparkle to Hello Kitty’s bow or as accents around the cake. Food-grade pearlescent dust brushed lightly over white areas creates a subtle sheen that elevates the final appearance.
For a modern twist, consider creating Hello Kitty cake pops or cupcakes as accompaniments to your main cake. These mini versions make perfect party favors or alternative options for guests. They follow the same flavor principles but in smaller, more manageable formats. This approach works particularly well for children’s parties, similar to the popularity of funfetti birthday cake donuts.
How to Store Hello Kitty Cake Properly
Proper storage extends your Hello Kitty cake’s freshness and maintains its appearance. For short-term room temperature storage, place the cake in a cake stand with a cover or a large container with a lid. This method keeps the cake fresh for 1-2 days, protecting it from dust and maintaining moisture. Avoid this method during hot weather, as buttercream can soften and decorations may sag.
For extended freshness, refrigeration offers the best solution. Place your Hello Kitty cake in an airtight container to prevent it from absorbing refrigerator odors. The cake remains fresh for up to 5 days when refrigerated properly. Before serving, allow it to sit at room temperature for 1-2 hours to soften the buttercream and enhance flavor – cold cake lacks the same depth of taste and texture.
When freezing your Hello Kitty cake for long-term storage, first place it uncovered in the freezer for 1-2 hours until the exterior hardens. Then wrap it thoroughly in plastic wrap followed by aluminum foil to prevent freezer burn. Properly wrapped, the cake maintains quality for up to 3 months. Thaw frozen cake overnight in the refrigerator, then bring to room temperature before serving.
If you’re storing a cut Hello Kitty cake, press plastic wrap directly against the exposed cake surfaces to prevent them from drying out. This creates a moisture barrier that maintains freshness. Cut cakes generally have a shorter storage life than whole cakes, so consume within 3-4 days for best quality. These storage principles apply to many decorated cakes, including those featuring a birthday cake milkshake recipe theme.

Creating Memories Through Baking Art
A Hello Kitty cake represents more than just dessert – it embodies creativity, joy, and connection. The process of making this cake creates cherished memories for both the baker and recipients. The genuine delight on someone’s face when they see their favorite character brought to life through cake makes every minute of preparation worthwhile.
For many, these character cakes mark significant milestones and celebrations. They become part of personal traditions, with photos of each year’s cake capturing a timeline of growth and changing preferences. Yet the Hello Kitty design remains timeless, beloved by multiple generations for its simplicity and charm.
Whether you’re a novice baker or experienced pastry artist, creating a Hello Kitty cake allows you to express creativity while making someone feel truly special. The skills learned through character cake decorating—patience, precision, color theory, and design—translate to other baking projects and creative pursuits. Each cake becomes a stepping stone to more ambitious creations.
So gather your ingredients, prepare your workspace, and embrace the joy of creating something both beautiful and delicious. Your Hello Kitty cake will bring smiles, create memories, and perhaps even inspire the next generation of bakers to explore their creativity through the wonderful world of decorated cakes.