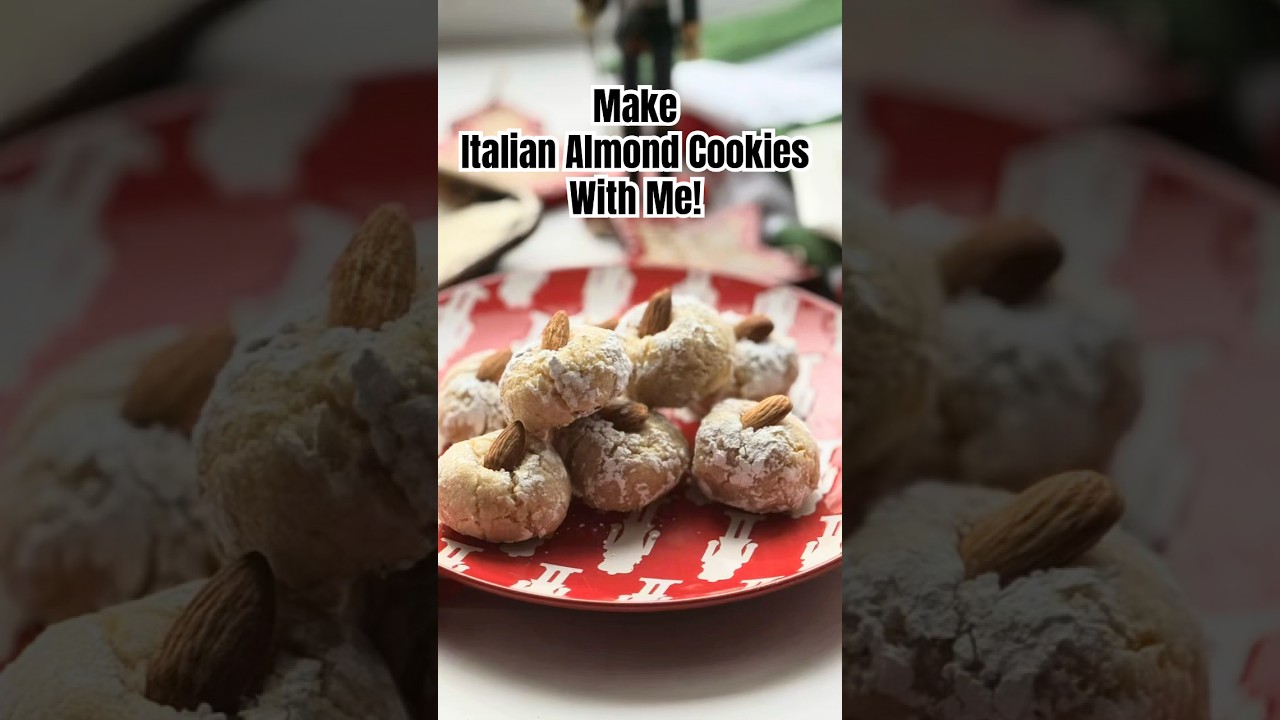
Inspired by the beloved amaretti and other classic almond-based treats, this recipe highlights the natural flavors of almond flour and almond extract. These cookies are naturally gluten-free, incredibly easy to make, and require just a handful of ingredients—yet they deliver a taste that transports you straight to an Italian café.
What I love most about this recipe is its versatility. It’s perfect for any occasion, from casual gatherings to festive celebrations. Plus, it’s gluten-free and dairy-free, making it a great option for those with dietary restrictions. If you’re looking for more baking inspiration, check out these must-try cookie trends for 2025.
I hope this recipe brings a piece of Italy into your kitchen. It’s a joy to bake and even more delightful to share. Let’s get started and create something special together!
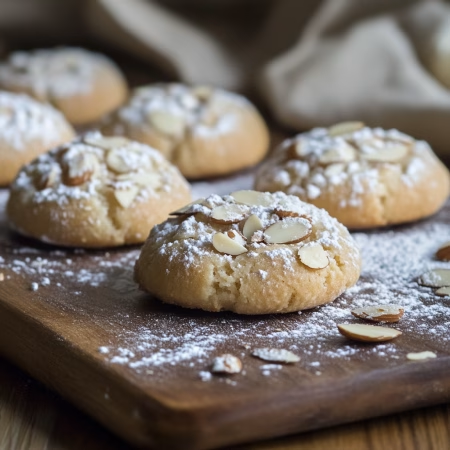
Authentic Italian Almond Cookies
Equipment
- Electric mixer for beating egg whites
- Baking sheet lined with parchment paper
- Oven
- Piping bag for shaping the cookies
Ingredients
- 2 cups almond flour finely ground
- 1 cup granulated sugar
- 2 large egg whites room temperature
- 0.5 tsp almond extract
- 0.5 tsp vanilla extract
- 0.25 cup powdered sugar for dusting
Instructions
- Preheat oven to 325°F (160°C) and line a baking sheet with parchment paper.
- In a mixing bowl, beat the egg whites with an electric mixer until soft peaks form.
- In a separate bowl, whisk together almond flour and granulated sugar.
- Gently fold the almond extract, vanilla extract, and dry ingredients into the beaten egg whites until a thick dough forms.
- Transfer the dough to a piping bag and pipe small rounds onto the prepared baking sheet. Lightly dust with powdered sugar.
- Bake for 18-20 minutes, or until the cookies are lightly golden and firm to the touch.
- Let cookies cool on the baking sheet for 5 minutes before transferring to a wire rack to cool completely.
Notes
- Optional Equipment: A cookie scoop can be used instead of a piping bag.
- Customization: Add a whole almond on top of each cookie before baking.
- Storage: Store in an airtight container at room temperature for up to 1 week.
- Serving Tip: Pairs perfectly with espresso or a glass of sweet wine.
Nutrition
Introduction to This Authentic Almond Cookie Journey
Traveling introduced me to flavors that transformed my baking forever. One of the most memorable experiences was discovering the rich, nutty taste of traditional treats made with almond flour and powdered sugar. These ingredients became the heart of my recipe, blending simplicity with authenticity.
My journey took me to Florence and Siena, where I met fellow food enthusiasts like Emily from Inside the Rustic Kitchen. Sharing recipes and stories with her deepened my appreciation for the cultural origins of these cookies. It was in Siena that I first tasted ricciarelli, a classic treat that inspired this recipe.
What makes these cookies special is their connection to Italian traditions. The use of almond flour and powdered sugar creates a delicate texture, while egg whites add a light, airy finish. These elements come together to form a treat that’s both nostalgic and timeless.
I invite you to join me on this culinary journey. Whether you’re a seasoned baker or just starting, this recipe is a celebration of flavors and memories. For more inspiration, explore these bold almond-flavored desserts that showcase the versatility of this ingredient.
Background and Inspiration
My love for baking began with family traditions, but it was my travels that truly shaped my craft. Each trip brought new ingredients and techniques, from the almond orchards of Sicily to the bustling markets of Florence. These experiences taught me the importance of using quality ingredients like almond flour and powdered sugar to achieve authentic flavors.
The Italian Connection and Travel Memories
Italy holds a special place in my heart, not just for its beauty but for its culinary heritage. The cookies I discovered there, like ricciarelli, are a testament to the country’s rich baking traditions. Using almond flour and egg whites, these treats are a perfect blend of simplicity and elegance.
As I continue to explore and create, I’m reminded of the joy that baking brings. This recipe is my way of sharing a piece of that joy with you. Let’s bake something unforgettable together!
Ingredients Breakdown: Understanding Every Component
Every great recipe starts with understanding its core ingredients. Each component plays a unique role in creating the perfect dough. Let’s dive into what makes these treats so special.
The Role of Almond Flour, Powdered Sugar, and Egg Whites
Almond flour is the star of this recipe. It gives the dough a rich, nutty flavor and a soft, crumbly texture. Unlike regular flour, it’s gluten-free, making it a great choice for those with dietary restrictions.
Powdered sugar isn’t just for sweetness. It helps create that signature cracked exterior, adding a delicate finish to each bite. Sifting it into the mixture ensures a smooth, lump-free dough.
Egg whites are essential for structure. Whipping them to the right consistency adds lightness and airiness to the dough. This step takes just a minute but makes a huge difference in the final texture.
Enhancers: Zests, Extracts, and Secret Touches
To elevate the flavor, I love adding a few drops of almond extract. It enhances the nutty taste without overpowering the other ingredients. Citrus zests, like lemon or orange, add a fresh, aromatic twist.
For a secret touch, try incorporating a pinch of salt. It balances the sweetness and brings out the flavors of the other ingredients. These small additions can transform a good recipe into something extraordinary.
| Ingredient | Role |
|---|---|
| Almond Flour | Provides nutty flavor and crumbly texture |
| Powdered Sugar | Adds sweetness and creates cracked exterior |
| Egg Whites | Gives structure and lightness to the dough |
| Almond Extract | Enhances nutty flavor |
| Citrus Zest | Adds fresh, aromatic notes |
Understanding each ingredient’s role is the first step to mastering this recipe. For more tips on perfecting your baking techniques, check out these pro tips for baking fluffy cakes.
Mixing and Preparing the Dough
Mastering the dough is the key to creating a perfect treat. The process is simple but requires attention to detail. Let’s break it down step by step to ensure your dough turns out light, airy, and full of flavor.
Techniques for Whipping Egg Whites and Folding with Dry Ingredients
Start by whipping the egg whites to medium peaks. This step is crucial for adding lightness and structure to the dough. Use a clean bowl and mixer to avoid any grease that could prevent the whites from whipping properly.
Next, gently fold the dry ingredients into the whipped egg whites. Use a spatula and clean hands to ensure the mixture stays airy. Overmixing can deflate the dough, so take your time and fold carefully.
- Whip egg whites to medium peaks in a clean bowl.
- Sift almond flour and powdered sugar into a separate cup.
- Gently fold the dry ingredients into the egg whites using a spatula.
- Keep the mix light to preserve the almond flavor and texture.
Using a clean sheet of parchment paper for baking ensures even cooking and easy cleanup. For more tips on perfecting your baking techniques, check out these healthy sweet potato brownies.
Remember, the key to success is patience and precision. Take your time, and you’ll be rewarded with a dough that’s perfect for shaping and baking. Happy baking!
Shaping and Pre-Cracking for a Beautiful Texture
The artistry of baking lies in the details, especially when shaping dough into perfection. This step is where the magic happens, transforming simple ingredients into a treat that’s as visually stunning as it is delicious. Let’s dive into the techniques that ensure your cookies have that signature cracked surface and perfect texture.
Rolling Dough into Perfect Balls
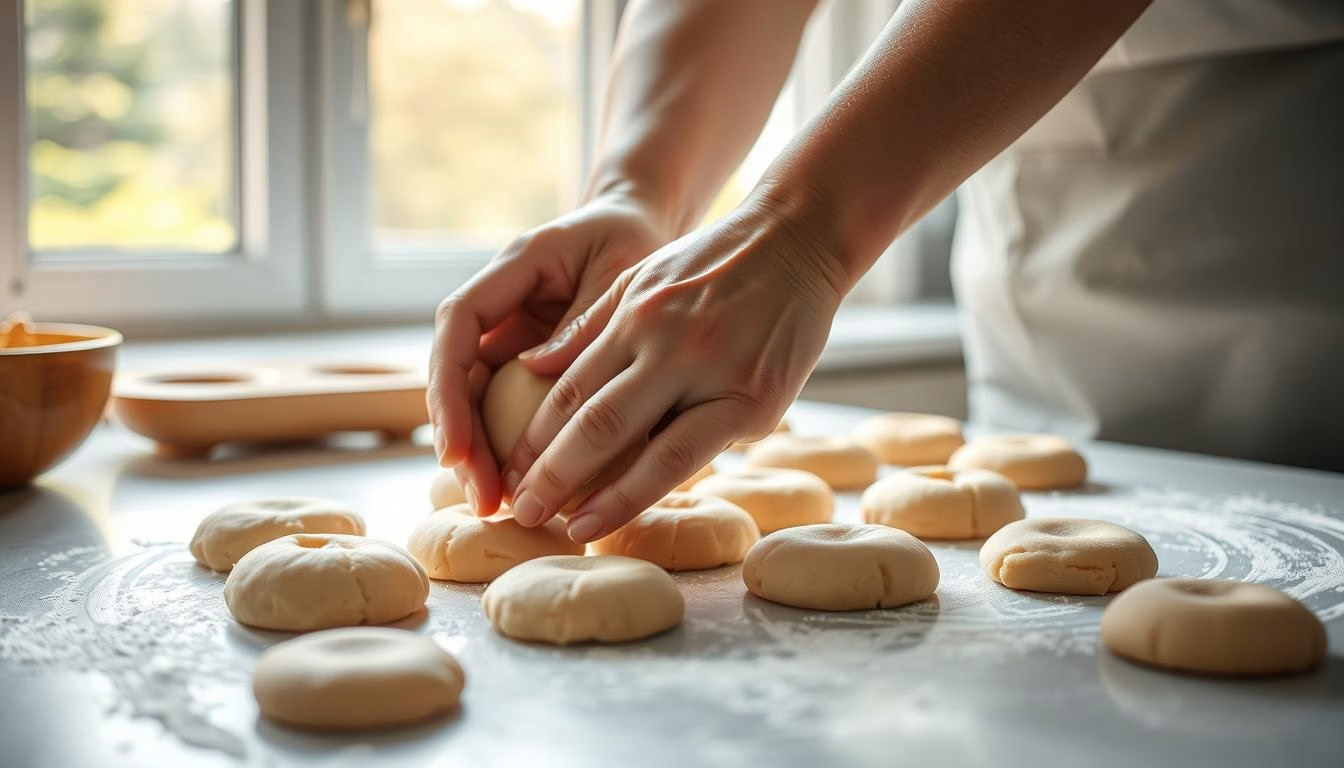
Start by lightly dusting your hands with powdered sugar. This prevents sticking and makes it easier to roll the dough into smooth, 1-inch balls. Gently shape each piece, ensuring they’re uniform in size for even baking. The key here is patience—take your time to create flawless balls that will bake beautifully.
Pre-cracking Methods for that Signature Cracked Surface
Pre-cracking is the secret to achieving that classic, craggy finish. After shaping the balls, gently squeeze each one from opposite corners. This creates small cracks on the surface, which will expand during baking. Place the shaped dough on a baking sheet lined with parchment paper, leaving enough space for expansion.
For an extra touch, let the shaped dough sit uncovered for 10-15 minutes. This pre-drying step enhances the texture, giving the cookies a delicate, cracked top. It’s these small details that elevate the final product, making every bite a delight.
| Step | Purpose |
|---|---|
| Roll into balls | Ensures even baking and uniform size |
| Pre-crack surface | Creates signature cracked texture |
| Pre-dry on parchment | Enhances final texture and appearance |
By mastering these techniques, you’ll create cookies that are not only delicious but also visually stunning. For more inspiration on perfecting your baking skills, check out these irresistible homemade pastries that are sure to impress.
Baking the Perfect italian almond cookies
The secret to a perfect treat lies in mastering the oven’s heat. Baking is all about precision, and understanding how temperature and time work together can make all the difference. Let’s dive into the details to ensure your creation turns out just right.
Optimal Baking Temperatures and Timing
For the best results, preheat your oven to 350°F (180°C). This temperature ensures the edges turn lightly golden while keeping the center soft and chewy. Bake for 10-12 minutes, but keep an eye on them—every oven is different. Overbaking can lead to a dry texture, so timing is crucial.
As the sugar caramelizes, it creates a beautiful, crackled exterior. This process is enhanced by the whites of the eggs, which contribute to the delicate, meringue-like finish. For more insights on how baking temperatures affect desserts, check out this guide on understanding baking temperatures.
How Rest Time Impacts the Crunch and Chew
Resting the dough before baking is a game-changer. Letting it sit uncovered for 10-15 minutes allows the surface to dry slightly, forming a thin, crispy shell. This step ensures the inside stays moist and chewy, creating a delightful contrast in every bite.
Here’s a quick breakdown of how each element contributes to the final texture:
| Element | Role |
|---|---|
| Oven Temperature | Ensures even baking and golden edges |
| Rest Time | Creates a crispy exterior and chewy interior |
| Sugar | Caramelizes for a crackled finish |
| Egg Whites | Adds lightness and structure |
When it’s time to serve, enjoy them fresh out of the oven for the best flavor and texture. These treats are perfect for any occasion, and their delicate balance of crunch and chew will leave everyone wanting more.
Flavor Variations and Creative Customizations
The beauty of this recipe lies in its adaptability to endless flavor possibilities. Whether you’re baking for a special occasion or just experimenting in the kitchen, there are so many ways to make this treat uniquely yours.
Start by adding a handful of chocolate bits for a rich, indulgent twist. The melty pockets of chocolate add a delightful surprise to every bite. For a nutty crunch, try folding in chopped walnuts or pistachios. These small additions can elevate the texture and flavor profile.
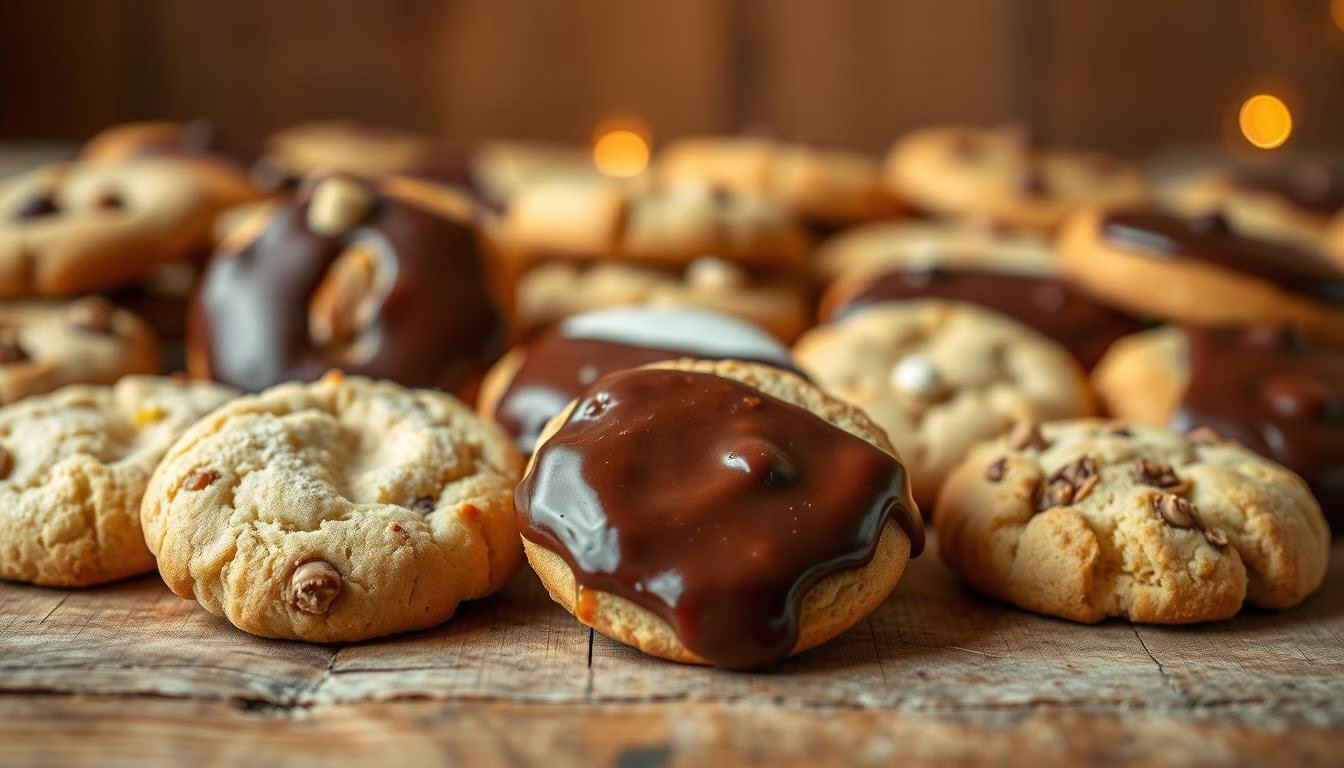
Citrus zests, like lemon or orange, bring a fresh, aromatic note to the dough. For a festive touch, consider candied cherries or dried cranberries. These colorful mix-ins not only add flavor but also make the cookies visually appealing.
If you’re feeling adventurous, incorporate a hint of coffee for an unexpected depth of flavor. A teaspoon of espresso powder can transform the cookies into a sophisticated treat. The base recipe is foolproof, so don’t hesitate to experiment with your favorite ingredients.
For more inspiration, check out these Valentine’s Day cookies that showcase creative flavor combinations. The possibilities are endless, and the best part is making the recipe your own!
Storing Your Masterpiece and Serving Suggestions
The joy of baking doesn’t end when the oven timer goes off. Proper storage and presentation ensure your creations stay fresh and delightful. Whether you’re saving them for later or serving them immediately, these tips will help you make the most of your baked goods.
Proper Storage Techniques for Longevity
To keep your treats fresh, store them in an airtight container. This prevents moisture loss and maintains their texture. Place a sheet of parchment paper between layers to avoid sticking. For longer storage, use a container with a tight seal and keep it in a cool, dry place.
If you’re planning to freeze them, wrap each piece individually in plastic wrap before placing them in a freezer-safe bowl. They can last up to six months without losing quality. When ready to enjoy, let them thaw at room temperature for an hour.
Presentation Ideas: Pairing with Beverages
Presentation is key to making your baked goods stand out. Arrange them on a cookie sheet lined with parchment paper for a rustic look. For a more elegant touch, use a decorative bowl or platter.
Pairing your treats with the right beverage enhances the experience. A robust coffee complements the nutty notes, while a delicate tea brings out the subtle sweetness. For a classic combination, serve them with a glass of milk.
| Storage Tip | Purpose |
|---|---|
| Use an airtight container | Preserves freshness and texture |
| Layer with parchment paper | Prevents sticking |
| Freeze individually wrapped | Extends shelf life up to 6 months |
By following these storage and serving tips, you’ll ensure your baked goods remain as delicious as the day they were made. Enjoy every bite, and don’t forget to share the joy with others!
Please Enjoy My Easy Authentic Italian Almond Cookies Recipe
Baking has always been my way of sharing joy and tradition. This recipe, inspired by my travels, is a testament to the beauty of simple, authentic methods. From whipping egg whites to pre-cracking the dough, every step is designed to create a treat that’s both delightful and memorable.
What makes this recipe special is its balance of texture and flavor. A teaspoon of carefully measured extract or a pinch of citrus zest can elevate the experience. These small details, combined with quality ingredients, ensure a result that’s hard to resist.
I encourage you to try this at home and make it your own. Experiment with flavors, share your creations, and store any leftovers in an airtight container to keep them fresh. Baking is about more than just the final product—it’s about the joy of creating something special.
Thank you for joining me on this journey. I hope this recipe brings a little warmth and inspiration to your kitchen. Happy baking!
FAQ
Can I use regular flour instead of almond flour?
No, almond flour is essential for the authentic texture and flavor. Regular flour will change the recipe entirely.
How do I store these cookies to keep them fresh?
Store them in an airtight container at room temperature. They’ll stay fresh for up to a week!
Can I add chocolate or other flavors to the dough?
Absolutely! Try adding chocolate chips, citrus zest, or even a splash of vanilla extract for a unique twist.
Why do I need to pre-crack the dough before baking?
Pre-cracking creates that signature cracked surface, giving the cookies their classic look and texture.
Can I freeze the dough for later use?
Yes! Roll the dough into balls, freeze them on a baking sheet, then transfer to a freezer bag. Bake straight from the freezer, adding a minute or two to the baking time.
What’s the best way to whip egg whites for this recipe?
Use a clean, dry bowl and whisk until stiff peaks form. This helps create a light and airy texture in the cookies.
Can I use granulated sugar instead of powdered sugar?
Powdered sugar is preferred for its fine texture, but you can blend granulated sugar into a powder if needed.
How do I know when the cookies are done baking?
They should be lightly golden around the edges but still soft in the center. They’ll firm up as they cool.
What’s the best beverage to pair with these cookies?
They’re perfect with coffee, tea, or even a glass of dessert wine for a delightful treat.

Perfetta!