
The first time I made this Key Lime Cream Cheese Pie Recipe, I knew it was going to be a staple in my kitchen. There’s just something about the combination of zesty lemon and smooth, creamy filling that feels like pure comfort in every bite. Whether it’s a hot summer afternoon or a cozy weekend treat, this pie delivers the perfect balance of refreshing citrus and rich indulgence.
What sets this dessert apart is how effortlessly it comes together. With just a handful of ingredients—fresh lemon juice, sweetened condensed milk, and cream cheese—you can create a luscious, no-fuss filling that requires minimal effort but tastes like you spent hours in the kitchen. And let’s not forget about the homemade graham cracker crust. That buttery, slightly sweet crunch provides the ideal contrast to the creamy filling, making every bite absolutely perfect.
Ready to dive in? Follow along as I share the step-by-step process to create this unforgettable dessert. Trust me, once you try it, you’ll understand why it’s become my go-to recipe. For more classic American desserts, check out this list of 7 Classic American Pies You Need to.

Key Lime Cream Cheese Pie
Equipment
- Electric mixer for blending the filling
- Oven for baking the crust
- Spatula for smoothing the filling
- Refrigerator for chilling the pie
Ingredients
- 1.5 cups graham cracker crumbs finely crushed
- 0.25 cup granulated sugar for crust
- 6 tbsp unsalted butter melted
- 8 oz cream cheese softened
- 1 can sweetened condensed milk (14 oz)
- 0.5 cup key lime juice freshly squeezed
- 1 tbsp lime zest finely grated
- 1 tsp vanilla extract
- 1 cup whipped topping for garnish
- 1 slice lime for garnish
Instructions
- Preheat oven to 350°F (175°C).
- In a mixing bowl, combine graham cracker crumbs, granulated sugar, and melted butter. Mix until the texture resembles wet sand.
- Press the mixture firmly into a 9-inch pie pan. Bake for 8-10 minutes, then let cool completely.
- In a mixing bowl, beat the cream cheese with an electric mixer until smooth. Gradually add the sweetened condensed milk, key lime juice, lime zest, and vanilla extract. Beat until fully combined.
- Pour the key lime filling into the cooled crust and smooth the top with a spatula.
- Refrigerate for at least 4 hours or until fully set.
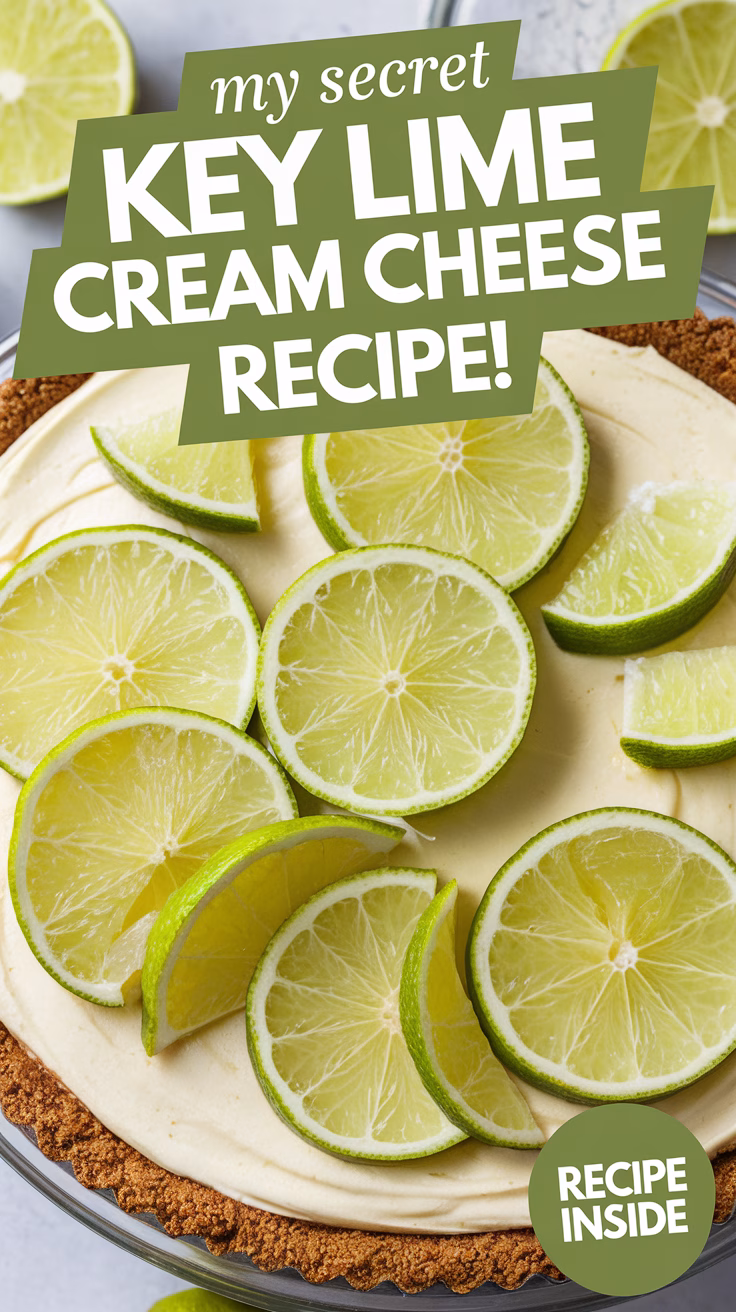
- Top with whipped topping and lime slices before serving.
Notes
- Optional Equipment: A food processor can be used to crush graham crackers for a finer texture.
- Customization: Use a pre-made graham cracker crust for a no-bake version.
- Storage: Store covered in the refrigerator for up to 4 days.
- Serving Tip: Best served chilled for a refreshing citrus flavor.
Nutrition
The Tangy & Creamy Delight of Key Lime Pie
Few desserts capture the essence of summer like a tangy and creamy citrus treat. This classic dessert is a perfect balance of flavors—sharp, refreshing lime paired with a smooth, velvety texture. It’s no wonder it’s a favorite for so many occasions.
Overview of the Recipe’s Unique Charm
What makes this dessert stand out is its simplicity. With just a few quality ingredients, you can create something truly special. Fresh lime juice adds a vibrant tang, while homemade graham cracker crumbs provide a buttery, crunchy base. It’s a combination that’s hard to resist.
I’ve always been drawn to recipes that are both easy to make and deeply satisfying. This one ticks all the boxes. Whether you’re baking for a crowd or just treating yourself, it’s a dessert that never disappoints.
Inspiration Behind the Secret Recipe
My love for this dessert started with a trip to the Florida Keys. There, I discovered the magic of key limes—smaller and more aromatic than regular limes. Their intense flavor inspired me to create my own version of this classic treat.
Over time, I’ve refined the recipe to highlight the best qualities of each ingredient. The result is a dessert that’s both refreshing and indulgent. It’s a testament to how simple ingredients can come together to create something extraordinary.
| Ingredient | Role |
|---|---|
| Fresh Lime Juice | Adds tartness and brightness |
| Graham Cracker Crumbs | Creates a buttery, crunchy crust |
| Whipped Cream | Provides a light, creamy topping |
This dessert is more than just a recipe—it’s a celebration of flavor and simplicity. Whether you’re a seasoned baker or just starting out, it’s a treat that’s sure to impress.
Gathering Essential Ingredients for a Flavorful Pie
The foundation of any great dessert lies in its ingredients. For this tangy and creamy treat, every component plays a crucial role in creating the perfect balance of flavors and textures. Let’s dive into what you’ll need to make this dessert a success.
Graham Cracker Crust Essentials
The crust is the base that holds everything together. For this recipe, you’ll need 1½ cups of graham cracker crumbs. These crumbs create a buttery, crunchy foundation that complements the smooth filling perfectly. Make sure to measure them accurately for the best results.
Adding a touch of melted butter helps bind the crumbs together, giving the crust its signature texture. This simple step ensures your dessert has a sturdy base that’s easy to slice and serve.
Fresh Citrus and Cream Cheese Insights
Fresh citrus juice is the star of the filling. Using high-quality key lime juice adds a bright, tangy flavor that’s hard to resist. If you can’t find key limes, regular lime juice works too, but the unique aroma of key limes truly elevates the dish.
For the creamy layer, opt for 8 ounces of cream cheese. This ingredient brings a rich, velvety texture that pairs beautifully with the tartness of the citrus. Make sure it’s at room temperature for smooth blending.
| Ingredient | Role |
|---|---|
| Graham Cracker Crumbs | Creates a buttery, crunchy crust |
| Key Lime Juice | Adds tangy brightness |
| Cream Cheese | Provides creamy richness |
Each ingredient is carefully chosen to ensure the dessert is both refreshing and indulgent. Whether you’re baking for a crowd or treating yourself, these components guarantee a memorable experience. For more festive dessert ideas, check out these Mardi Gras desserts that are sure to impress.
Creating the Perfect Homemade Graham Cracker Crust
The secret to a great dessert often starts with a solid foundation—like a homemade graham cracker crust. This simple yet essential step ensures your dessert has the perfect balance of flavor and texture. Let’s dive into how to make it right.
Mixing Techniques and Ideal Texture
Start with 1½ cups of graham cracker crumbs. Combine them with 6 tablespoons of melted butter and ¼ cup of sugar. Mix until every crumb is coated. This creates a buttery, slightly sweet base that’s easy to press into your pan.
Use your hands or the back of a spoon to press the mixture firmly into the bottom and sides of the pan. A smooth, even layer ensures your crust holds together when sliced.
Pre-Baking Tips for Optimal Crunch
Pre-baking the crust is crucial for that perfect crunch. Preheat your oven to 350°F and bake the crust for 10 minutes. This step locks in the texture and prevents sogginess when you add the filling.
Let the crust cool completely before adding the next layer. This ensures it stays crisp and provides a sturdy base for your dessert.
| Ingredient | Role |
|---|---|
| Graham Cracker Crumbs | Forms the base of the crust |
| Melted Butter | Binds the crumbs together |
| Sugar | Adds sweetness and prevents crumbling |
With these tips, you’ll create a crust that’s both flavorful and functional. It’s the perfect foundation for any dessert, ensuring every slice is a delight.
Step-by-Step Guide to the Key Lime Cream Cheese Pie recipe
Crafting the perfect filling is where the magic truly happens. This step-by-step guide will walk you through creating a smooth, velvety filling that’s the heart of this dessert. Let’s dive in!
Combining the Filling Ingredients Smoothly
Start by placing 8 ounces of cream cheese in a large bowl. Make sure it’s at room temperature for easy blending. Use a hand mixer to beat it until it’s completely smooth—this usually takes about 1 minute. A lump-free base is essential for the perfect texture.
Next, gradually add 14 ounces of sweetened condensed milk. Pour it in slowly while mixing to ensure everything combines evenly. Once incorporated, add ½ cup of fresh lime juice. For the best flavor, use key lime juice if available. Its bright, tangy taste elevates the dessert.
Mix everything well for another minute until the filling is uniform and silky. If you spot any lumps, keep mixing until they’re gone. This step ensures every bite is smooth and satisfying.
Pour the filling into your prepared graham cracker crust. Spread it evenly with a spatula. Bake the dessert at 350°F for just 10 minutes. This short bake time helps set the filling without overcooking it.
Once baked, let the dessert cool slightly before transferring it to the fridge. Chill it for at least 4 hours to allow the flavors to meld and the texture to firm up. The result? A tangy, creamy treat that’s impossible to resist.
For more dessert inspiration, check out these 10 Irresistible Blueberry Dessert Recipes. They’re perfect for adding variety to your baking repertoire!

Mastering the Creamy Filling
The creamy filling is the heart of this dessert, and getting it right makes all the difference. It’s where the tangy citrus meets smooth richness, creating a texture that’s both velvety and refreshing. Let’s break down the steps to achieve perfection.
Room Temperature Cream Cheese for Smooth Consistency
Starting with cream cheese at room temperature is crucial. Cold cream cheese can lead to lumps, which disrupt the smooth texture we’re aiming for. Let it sit out for about 30 minutes before mixing. This ensures it blends seamlessly with other ingredients.
When you beat the cream cheese, aim for a completely smooth base. This usually takes about a minute with a hand mixer. A lump-free mixture is the foundation of a professional-quality filling.
Enhancing Flavor with Lime Juice and Zest
Adding fresh lime juice brings a bright, tangy flavor that’s essential to this dessert. For an extra burst of citrus, incorporate a dash of lime zest. It’s a simple step that elevates the overall taste.
Mix the juice and zest into the cream cheese slowly. This ensures even distribution and prevents overmixing, which can affect the texture. The result is a filling that’s both creamy and vibrant.
Pay attention to sensory cues as you work. The filling should have a smooth, silky texture and a bright, citrusy aroma. These are signs you’re on the right track. Mastering this step ensures every bite is a delight.
Baking vs. No-Bake Methods: Customizing Your Approach
Choosing the right method to set your dessert can make all the difference in texture and flavor. Whether you prefer a lightly baked finish or a no-bake option, both techniques have their unique benefits. Let’s explore how each method works and how to decide which one suits your needs.
Baked Version: Quick 10-Minute Technique
For those who enjoy a slightly firmer texture, the baked method is a great choice. After preparing the filling, simply pop it into a preheated oven at 350°F for just 10 minutes. This short bake time helps set the filling without overcooking it, ensuring a smooth and creamy result.
Once baked, let the dessert cool slightly before transferring it to the fridge. Chilling for at least 4 hours allows the flavors to meld and the texture to firm up. This method is perfect if you’re serving it the same day.
No-Bake Option: Maximum Creaminess without the Oven
If you’re short on time or prefer a no-fuss approach, the no-bake method is ideal. Simply pour the filling into the prepared crust and refrigerate it for a minimum of 2 hours. This method retains maximum creaminess and is incredibly convenient.
The no-bake version is also great for making ahead. You can prepare it the night before and let it chill overnight. This makes it a stress-free option for busy days or last-minute gatherings.
| Method | Texture | Preparation Time |
|---|---|---|
| Baked | Slightly firmer | 10 minutes baking + 4 hours chilling |
| No-Bake | Ultra-creamy | 2 hours chilling |
Both methods are reliable and deliver delicious results. Whether you choose to bake or skip the oven, this dessert is sure to impress. The choice ultimately depends on your schedule and the texture you prefer. Happy baking—or not baking!
Helpful Tips and Variations for Perfecting Your Pie
Perfecting this dessert is all about flexibility and creativity. Whether you’re preparing it ahead of time or experimenting with new flavors, these tips will help you make it your own. Let’s dive into some practical advice to elevate your baking game.
Make Ahead and Freezing Instructions
Planning ahead? This dessert is perfect for prepping in advance. You can make the crust and filling a day before assembling. Simply store the crust in an airtight container and keep the filling refrigerated. When ready, just combine and chill.
Freezing is also a great option. After baking, let the dessert cool completely. Wrap it securely with plastic wrap and foil to prevent freezer burn. Thaw it overnight in the refrigerator before serving. This ensures it retains its creamy texture and fresh flavor.
Substitutions and Personal Twists
Don’t have all the ingredients? No problem! You can use store-bought graham cracker crumbs for the crust. If you’re out of fresh citrus, bottled juice works in a pinch. For a richer filling, try swapping sour cream for an extra dollop of butter.
Want to get creative? Add a splash of vanilla extract or a sprinkle of lime zest for extra flavor. You can even top it with a cardamom whipped cream for a unique twist. The possibilities are endless!
Remember, these variations maintain the integrity of the dessert while allowing you to personalize it. Whether you’re baking for a crowd or just treating yourself, these tips ensure every slice is a delight. Happy baking!
Enjoy Every Refreshing Bite of This Creamy Lemon Icebox Pie
This dessert is a testament to how simple ingredients can create something extraordinary. The balance of tangy citrus and creamy richness makes every bite unforgettable. Whether you choose the baked or no-bake method, the result is a treat that’s both refreshing and indulgent.
Remember, great desserts start with quality ingredients and thoughtful technique. From the homemade crust to the smooth filling, every step matters. I encourage you to try this pie recipe and make it your own. Share your creations and experiences—I’d love to see them!
Thank you for joining me on this culinary journey. If you enjoyed this recipe, explore more like these calamansi pie variations. Happy baking—your next masterpiece is just a recipe away!
FAQ
Can I use regular lime juice instead of key lime juice?
Absolutely! While key lime juice offers a unique tang, regular lime juice works just fine. The flavor will still be bright and delicious.
How do I prevent the graham cracker crust from getting soggy?
Pre-baking the crust for about 10 minutes helps create a sturdy base. Also, let the filling cool slightly before pouring it in.
Can I make this dessert ahead of time?
Yes! This pie is perfect for making ahead. Store it in the fridge for up to 2 days, or freeze it for longer storage.
What’s the best way to zest a lime for the filling?
Use a fine grater or microplane to gently remove the outer green layer. Avoid the white pith, as it can be bitter.
Can I use a store-bought crust to save time?
Definitely! A pre-made graham cracker crust is a great shortcut and still delivers a tasty result.
How do I know when the pie is set?
For the baked version, the edges should be slightly firm, and the center will jiggle just a bit. For no-bake, let it chill for at least 4 hours.
Can I add whipped cream on top?
Yes! Fresh whipped cream adds a lovely finish. Just add it right before serving for the best texture.
What’s the difference between baked and no-bake methods?
The baked version has a firmer texture, while the no-bake option is creamier and requires no oven time. Both are delicious!