
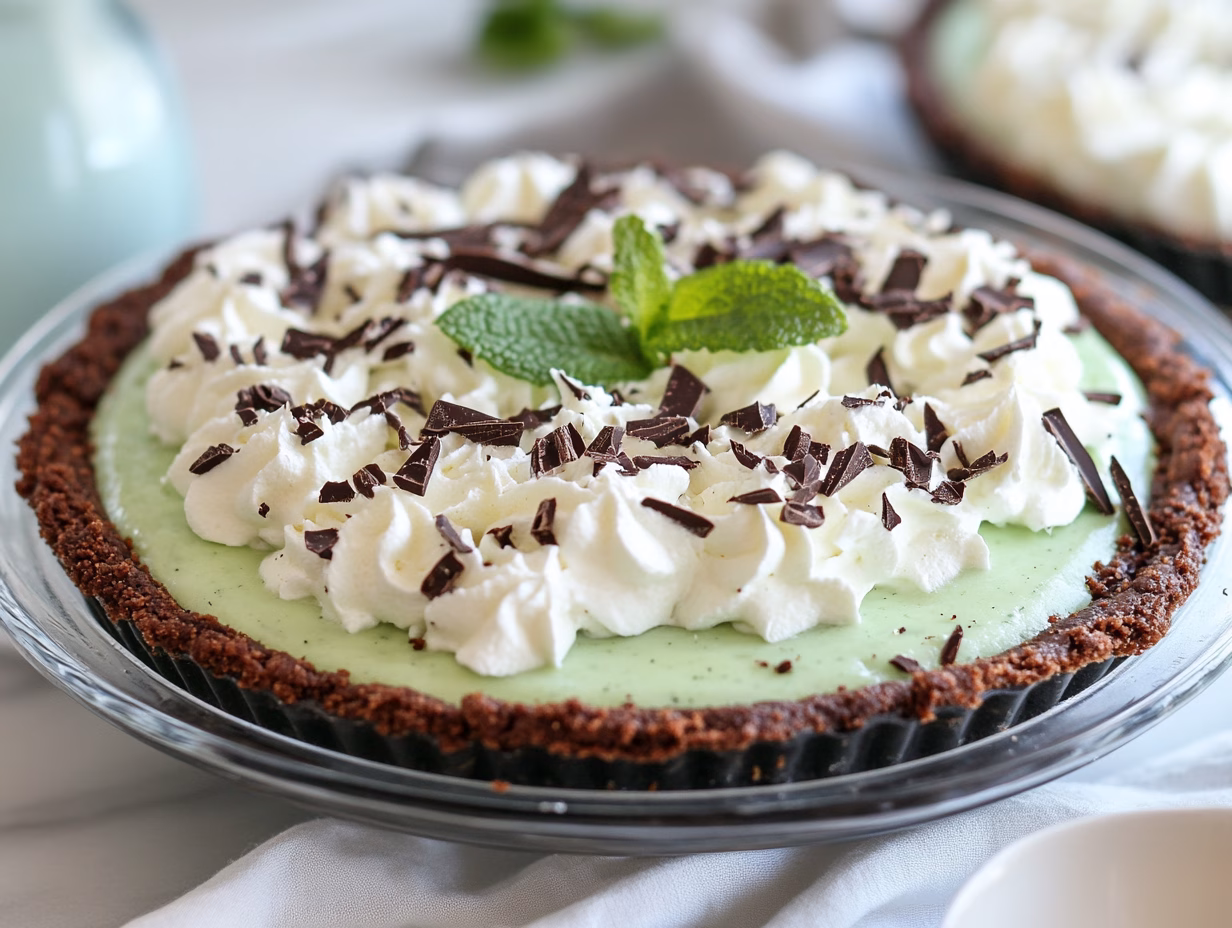
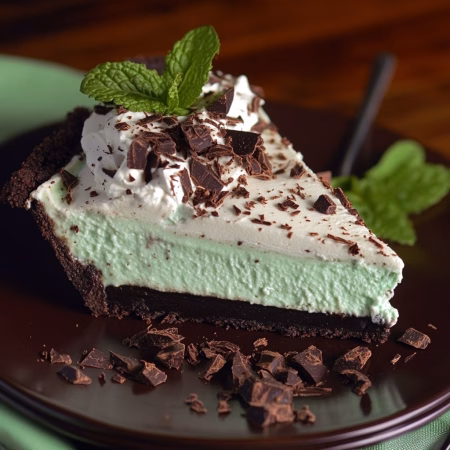
Few desserts whisper “comfort” and shout “indulgence” quite like a slice of Mint Chocolate Grasshopper Pie. Imagine this: a dreamy, velvety smooth mint filling, bursting with refreshing mint flavor, nestled in a deep, rich chocolate cookie crust. This isn’t just a pie; it’s a nostalgic journey back to simpler times, reimagined for today’s dessert lover.
Popularized for its effortless elegance and irresistible taste since the 1970s, the Grasshopper Pie has earned its place as a timeless classic. And the secret to its enduring appeal? It’s unbelievably easy to make! Picture a buttery, crumbly chocolate cookie crust – the perfect textural contrast to the lusciously creamy mint filling that truly does melt in your mouth with every bite. Whether you’re looking for a show-stopping dessert for your next party, a delightful treat to celebrate a special occasion, or simply a satisfyingly sweet end to your day, this no-bake, crowd-pleasing Mint Chocolate Grasshopper Pie recipe is guaranteed to impress and become a new family favorite. Prepare for a flavor explosion that perfectly marries cool mint and decadent chocolate – you’re about to discover your new go-to dessert obsession!
Ready to dive in? Let’s explore how to create this delightful dessert step by step. And if you’re looking for more festive treats, check out these simple Mardi Gras desserts for more inspiration!
Mint Chocolate Grasshopper Pie
Equipment
- 9-inch pie dish for assembling the pie
- Spatula for spreading the filling
- Food processor for crushing chocolate cookies
- Refrigerator for setting the pie
Ingredients
- 24 pieces chocolate sandwich cookies crushed (such as Oreos)
- 1/4 cup unsalted butter melted, for crust
- 1 cup heavy whipping cream cold
- 8 oz cream cheese softened
- 1 cup powdered sugar
- 1/4 cup crème de menthe or 1 tsp mint extract + 1 tbsp milk
- 1 drop green food coloring optional, for minty color
- 1 cup whipped topping for garnish
- 1/4 cup chocolate shavings for garnish
Instructions
- In a food processor, crush chocolate sandwich cookies into fine crumbs. Mix with melted butter until combined. Press the mixture firmly into a 9-inch pie dish to form an even crust. Refrigerate while preparing the filling.
- In a mixing bowl, beat softened cream cheese and powdered sugar until smooth. Add crème de menthe (or mint extract and milk) and green food coloring if using. Fold in the whipped cream until the filling is light and fluffy.
- Spread the mint filling evenly over the chilled cookie crust. Smooth the top with a spatula.
- Refrigerate the pie for at least 3-4 hours, or until set.
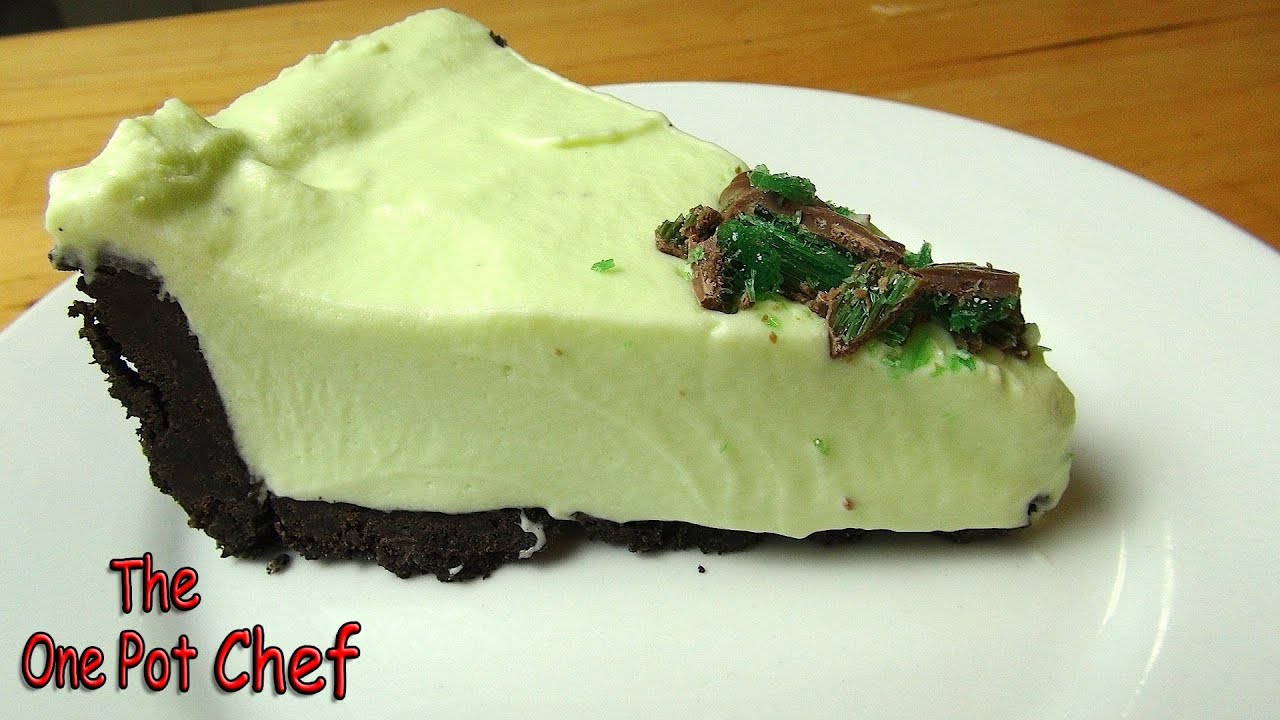
- Before serving, top with whipped topping and chocolate shavings. Slice and enjoy this refreshing dessert!
Notes
- Optional Equipment: An offset spatula can help spread the filling smoothly.
- Customization: Add a layer of chocolate ganache for extra richness.
- Storage: Store in the refrigerator for up to 3 days. Keep covered to maintain freshness.
- Serving Tip: For a firmer pie, freeze for 30 minutes before slicing.
Nutrition
Introduction to the Mint Chocolate Grasshopper Pie Recipe
Every bite of this treat feels like a journey through time and flavor. It’s a dessert that bridges the gap between the past and the present, offering a taste of nostalgia with a modern twist. Let’s dive into its fascinating background and what makes it so special.
Background and Inspiration
This dessert has its roots in the 1970s, a time when no-bake treats were all the rage. Inspired by Betty Daley’s classic recipe box, this version brings a personal touch to a beloved favorite. Her family’s love for this dessert sparked my passion to recreate it with a unique spin.
What sets this apart is its unexpected twist. While traditional versions relied on boxed mixes, this one celebrates homemade creativity. The inspiration from cocktail culture—think crème de menthe and crème de cacao—adds a layer of sophistication to the flavor profile.
Why This Recipe Stands Out
This version combines a cookie-based crust with a creamy, minty filling that’s both refreshing and indulgent. It’s a dessert that’s as fun to make as it is to eat. Whether you’re a beginner or an experienced baker, this recipe is designed to impress.
For those who love exploring unique desserts, this decadent chocolate pie collection offers even more inspiration. Each recipe is a celebration of flavor and creativity.
| Nutritional Info (Per Serving) | Amount |
|---|---|
| Calories | 566 |
| Carbohydrates | 59.3g |
| Protein | 7.1g |
| Fat | 33.5g |
| Cholesterol | 138.1mg |
This background not only makes the recipe more endearing but also sets the stage for the technical steps you’ll learn in the next sections. Get ready to create a dessert that’s as rich in history as it is in flavor!
Essential Ingredients and Equipment for a Perfect Pie
Creating the perfect dessert starts with the right ingredients and tools. Whether you’re a seasoned baker or just starting, having everything prepared ensures a smooth process and delicious results. Let’s break down what you’ll need to make this treat unforgettable.
Key Ingredients and Their Roles
Every ingredient plays a crucial part in bringing this dessert to life. Here’s what you’ll need:
- Oreo Cookies: These form the base of the crust, adding a rich, chocolatey flavor and a satisfying crunch.
- Melted Butter: Binds the cookie crumbs together, creating a firm and even crust.
- Marshmallow Creme: Provides a smooth, fluffy texture to the filling. It’s easier to work with than regular marshmallows.
- Heavy Cream: Whipped to perfection, it adds lightness and creaminess to the mixture.
- Creme de Menthe: Infuses the filling with a refreshing mint flavor. Adjust the amount to suit your taste.
- Green Food Coloring: Gives the filling its signature vibrant hue, making it visually appealing.
“The right ingredients are the foundation of any great dessert. Quality matters!”
Kitchen Tools and Preparation Tips
Having the right tools on hand makes the process easier and more enjoyable. Here’s what you’ll need:
- Food Processor: Perfect for turning Oreos into fine crumbs for the crust.
- Mixing Bowls: Use separate bowls for the crust, filling, and whipped cream to keep things organized.
- Hand Mixer or Stand Mixer: Essential for whipping the cream to stiff peaks.
- Pie Pan: A standard 9-inch pan works best for this recipe.
Here are some tips to ensure success:
- Press the crust firmly into the pan to create an even layer.
- Chill the crust before adding the filling to prevent it from becoming soggy.
- Freeze the pie for at least 2 hours to allow it to set properly.
| Ingredient | Role |
|---|---|
| Oreo Cookies | Forms the crust |
| Melted Butter | Binds the crust |
| Marshmallow Creme | Adds fluffiness |
| Heavy Cream | Creates creaminess |
| Creme de Menthe | Infuses mint flavor |
| Green Food Coloring | Adds vibrant color |
With these ingredients and tools, you’re well on your way to creating a dessert that’s as beautiful as it is delicious. Happy baking!
Mastering the Mint Chocolate Grasshopper Pie Recipe
Mastering this dessert is easier than you think with these detailed instructions. Whether you’re a beginner or a seasoned baker, I’ll walk you through every step to ensure success. Let’s get started!
Step-by-Step Preparation of the Crust and Filling
First, let’s tackle the crust. Start by crushing 24 Oreo cookies in a food processor until you have fine crumbs. Mix these with 1/4 cup of melted butter until the mixture holds together. Press it firmly into a 9-inch pie pan, making sure it’s even. Chill this in the fridge while you prepare the filling.
For the filling, gently warm 24 large marshmallows with 1/4 cup of half-and-half in a saucepan over low heat. Stir until smooth. Remove from heat and add 1/4 cup of crème de menthe and 3 drops of green food coloring. Let this cool slightly.
In a separate bowl, whip 1/2 cup of heavy cream until stiff peaks form. Fold the cooled marshmallow mixture into the whipped cream for a light, airy texture. Pour this into the chilled crust, smoothing the top with a spatula.

Cooling, Freezing, and Finishing Touches
Once the filling is in the crust, it’s time to let it set. Place the pie in the freezer, uncovered, for at least 2 hours. This ensures it firms up perfectly. After it’s set, cover it with plastic wrap to prevent freezer burn.
For the finishing touches, sprinkle crushed Oreo crumbs on top or add chocolate curls for a decorative touch. If you’re feeling extra creative, drizzle melted chocolate over the pie for a gourmet look.
When serving, let the pie sit at room temperature for 10 minutes to soften slightly. This makes it easier to slice and enhances the flavors. Pair it with a dollop of whipped cream for an extra indulgent treat!
| Freezing and Serving Tips | Details |
|---|---|
| Freezing Time | 2 hours minimum |
| Serving Temperature | Room temperature for 10 minutes |
| Storage | Up to 5 days in the fridge |
| Optional Toppings | Chocolate curls, crushed Oreos |
Looking for more dessert inspiration? Check out this white chocolate cream-filled churro recipe for another crowd-pleasing treat!
Creative Tips, Variations, and Serving Suggestions
Experimenting with flavors and presentation can turn a classic dessert into something uniquely yours. Whether you’re looking to tweak the ingredients or elevate the serving style, these tips will inspire you to make this treat your own.
Recipe Variations and Ingredient Substitutions
One of the best parts of baking is the freedom to customize. For the crust, try swapping Oreos for Hydrox cookies or even graham crackers for a different texture. If you’re feeling adventurous, use mint-flavored cookies to amplify the refreshing taste.
For the filling, you can adjust the amount of mint extract to suit your preference. If you’re out of crème de menthe, a drop of peppermint oil works just as well. And if you’re aiming for a lighter version, substitute heavy cream with coconut cream or a dairy-free alternative.

- Use a food processor to blend the crust ingredients for a smoother texture.
- Add a drop of green food coloring for a vibrant holiday look, perfect for St. Patrick’s Day.
- Layer whipped cream through the filling for an extra creamy finish.
Presentation and Serving Ideas
Presentation can take your dessert from ordinary to extraordinary. Pipe buttercream around the edges of the crust for a polished look. Sprinkle extra cookie crumbs on top or drizzle with chocolate ganache for a decadent touch.
For individual servings, try making mini versions in muffin tins. These are perfect for parties or gatherings. Serve each slice with a dollop of whipped cream and a sprig of fresh mint for a refreshing finish.
If you’re serving this for a special occasion, consider adding themed decorations. For example, use green food coloring and shamrock-shaped sprinkles for St. Patrick’s Day. Or, for a winter holiday, top it with crushed candy canes.
“The key to a stunning dessert is in the details. A little creativity goes a long way!”
For more inspiration, check out these calamansi pie variations. They’re a great way to explore new flavors and techniques.
Conclusion
Creating this delightful treat is simpler than you might think! With a cookie crust and a creamy filling, it’s a dessert that combines nostalgia with modern flair. The step-by-step process ensures success, even for beginners.
What makes this recipe special is its versatility. You can tweak the flavors or presentation to suit any holiday or occasion. Whether you’re serving a slice at a party or enjoying it as a personal treat, it’s sure to impress.
I encourage you to try it yourself and make it your own. Share your results and experiment with the creative variations mentioned earlier. For another crowd-pleasing dessert, check out this Pistachio Raspberry Cake recipe.
Embrace the tradition and innovation behind this dessert. With these tips, you’ll create a treat that’s as fun to make as it is to eat. Happy baking!
FAQ
Can I use a different type of cookie for the crust?
Absolutely! While Oreo cookies are classic, you can swap them for graham crackers or chocolate wafers. Just make sure to adjust the melted butter ratio for the perfect crumb texture.
How long does it take to freeze the dessert properly?
I recommend letting it set in the freezer for at least 4 hours. For the best results, leave it overnight to ensure the filling firms up completely.
Can I skip the green food coloring?
Of course! The coloring is purely for visual appeal. The flavor will still be fantastic without it, making it a great option for those avoiding artificial dyes.
Is there a way to make this dessert ahead of time?
Yes! This treat is perfect for prepping in advance. Assemble it a day before your event, and keep it frozen until you’re ready to serve. It’s a lifesaver for busy holidays like St. Patrick’s Day.
Can I use store-bought whipped cream instead of making my own?
Definitely! While homemade whipped cream adds a special touch, a high-quality store-bought version works just as well for a quicker option.
What’s the best way to slice and serve this dessert?
Use a sharp knife dipped in warm water for clean slices. Let it sit at room temperature for 5-10 minutes before serving to make cutting easier.
Can I add other flavors to the filling?
Absolutely! Experiment with a hint of vanilla or a splash of liqueur for a unique twist. Just keep the balance so the mint and chocolate flavors remain the stars.
Any mint and chocolate lover will lvoe this recipe