
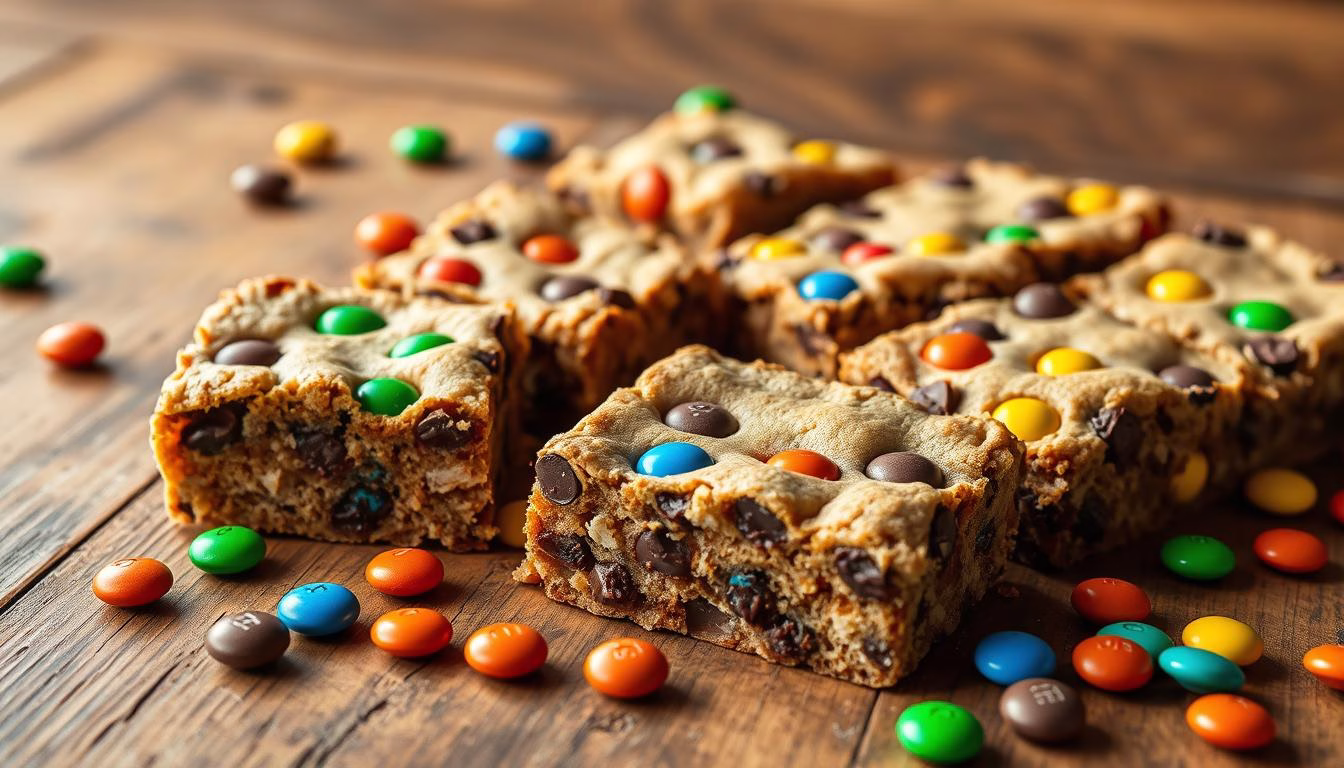
Okay, seriously, if you need a dessert win – like, right now – you HAVE to make these M&M Cookie Bars. Forget fussy, complicated baking. We’re talking about cookie bar perfection in, like, no time flat. Imagine sinking your teeth into a square of pure chewy goodness. These aren’t just any cookie bars; they’re unbelievably soft, seriously chewy, and absolutely loaded with melty chocolate chips and those colorful, crunchy M&Ms. Basically, they’re the ultimate easy dessert when you need something guaranteed to disappear in minutes. And honestly? They are ridiculously simple to make, even if your baking experience is… well, let’s just say “limited.”
What makes these M&M Cookie Bars: Easy, Soft, and Perfectly Chewy! so genuinely amazing is how incredibly FAST they come together. Seriously, you can ditch the stand mixer, forget about chilling the dough for hours – none of that nonsense here. This is a one-bowl wonder: melt some butter (yes, melt it – even easier!), dump in the rest of the ingredients, stir it all up, and press it into a pan. That’s it. Pop it in the oven, and in under an hour, you’ll be pulling out a pan of golden, gooey, ridiculously tempting chewy cookie bars. They are absolutely perfect for everything: last-minute holiday parties, casual weekend baking sessions with zero stress, potlucks where you need to bring something crowd-pleasing, or even just those days when you desperately need a serious chocolate chip cookie bar fix. Trust me (and everyone who tries them!), these easy M&M cookie bars don’t just disappear fast… they vanish. Get ready to become a cookie bar hero.
Ready to bake? Let’s dive into the details and create something truly special. For more baking inspiration, check out this delicious recipe that’s sure to impress.
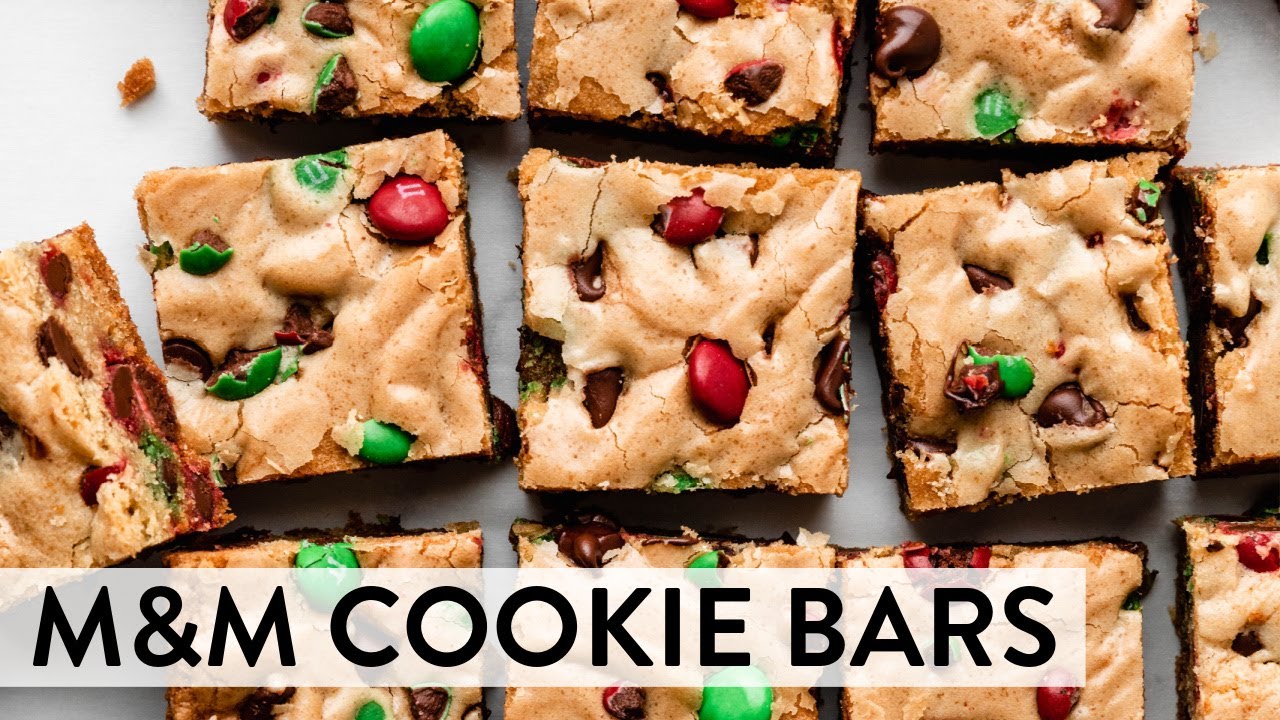
M&M Cookie Bars
Equipment
- 8×8-inch baking dish greased or lined with parchment paper
- Oven preheated to 350°F
- Spatula for mixing and spreading dough
- Cooling rack for cooling the cookie bars
Ingredients
- 1/2 cup unsalted butter melted
- 1 cup brown sugar packed
- 1 large egg room temperature
- 1 tsp vanilla extract
- 1 cup all-purpose flour sifted
- 1/2 tsp baking powder
- 1/4 tsp salt
- 1 cup M&M candies divided, reserve some for topping
Instructions
- In a mixing bowl, whisk together melted butter and brown sugar until smooth. Add the egg and vanilla extract, mixing until well combined.
- Stir in flour, baking powder, and salt until just combined. Fold in most of the M&M candies, reserving a handful for topping.
- Spread the dough evenly into the prepared 8×8 inch baking dish using a spatula. Sprinkle the reserved M&M candies on top and gently press them into the dough.
- Bake in the preheated oven at 350°F (175°C) for 20-25 minutes or until the edges are golden and a toothpick inserted into the center comes out with a few moist crumbs.
- Allow the cookie bars to cool in the baking dish for 10 minutes. Transfer to a cooling rack to cool completely before slicing into bars. Enjoy!
Notes
- Optional Equipment: A stand mixer can be used to mix the dough more quickly.
- Customization: Add chocolate chips or chopped nuts for extra texture and flavor.
- Storage: Store in an airtight container at room temperature for up to 5 days.
- Serving Tip: Warm in the microwave for a few seconds and serve with a scoop of vanilla ice cream for an indulgent dessert.
Nutrition
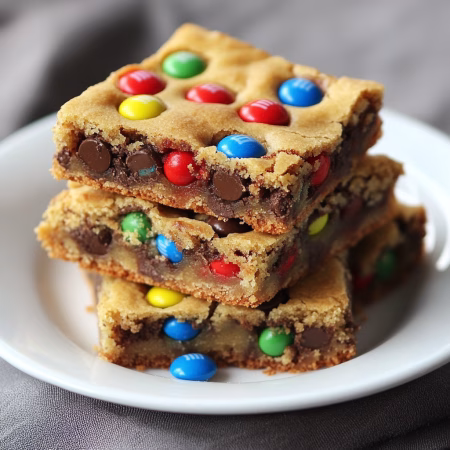
Introduction to M&M Cookie Bars
Ever wondered what makes a dessert both simple and unforgettable? These cookie bars are the answer! They’re soft, chewy, and packed with chocolate chip goodness, making them a hit with both kids and adults.
What Makes This Recipe Unique?
What sets this recipe apart is its simplicity. Unlike traditional methods, there’s no need to cream butter or chill the dough. Instead, melted butter creates a rich, gooey texture that’s hard to resist.
Another standout feature? No mixer or rolling pin is required. Just mix the ingredients in a bowl, spread the dough in a pan, and bake. In under an hour, you’ll have golden bars ready to enjoy.
User Testimonials and Success Stories
Donna, a fellow baker, shared her experience:
“These bars are a game-changer! They’re so easy to make, and the texture is perfect—soft and chewy every time.”
Many readers love how versatile this recipe is. You can use a mix of regular and mini candies for added color and crunch. Plus, it’s a great way to involve kids in the kitchen.
Ready to try it yourself? Stay tuned for the detailed ingredients and steps in the next section. Trust me, this is one recipe you’ll want to keep on hand!
Ingredients and Essential Kitchen Tools
Ready to gather everything you need for a batch of soft, chewy treats? Let’s dive into the ingredients and tools that make this recipe a breeze. With the right pantry staples and a few essential tools, you’ll be set to create something truly special.
Key Pantry Ingredients Overview
Here’s what you’ll need to whip up these irresistible desserts:
- Butter: Melted butter gives the bars a rich, gooey texture. Use 1 cup (227 grams) for the perfect consistency.
- Sugar: A mix of brown and granulated sugar ensures a soft, chewy result. Use 1 cup of each for balanced sweetness.
- Flour: All-purpose flour (2 cups or 240 grams) provides structure. Sift it for a lighter texture.
- Eggs: Two large eggs bind the ingredients together and add moisture.
- Baking Soda: Just 1 teaspoon helps the bars rise slightly for that perfect chew.
- Vanilla Extract: A teaspoon enhances the flavor profile.
- Candies: Add 2 cups of colorful candies for a fun, festive touch.

Must-Have Baking Equipment and Parchment Paper Tips
Having the right tools makes all the difference. Here’s what you’ll need:
- 9×13-Inch Pan: This size ensures even baking and the perfect thickness.
- Parchment Paper: Line the pan with an overhang for easy removal. It also prevents sticking.
- Mixing Bowls: Use large bowls to combine wet and dry ingredients effortlessly.
- Silicone Spatula: Perfect for scraping every bit of dough into the pan.
- Whisk: Ensures even mixing of dry ingredients like flour and baking soda.
For more tips on essential baking tools, check out this helpful guide. Now that you’re all set, let’s move on to the hands-on process!
Step-by-Step Preparation and Baking Process
Let’s walk through the simple steps to create these gooey treats. Whether you’re a beginner or a seasoned baker, this recipe is designed for success. Follow along, and you’ll have a pan of golden, chewy bars in no time!
Mixing the Wet and Dry Ingredients
Start by combining the wet ingredients. In a large bowl, whisk together melted butter, brown sugar, and granulated sugar. The mixture should be smooth and glossy. Add two large eggs and a teaspoon of vanilla, mixing until fully incorporated.
Next, add the dry ingredients. In a separate bowl, sift together flour, baking soda, and a pinch of salt. Gradually fold this into the wet mixture. The dough will be thick and slightly sticky, which is perfect for creating that soft texture.

Pressing Dough and Achieving an Even Bake
Line a 9×13-inch baking pan with parchment paper, leaving an overhang for easy removal. Transfer the dough into the pan and press it evenly with a spatula. This ensures the bars bake uniformly and have consistent thickness.
Preheat your oven to 350°F and bake for 20-25 minutes. Check halfway through to avoid over-browning. The edges should be lightly golden, and the center will look slightly underbaked—this is key for that soft, chewy texture.
| Step | Time | Outcome |
|---|---|---|
| Mixing Ingredients | 10 minutes | Smooth, glossy dough |
| Pressing Dough | 5 minutes | Even layer in pan |
| Baking | 20-25 minutes | Golden edges, soft center |
For more detailed guidance, check out this step-by-step guide. It’s packed with tips to help you master this recipe. Happy baking!
Expert Tips for Perfect Texture and Flavor
Discover the secrets to achieving the perfect texture every time. Whether you’re a beginner or a seasoned baker, these tips will help you create soft, chewy treats that everyone will love.
Melted Butter vs. Creamed Butter
One of the biggest game-changers in baking is the type of butter you use. Melted butter creates a rich, gooey texture that’s perfect for cookie bars. Unlike creamed butter, which can make the dough cakey, melted butter gives that signature crackled top and chewy center.
Here’s why melted butter works so well:
- It blends seamlessly with sugars, creating a shiny, brownie-like finish.
- It prevents the dough from rising too much, keeping it dense and chewy.
- It’s easier to mix by hand, so you don’t need a mixer.
For the best results, let the melted butter cool slightly before adding it to your ingredients. This prevents it from cooking the eggs prematurely. Aim for a temperature below 144°F (62°C) for perfect consistency.
Another pro tip? Adjust the ratio of brown sugar to granulated sugar. More brown sugar adds moisture, making the bars even softer. A mix of ¾ cup brown sugar and ½ cup granulated sugar works wonders.
“Using melted butter transformed my baking. The texture is always soft and chewy—just like my favorite bakery treats!”
Finally, don’t overwork the dough. Mix just until the ingredients are combined. Overmixing can lead to tough bars. For more baking tips, check out this helpful guide.
Experiment with small tweaks, but stick to the core techniques for consistent results. Happy baking!
Variations and Creative Add-ins for Cookie Bars
Want to take your dessert game to the next level? This recipe is incredibly versatile, allowing you to customize it to suit your taste or the occasion. Whether you’re baking for a holiday, a party, or just because, there are endless ways to make these treats uniquely yours.
Customizing with Different M&M Sizes and Colors
One of the easiest ways to personalize your cookie bars is by playing with the size and color of the candies. For holidays like Christmas or Easter, use themed colors to match the season. Mini candies add a fun, bite-sized twist, while larger ones create a bold, colorful look.
Swap Chocolate Chips or Add Nuts for Extra Crunch
If you’re feeling adventurous, swap out traditional chocolate chips for alternatives like white chocolate, peanut butter, or butterscotch chips. Each option brings a new flavor profile to the table. For a nutty twist, add finely chopped walnuts or pecans. They add a satisfying crunch without compromising the soft, chewy texture.
Here’s a quick guide to balancing add-ins:
| Add-In | Quantity | Effect |
|---|---|---|
| White Chocolate Chips | 1 cup | Creamy, sweet flavor |
| Peanut Butter Chips | 1 cup | Rich, nutty taste |
| Chopped Nuts | ½ cup | Extra crunch |
Another fun technique? Crush a handful of candies and sprinkle them on top before baking. This adds a delightful texture variety and makes every bite a surprise. The key is to balance the add-ins so the dough stays soft and chewy.
“I love how flexible this recipe is. Every time I make it, I try something new, and it always turns out amazing!”
For more creative baking ideas, check out this inspirational guide. It’s packed with tips to help you experiment and create something truly special. Remember, baking is all about having fun and making it your own!
M&M Cookie Bars: Serving, Storage, and Make Ahead Tips
Craving a dessert that’s both easy to make and stays fresh for days? These cookie bars are perfect for any occasion, and with the right techniques, you can enjoy them for up to a week—or even longer! Here’s how to serve, store, and make them ahead of time for maximum convenience.
Proper Cooling and Cutting Techniques
After baking, let the bars cool completely in the pan. This allows them to set their structure and makes cutting easier. Use the parchment paper overhang to lift them out of the pan for clean, even slices.
For perfect squares, use a sharp knife and wipe it clean between cuts. This ensures neat edges and a professional look. Pro tip: Let the bars cool for at least an hour before slicing to avoid crumbling.
Freezing, Storage, and Reheating Tips
To keep your cookie bars fresh, store them in an airtight container at room temperature for up to a week. For longer storage, freeze them for up to 3 months. Wrap individual slices in plastic wrap and place them in a freezer-safe bag.
When ready to enjoy, thaw them at room temperature for about an hour. If you prefer them warm, microwave a slice for 10-15 seconds. This brings back that soft, chewy texture you love!
Want to save time? Make the dough ahead and refrigerate it for 2-3 days or freeze it for up to 3 months. This way, you can bake fresh bars whenever the craving strikes.
“These storage tips are a lifesaver! My bars stay soft and chewy for days, and freezing them means I always have a treat on hand.”
For more baking inspiration and tips, check out this helpful guide. With these strategies, you’ll always have a delicious dessert ready to enjoy!
Be a Cookie Bar Hero: Bake These M&M Bars and Wow Everyone!
Baking a crowd-pleasing treat has never been easier. This recipe combines simplicity with incredible flavor, making it perfect for any occasion. From mixing the dough to achieving an even bake, every step is designed for success.
Feel free to get creative with add-ins like chocolate chips or nuts. The versatility of this recipe ensures it’s always fresh and exciting. Plus, storing them in an airtight container keeps them soft and chewy for days.
I encourage you to try this recipe and make it your own. Share your creations with friends and family—they’ll be impressed by your baking skills. Don’t forget to let me know how it turns out!
With its gooey texture and endless customization options, this dessert is sure to become a favorite. Happy baking, and enjoy every delicious bite!
FAQ
Can I use melted butter instead of creamed butter in this recipe?
Yes, melted butter works well and creates a chewier texture. Just ensure it’s slightly cooled before mixing with other ingredients.
How do I prevent the dough from sticking to the pan?
Line your baking pan with parchment paper or lightly grease it with butter. This ensures easy removal and clean cuts.
Can I substitute chocolate chips for M&M’s?
Absolutely! Swap M&M’s for chocolate chips or mix both for a fun twist. You can also add nuts for extra crunch.
How long should I cool the bars before cutting them?
Let the bars cool in the pan for at least 15-20 minutes. This helps them set and makes cutting into squares easier.
Can I freeze these bars for later?
Yes! Once cooled, wrap them tightly in plastic wrap or store in an airtight container. They freeze well for up to 3 months.
What’s the best way to store these bars to keep them fresh?
Store them in an airtight container at room temperature for up to 5 days. For longer freshness, refrigerate or freeze them.
Can I use different M&M colors for special occasions?
Definitely! Customize with seasonal or themed M&M colors to match holidays, parties, or celebrations.
Why is my dough too sticky to press into the pan?
If the dough is sticky, chill it in the fridge for 10-15 minutes. This makes it easier to handle and press evenly into the pan.