
Want to make churros that are just… better? Like, way beyond the usual cinnamon-sugar treat? Then you have to try Homemade Vanilla Bean Churro Dough. Seriously, just imagine the scene: warm, crispy churros, that incredible cinnamon-sugar crunch, but then, this amazing, deep, fragrant aroma that fills the kitchen and your first bite is pure vanilla bean heaven. It’s a flavor upgrade that’s ridiculously simple to pull off, and it will completely change how you think about homemade churros.
This Homemade Vanilla Bean Churro Dough Recipe isn’t about complicated pastry techniques or hunting down fancy ingredients. It’s about taking something classic and making it truly exceptional with one key addition: real vanilla bean. Forget the extract – scraping those tiny, fragrant vanilla seeds right into the dough is what unlocks this incredible depth of flavor and aroma. And the best part is, despite tasting totally gourmet, this vanilla bean churro dough is actually surprisingly straightforward to make at home.
If you’re ready to seriously impress with your dessert skills, or just want to treat yourself to something outrageously delicious and just a little bit fancy (without any of the fuss), then you’ve got to give this recipe a go. This Homemade Vanilla Bean Churro Dough Recipe is your guide to creating churros that are crispy, golden, and infused with the warm, comforting essence of real vanilla bean. Let’s get baking and make some vanilla magic happen – you are going to love this.
Vanilla Bean Churro Dough
Equipment
- Saucepan for boiling water and butter
- Mixing bowl for combining ingredients
- Electric mixer to mix the dough
- Deep fryer for frying the churros
Ingredients
- 1 cup water
- 1/2 cup unsalted butter cut into pieces
- 1 tbsp granulated sugar
- 1 vanilla bean seeds scraped from a real vanilla bean
- 1 cup all-purpose flour
- 2 large eggs
- 1 cup sugar for coating churros
- 1 tsp ground cinnamon for coating churros
Instructions
- In a saucepan, bring water, butter, and sugar to a boil. Add the vanilla bean seeds and mix well.
- Reduce heat to low, add flour, and stir vigorously until the mixture forms a smooth ball.
- Transfer the dough to a mixing bowl. Using an electric mixer, beat in eggs one at a time until the dough is smooth and well combined.
- Heat oil in a deep fryer to 350°F (175°C). Pipe dough into hot oil and fry until golden brown.
- Mix sugar and cinnamon. Roll fried churros in the mixture while still warm.
Notes
- Storage: Best served fresh. Store leftovers in an airtight container and reheat in an oven for crispiness.
- Serving Tip: Serve with warm chocolate or caramel dipping sauce for extra indulgence.
Nutrition
Introduction: A Unique Take on Vanilla Bean Churros
Ready to elevate your dessert game with a twist on a classic? This recipe takes the beloved churro and adds a touch of luxury with a hint of vanilla. It’s a creative variation that’s both familiar and extraordinary, perfect for anyone looking to impress.
What makes this version stand out? It’s the careful balance of flavors. A sprinkle of cinnamon enhances the sweetness, while the subtle aroma of vanilla adds depth. Every bite is designed to delight your taste buds.
Preparing this treat is surprisingly simple. All you need is a bowl and a few high-quality ingredients. The process is straightforward, making it ideal for beginners and seasoned bakers alike. It’s an approachable way to bring a touch of indulgence to your kitchen.
Here’s a quick look at the key ingredients and their roles:
| Ingredient | Role |
|---|---|
| Vanilla | Adds depth and aroma |
| Cinnamon | Enhances sweetness |
| Flour | Provides structure |
| Butter | Adds richness |
This recipe is more than just a dessert—it’s an experience. From the first mix to the final sprinkle of cinnamon-sugar, every step is crafted to bring joy. Let’s dive in and create something truly special!
Essential Ingredients for Your Vanilla Bean Churro Dough
The secret to amazing churros lies in the quality of your ingredients. Each component plays a crucial role in creating the perfect texture and flavor. Let’s break down what you’ll need and why it matters.
Here’s the complete list of essentials:
- Unsalted butter: Adds richness and helps create a tender dough.
- Granulated sugar: Ensures a crisp texture and balanced sweetness.
- All-purpose flour: Provides the base for the dough, giving it structure.
- Egg: Adds richness and helps bind the dough together.
- Vanilla bean pod: Infuses the dough with a deep, aromatic flavor.
Using high-quality ingredients is key. For example, a fresh vanilla bean pod makes a world of difference compared to extracts. Its natural oils and seeds elevate the flavor profile, making your churros truly special.
Sugar and granulated sugar work together to balance the sweetness. While sugar enhances the flavor, granulated sugar helps achieve that signature crispy exterior. It’s a delicate balance that makes all the difference.
Here’s a quick overview of how each ingredient contributes:
| Ingredient | Role |
|---|---|
| Unsalted Butter | Adds richness and tenderness |
| Granulated Sugar | Ensures crispiness and sweetness |
| All-Purpose Flour | Provides structure |
| Egg | Binds the dough and adds richness |
| Vanilla Bean Pod | Infuses deep, aromatic flavor |
For an extra twist, consider experimenting with fillings like Bavarian cream. It’s a delicious way to take your churros to the next level!
Remember, the bean’s quality directly impacts the flavor. Opt for fresh, high-quality pods to ensure your dough is infused with the best aroma and taste. With these ingredients, you’re well on your way to creating churros that are crispy, flavorful, and unforgettable.
Must-Have Kitchen Tools and Equipment
Having the right tools in your kitchen can make all the difference when crafting the perfect treat. Whether you’re a beginner or a seasoned baker, having the essential equipment ensures a seamless process and professional results.
Here’s a breakdown of the must-have items:
- Pastry bag with a star tip: This is crucial for piping the dough into those signature ridges. A sturdy bag ensures smooth and even piping.
- Deep fryer or large pot: A deep pot allows the oil to heat evenly, ensuring your treats cook to golden perfection. Aim for a pot that holds at least 2 quarts of oil.
- Paper towel-lined plate: After frying, place your treats here to drain excess oil. It’s a simple but effective step for a crispier finish.
| Tool | Purpose |
|---|---|
| Pastry Bag | Piping dough with precision |
| Deep Pot | Ensures even frying |
| Paper Towels | Drains excess oil |
With these tools, your baking day will be efficient and enjoyable. As the saying goes, “The right tools make the job easier.” So, gather your equipment and get ready to create something delicious!
Preparing the Dough: Step-by-Step Process
Let’s dive into the heart of this recipe: crafting the perfect dough. This step is where the magic happens, and I’ll guide you through it with clear, easy-to-follow instructions. Whether you’re a beginner or a seasoned baker, these tips will ensure success.
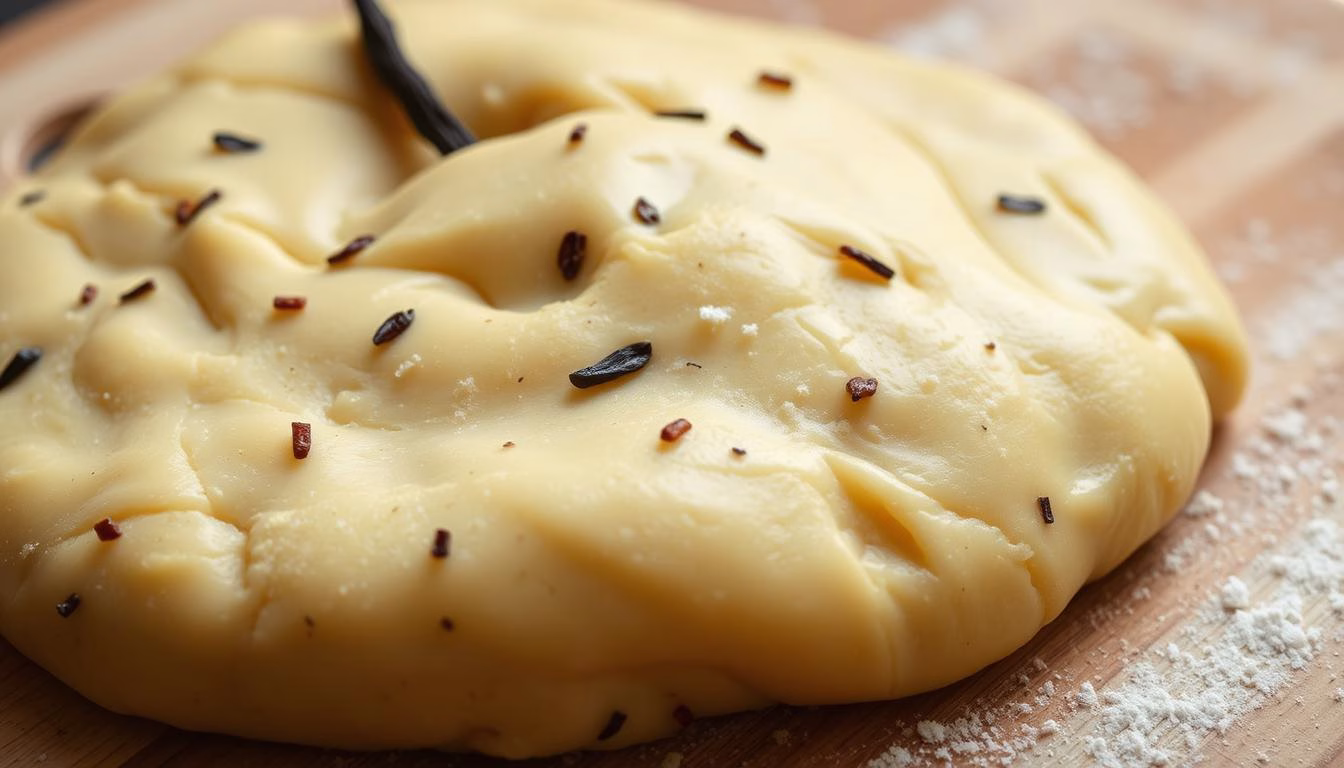
Infusing the Dough with Water, Butter, and Vanilla Bean
Start by combining water, butter, sugar, and a pinch of salt in a saucepan. Bring the mixture to a boil over medium heat, stirring occasionally. Once boiling, add the vanilla bean and let it infuse for about one minute. This step ensures the dough is packed with flavor.
Next, reduce the heat and gradually add the flour. Stir vigorously until the mixture forms a smooth dough. This process should take just a few minutes, but it’s crucial for achieving the right texture.
Mixing, Cooling, and Incorporating the Egg
Once the dough comes together, remove it from the heat and let it cool slightly. This step is important to prevent the egg from cooking when you add it. After cooling, beat in the egg until the mixture is smooth and glossy.
Here’s a pro tip: Use a teaspoon to measure spices accurately. This ensures the flavors are balanced and consistent. Transfer the dough to a piping bag fitted with a star tip for the signature ridges.
With the dough ready, you’re one step closer to golden, crispy treats. The next step is frying, but we’ll cover that in detail later. For now, pat yourself on the back—you’ve mastered the dough!
Mastering the Art of Frying Churros
Frying churros to golden perfection is an art that requires precision and patience. The key lies in controlling the oil temperature and handling the dough with care. Let’s break down the process to ensure your treats turn out crispy and delicious every time.
Setting the Perfect Oil Temperature
Start by heating your oil to 350°F (175°C). Use a candy thermometer to monitor the temperature accurately. This step is crucial because oil that’s too hot can burn the dough, while oil that’s too cool will make your churros greasy.
Piping, Cutting, and Achieving Golden Perfection
Once the oil is ready, it’s time to pipe the dough. Use a sturdy pastry bag fitted with a large star tip to create those signature ridges. Pipe the dough directly into the hot oil, cutting it with scissors or a knife to your desired length.
Fry the churros for about 3-4 minutes, turning them occasionally for even browning. When they’re golden and crisp, carefully transfer them to a paper towel-lined plate to drain excess oil.
With these tips, you’ll master the art of frying churros in no time. Attention to detail and precise timing are what make this recipe stand out. Now, let’s move on to the next step and perfect your dough consistency!
Achieving the Perfect Dough Consistency
Getting the right texture for your dough is the foundation of any great recipe. It’s all about balance—too sticky, and it won’t hold its shape; too dry, and it won’t fry evenly. Here’s how to nail that perfect consistency every time.
First, check your dough by performing the “V” test. When you lift a spoonful, it should form a smooth, slightly shiny “V” shape as it falls back into the bowl. This indicates the ideal texture for frying.

Allowing a cool minute for resting is another key step. This brief pause helps the moisture distribute evenly, ensuring a uniform texture. It’s a small detail that makes a big difference.
Mixing in small batches is another pro tip. This approach prevents lumps and ensures every part of the dough is smooth and consistent. It’s especially helpful when working with a larger recipe.
Don’t forget the importance of measured ingredients. Using a precise cup of flour or water ensures the dough has the right structure. This attention to detail pays off in the final product.
Finally, transfer your dough to a sturdy piping bag fitted with a star tip. This not only helps maintain consistency but also creates those signature ridges that make churros so irresistible.
With these tips, you’ll achieve a dough that’s smooth, easy to work with, and perfect for frying. It’s the little things that elevate your baking game!
Expert Tips for Enhancing Vanilla Flavor
Unlocking the full potential of vanilla in your recipes starts with understanding its nuances. Whether you’re using a pod or an extract, the quality and technique make all the difference. Let’s explore how to elevate your desserts with the best vanilla choices and alternatives.
Choosing High-Quality Vanilla Bean Pods
When it comes to flavor, nothing beats a fresh, high-quality vanilla bean pod. Its natural oils and seeds infuse your desserts with a rich, aromatic depth that extracts simply can’t match. I always recommend sourcing pods from reputable suppliers to ensure authenticity and freshness.
Here’s a quick guide to selecting the best pods:
| Feature | What to Look For |
|---|---|
| Appearance | Plump, moist, and dark brown |
| Aroma | Strong, sweet, and complex |
| Texture | Flexible but not brittle |
Storing your pods in a cool, dark place preserves their natural oils and flavor. For long-term use, consider freezing them in an airtight container.
Exploring Vanilla Alternatives Without Compromising Taste
If you’re out of pods, vanilla extract can be a great substitute. Look for pure extract with no artificial additives for the best results. For every vanilla bean pod, use about 1 teaspoon of extract to maintain the flavor balance.
Another option is vanilla paste, which combines extract with ground vanilla seeds. It’s perfect for recipes where you want visible specks of vanilla. Remember, maintaining a consistent temperature—like allowing a cool minute after heating—helps preserve the flavor.
Experiment with these alternatives while keeping the overall food quality on a balanced level. With the right choices, you can achieve a dessert that’s both flavorful and authentic.
Cutting and Shaping: Add Your Signature Twist
Transform your baking game by adding a personal touch to your treats. The way you cut and shape your dough can turn a simple snack into a show-stopping masterpiece. Let’s explore how you can make your creations truly unique.
Start by experimenting with shapes. Instead of the traditional straight sticks, try rolling the dough into spirals or loops. These fun designs not only look great but also add a playful twist to your recipe. Use a sharp knife or kitchen scissors to cut the dough cleanly for a polished finish.
Consistency is key when rolling the dough. Keep your hands lightly floured to prevent sticking, and aim for even thickness. This ensures every piece cooks evenly and maintains that perfect texture. A steady hand and a little patience go a long way!
Here are my top tips for perfecting the process:
- Chill the dough for 10-15 minutes before shaping. It’s easier to work with and holds its form better.
- Use a ruler or measuring tape to ensure uniform lengths for a professional look.
- Don’t be afraid to get creative—try braids, knots, or even mini bite-sized pieces.
Remember, even a small twist can make a big difference. Whether it’s a unique shape or a creative presentation, these little touches can turn a traditional treat into your signature creation. Happy baking!
Serving and Presentation Ideas
Presentation is everything when it comes to serving a dessert that wows. A beautifully plated treat not only tastes better but also creates a memorable experience for your guests. Let’s explore some creative ways to present your homemade delights and make them truly special.
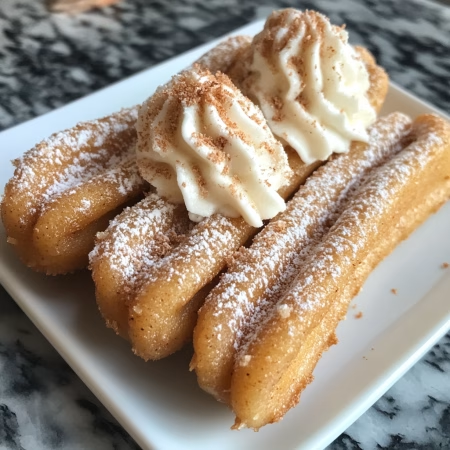
Creative Pairings with Whipped Cream and Ice Cream
One of my favorite ways to elevate a dessert is by pairing it with a dollop of whipped cream or a scoop of creamy ice cream. The contrast between the warm, crispy texture and the cool, smooth cream is simply irresistible. Serve it in a decorative bowl to add a touch of elegance.
For an extra layer of flavor, drizzle a generous amount of dulce de leche over the top. This rich, caramel-like sauce adds a sophisticated finish that’s sure to impress. You can even sprinkle a little sugar or cinnamon for added sweetness and texture.
Here are some practical tips I use in my own kitchen:
- Use a cup or small pitcher to serve sauces like dulce de leche for easy drizzling.
- Add a few fresh berries or a mint sprig for a pop of color and freshness.
- Consider shop-bought decorative elements, like matching plates or napkins, to tie the presentation together.
These small details can transform a simple snack into a show-stopping dessert. For more inspiration, check out this vanilla bean ganache recipe to create a luxurious topping that pairs perfectly with your treats.
Remember, the key to a great presentation is balance. Keep it simple but thoughtful, and let the flavors shine. With these ideas, you’ll create a dessert that’s as beautiful as it is delicious!
Troubleshooting Common Issues
Even the most experienced bakers can run into a few hiccups when making desserts at home. Don’t worry—I’ve got you covered with solutions to the most common problems you might face while preparing and frying your treats.
One frequent issue is managing the heat in your pot. If the oil is too hot, your dough can burn quickly. If it’s too cool, the result will be greasy and undercooked. Use a candy thermometer to keep the oil at a steady 350°F (175°C). This ensures a crispy exterior without overcooking.
Another challenge is incorporating the egg smoothly. If the dough is too warm, the egg can cook prematurely, leading to lumps. Let the dough cool for a minute before adding the egg, and mix thoroughly for a glossy, even texture.
Sticky dough can also be frustrating. If your dough is too wet, add a tablespoon of flour at a time until it reaches the right consistency. This makes it easier to transfer dough to the piping bag and ensures clean, even shapes when you cut dough.
Timing is crucial when frying. Overcooking can make your treats too hard, while undercooking leaves them doughy. Aim for 3-4 minutes, turning occasionally for even browning. Use a slotted spoon to fry and transfer them to a paper towel-lined plate to drain excess oil.
Finally, adjusting the granulated sugar1 can make a big difference. If your dough is too sweet, reduce the sugar slightly. For a balanced level of sweetness, stick to the recipe measurements. A little tweaking can help you achieve the perfect flavor.
With these tips, you’ll be able to troubleshoot like a pro and create flawless treats every time. Happy baking!
Maintaining Authenticity in Traditional and Modern Recipes
Balancing tradition and innovation in baking is a journey I’ve come to cherish. Over the years, I’ve learned that respecting time-honored techniques while embracing modern twists can create something truly special. This approach has allowed me to keep the tradition alive while adding my own creative flair.
One of my favorite ways to honor tradition is by sticking to trusted recipes that have stood the test of time. Even on busy days, following a classic recipe brings a sense of comfort and sweet satisfaction. It’s a reminder that sometimes, the simplest methods yield the best results.
That said, I’m always open to experimenting. For instance, adding a modern cream twist to a classic dessert can elevate it without losing its essence. The key is to maintain the integrity of the original flavors while introducing subtle innovations. This balance is what makes baking so exciting!
Here’s a quick look at how I approach this balance:
| Traditional Element | Modern Twist |
|---|---|
| Classic dough recipe | Infused with unique flavors |
| Hand-rolled shapes | Creative piping techniques |
| Simple toppings | Gourmet sauces and garnishes |
Through my baking days, I’ve learned that maintaining food integrity is about more than just following a recipe. It’s about understanding the story behind each dish and respecting its roots. Whether I’m baking for family or friends, I strive to create treats that are both authentic and innovative.
So, the next time you’re in the kitchen, don’t be afraid to experiment. Keep the tradition alive, but let your creativity shine. After all, baking is as much about the journey as it is about the final product!
Vanilla Bean Churro Dough: Expert Insights
Crafting the perfect dough is both an art and a science, and I’m here to share my expert tips. Over the years, I’ve learned that balancing flavors and textures is the key to creating a dessert that’s both delicious and memorable. Let’s dive into the techniques that will elevate your dough to the next level.
Balancing Flavors for a Refined Taste
One of the most important aspects of dough is achieving the right balance of flavors. The butter plays a crucial role here, adding richness and depth. I always measure it precisely by the cup to ensure consistency. This attention to detail makes a noticeable difference in the final product.
Incorporating the egg is another critical step. It binds the dough and adds richness, but it’s essential to mix it in smoothly. I’ve found that letting the dough cool slightly before adding the egg prevents lumps and ensures a glossy texture. This small adjustment can transform your dough’s consistency.

When it comes to advanced techniques, transfer dough methods are a game-changer. Piping the dough directly into the hot oil ensures even cooking and those signature ridges. It’s a technique I’ve mastered through countless batches, and it’s worth the effort.
Finally, I like to add a hint of leche to the final mixture. This touch of sweetness and creaminess brings a luxurious finish to the dough. It’s a subtle addition, but it makes all the difference in creating a truly indulgent treat.
| Ingredient | Role |
|---|---|
| Butter | Adds richness and depth |
| Egg | Binds the dough and adds richness |
| Leche | Enhances sweetness and creaminess |
As the saying goes, “The devil is in the details.” These small adjustments and techniques are what separate a good dough from a great one. For more inspiration, check out this white chocolate cream-filled churro recipe to add a decadent twist to your creations.
Innovative Variations and Twists
Exploring new flavors and techniques can transform a classic dessert into something extraordinary. One of my favorite ways to innovate is by drawing inspiration from Mexican and Spanish culinary traditions. These cultures have perfected the art of balancing spices and textures, creating desserts that are both familiar and exciting.
For example, adding a generous teaspoon of ground cinnamon to the coating mixture brings a warm, aromatic twist to the recipe. This small adjustment enhances the flavor profile, making each bite more memorable. I’ve also experimented with using a cup of finely chopped nuts for added crunch, which complements the soft interior perfectly.
When it comes to shaping, I encourage you to get creative with your piping bag. Instead of the traditional straight sticks, try swirling the dough into spirals or loops. These fun designs not only look great but also add a playful twist to your recipe. Just be sure to fry them in a trusted pan with the right amount of oil for even cooking.
For those who love experimenting, I recommend trying this churro cheesecake cookies recipe. It’s a delightful variation that combines the crispy texture of churros with a creamy cheesecake filling. Whether you stick to tradition or embrace a modern flair, the possibilities are endless!
FAQ
What’s the best way to infuse the dough with vanilla flavor?
Split a high-quality vanilla bean pod and scrape out the seeds. Add both the seeds and the pod to the warm water and butter mixture for maximum flavor infusion.
Can I use vanilla extract instead of a vanilla bean?
Yes, you can substitute with pure vanilla extract. Use 1-2 teaspoons, but note that the flavor won’t be as rich as using a whole bean.
How do I know when the oil is at the right temperature for frying?
Use a kitchen thermometer to ensure the oil reaches 350°F. If you don’t have one, test by dropping a small piece of dough in—it should sizzle and rise to the surface.
What’s the secret to achieving the perfect golden color?
Fry the churros in small batches, turning them occasionally, until they’re evenly golden brown. Overcrowding the pan can lower the oil temperature and affect the color.
Can I make the dough ahead of time?
Yes, you can prepare the dough and store it in the fridge for up to 24 hours. Let it come to room temperature before piping and frying.
What’s the best way to coat the churros after frying?
Roll them in a mixture of granulated sugar and ground cinnamon while they’re still warm. For a decadent twist, drizzle with dulce de leche or serve with whipped cream.
How do I prevent the dough from being too sticky?
Ensure the mixture cools slightly before adding the egg. If it’s still sticky, let it rest for 5-10 minutes before piping.
Can I bake the churros instead of frying them?
While traditional churros are fried, you can bake them at 400°F for a lighter option. Brush with melted butter before coating with cinnamon sugar.
What’s the best piping tip to use for churros?
A large star tip (like Wilton 1M) works best to create the classic ridged texture.
How do I store leftover churros?
Store them in an airtight container at room temperature for up to 2 days. Reheat in the oven for a few minutes to restore crispiness.