
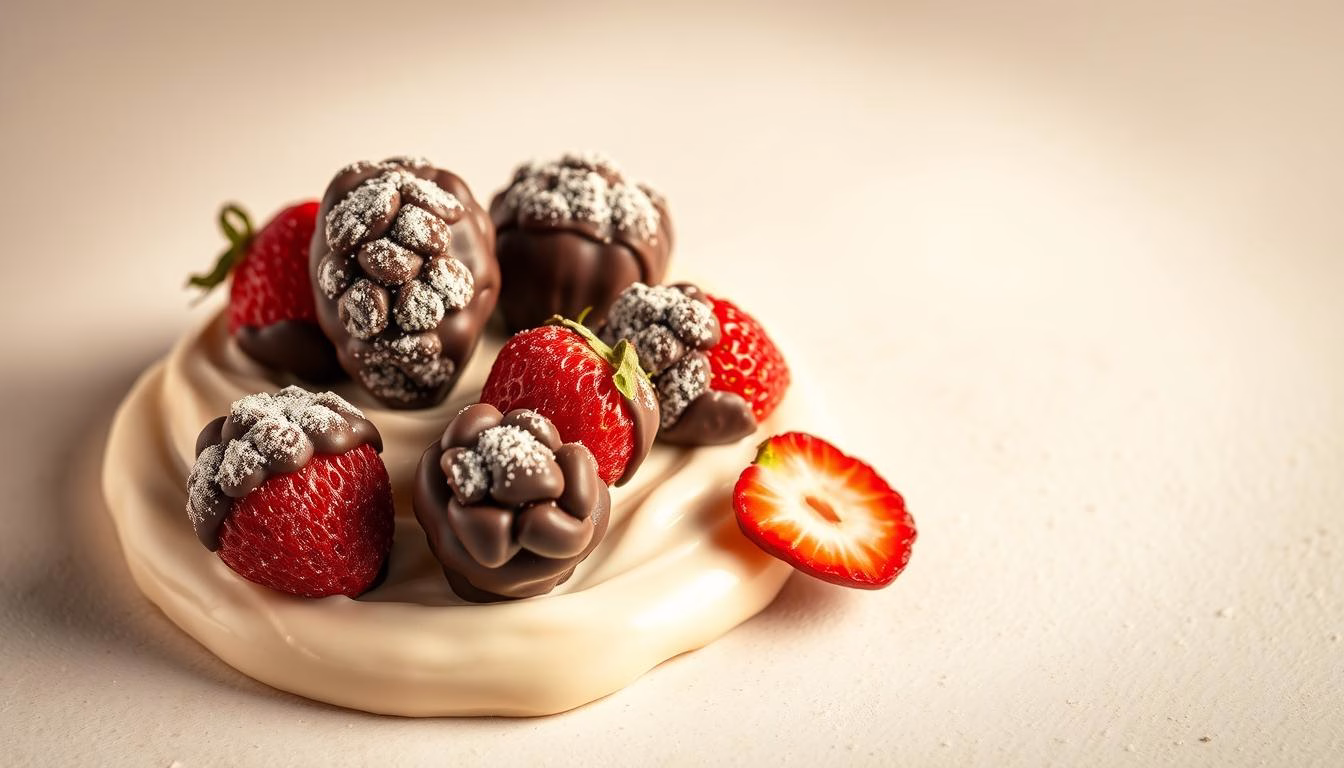
Forget the store-bought sweets—this recipe brings you a homemade treat that’s just as indulgent but with a healthier twist. Chocolate strawberry yogurt clusters have taken the internet by storm, and for good reason. They’re ridiculously easy to make, packed with real ingredients, and deliver the perfect balance of creamy, fruity, and chocolatey goodness in every bite.
These bite-sized delights come together with just a handful of ingredients—fresh strawberries, thick Greek yogurt, and rich melted chocolate. The result? A snack that feels like dessert but won’t weigh you down. Plus, you can easily tweak the recipe to fit your cravings, whether that means adding a drizzle of nut butter, a sprinkle of crushed nuts, or using dairy-free alternatives.
No baking, no complicated steps—just a simple, foolproof way to enjoy something sweet and refreshing. Ready to give these trending treats a try? Let’s get started!
Chocolate Strawberry Yogurt Clusters
Equipment
- Baking sheet lined with parchment paper
- Spoon for forming clusters
- Microwave-safe bowl for melting chocolate
- Freezer for setting clusters
Ingredients
- 1 cup Greek yogurt plain or vanilla
- 1 cup strawberries chopped
- 1 tbsp honey or maple syrup
- 1 tsp vanilla extract
- 1.5 cups dark chocolate chips or milk chocolate
- 1 tbsp coconut oil for smoother melting
Instructions
- In a mixing bowl, combine Greek yogurt, chopped strawberries, honey, and vanilla extract. Stir until well mixed.
- Using a spoon, drop small clusters of the yogurt mixture onto a parchment-lined baking sheet.
- Place the baking sheet in the freezer for at least 1 hour, or until the clusters are firm.
- In a microwave-safe bowl, melt the chocolate chips and coconut oil in 30-second intervals, stirring between each, until smooth.
- Dip each frozen yogurt cluster into the melted chocolate, ensuring full coverage. Return to the baking sheet.
- Place the chocolate-coated clusters back in the freezer for at least 1 hour, or until fully set.
- Enjoy frozen or slightly thawed for a softer texture.
Notes
- Optional Equipment: A fork can be used instead of a spoon for dipping clusters.
- Customization: Swap strawberries for blueberries, raspberries, or bananas.
- Storage: Store in an airtight container in the freezer for up to 2 weeks.
- Serving Tip: Let clusters sit at room temperature for 2-3 minutes before eating for a softer bite.
Nutrition
Introduction to This Viral Dessert Trend
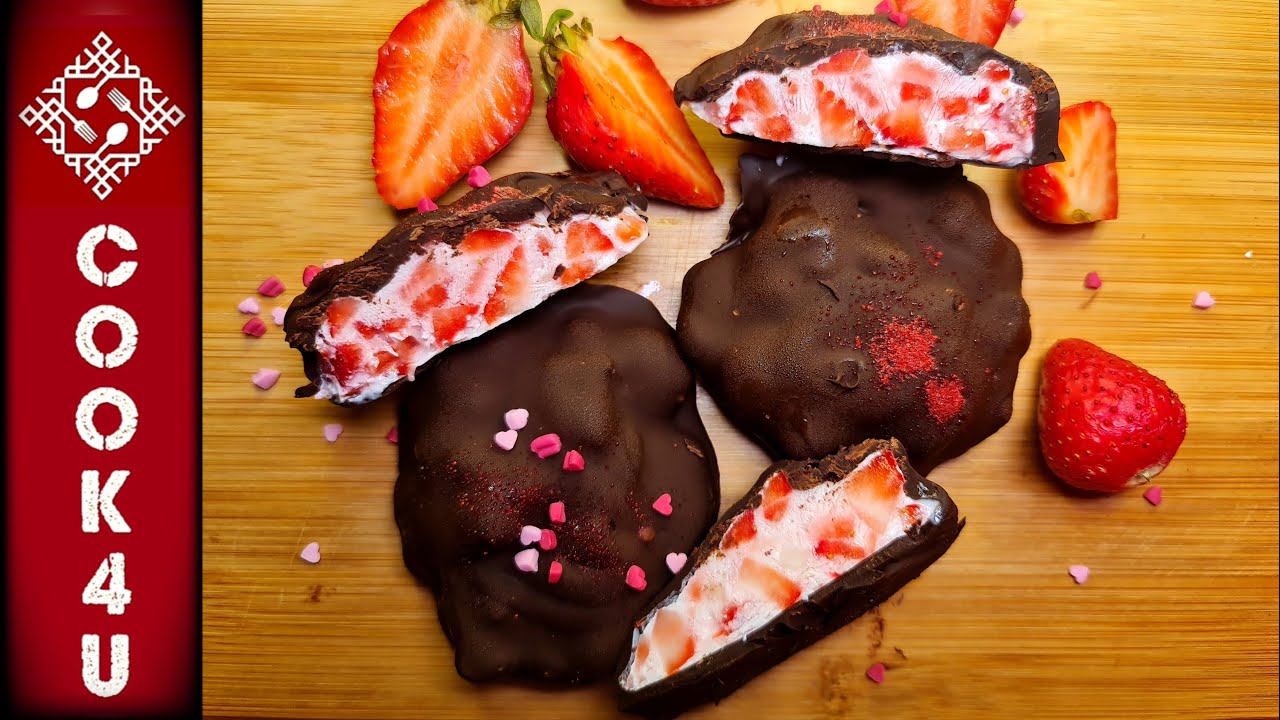
Lately, my social media feed has been flooded with these irresistible frozen bites. It’s no surprise—TikTok has been buzzing with creators sharing their take on this simple yet delightful treat. From its creamy texture to its satisfying crunch, it’s easy to see why this trend has taken off.
The Rise of Viral Desserts
Social media, especially TikTok, has become a hub for discovering new recipes. This trend is no exception. With over 86 million views under the hashtag #strawberrybites, it’s clear that people are loving this combination of fresh fruit, Greek yogurt, and a touch of sweetness.
What makes this recipe stand out is its simplicity. With just a few ingredients and minimal prep time, anyone can whip up these yogurt clusters in no time. Plus, the freezer does most of the work, making it perfect for busy schedules.
Why This Recipe is a Must-Try
When I first stumbled upon this trend, I was intrigued by how effortless it seemed. After trying it myself, I was hooked. The blend of creamy Greek yogurt and fresh fruit, topped with a hint of indulgence, creates a treat that’s both refreshing and satisfying.
If you’re looking for a healthier alternative to traditional desserts, this recipe is a game-changer. It’s versatile, customizable, and perfect for anyone following current food trends. Plus, it’s a great way to enjoy a guilt-free snack that feels indulgent.
| Key Features | Why It’s Popular |
|---|---|
| Minimal Ingredients | Easy to make with items you likely already have. |
| Healthy Twist | Uses Greek yogurt and fresh fruit for a nutritious treat. |
| Quick Prep | Ready in just a few hours, thanks to the freezer. |
If you’re curious about other frozen dessert ideas, check out these 10 irresistible frozen desserts that are perfect for any occasion. Trust me, once you try this viral recipe, you’ll understand why it’s everywhere!
Ingredients Spotlight for a Guilt-Free Treat
When it comes to guilt-free snacks, the right ingredients make all the difference. This recipe combines simple, wholesome components to create a treat that’s both delicious and nutritious. Let’s dive into what makes these bites so special.
Fresh Fruits and Greek Yogurt Essentials
At the heart of this recipe is plain Greek yogurt. I always recommend using full-fat versions for extra creaminess and a rich protein boost. It’s a great source of probiotics and calcium, making it a healthier choice for desserts.
Fresh strawberries add a burst of natural sweetness and a juicy texture. Look for bright red, firm berries for the best flavor. If strawberries aren’t in season, you can substitute with other fruits like blueberries or raspberries.
A touch of honey enhances the sweetness without overpowering the natural flavors. It’s a healthier alternative to refined sugar and blends perfectly with the tanginess of the yogurt.
Chocolate and Coconut Oil Magic
The chocolate coating is where the indulgence comes in. I use a mix of chocolate chips and coconut oil for a smooth, glossy finish. The oil helps the chocolate melt evenly and gives it a silky texture that’s perfect for dipping.
Coconut oil also adds a subtle tropical flavor and is packed with healthy fats. It’s a great way to keep the treat light while still feeling indulgent.
Here’s a quick breakdown of why these ingredients work so well together:
- Plain Greek yogurt: Creamy, protein-rich base.
- Fresh strawberries: Natural sweetness and vibrant flavor.
- Coconut oil: Smooths the chocolate for easy dipping.
- Honey: Balances tanginess with a touch of sweetness.
With just a handful of high-quality ingredients, this treat is as easy to make as it is delicious. Whether you’re a seasoned baker or a beginner, this recipe is sure to impress!
Tools and Preparation Essentials
Getting started with this recipe is easier than you think, especially with the right tools at hand. Whether you’re a seasoned baker or a beginner, having the proper equipment ensures a smooth and enjoyable process. Let’s break down what you’ll need to create these delightful bites.
First, you’ll need a mixing bowl to combine your ingredients. A sturdy bowl makes it easy to mix everything evenly without spills. Next, grab a chef’s knife and a cutting board for slicing your fresh fruit. Precision here ensures every bite is perfect.
Measuring cups and spoons are essential for accuracy. They help you get the right balance of flavors without guessing. A rubber spatula is also handy for scraping every last bit of mixture from the bowl—no waste here!
One of the most important tools is a baking sheet lined with parchment paper. This setup ensures your clusters won’t stick, making cleanup a breeze. The non-stick surface also helps maintain the shape of your bites while they freeze.
Here’s a quick checklist of what you’ll need:
- Mixing bowl: For combining ingredients.
- Chef’s knife and cutting board: For slicing fruit.
- Measuring cups and spoons: For precise measurements.
- Rubber spatula: For easy mixing and scraping.
- Baking sheet and parchment paper: For a non-stick surface.
Having these tools ready simplifies the entire process. If you’re looking for more kitchen inspiration, check out this homemade pistachio cream recipe—it’s another quick and delicious treat you can whip up with minimal effort!
Step-by-Step Preparation Process
Let’s dive into the step-by-step process to create these delightful bites! Whether you’re a beginner or a seasoned baker, this guide will walk you through every detail to ensure success.
Mixing, Scooping, and Freezing
Start by combining 2 cups of chopped fresh fruit with 1 cup of plain Greek yogurt. Add a drizzle of honey and a splash of vanilla for extra flavor. Mix everything until it’s well combined.
Next, use a standard measuring cup to portion the mixture onto a parchment-lined baking sheet. I recommend making each cluster about 2-3 tablespoons for the perfect bite-sized treat.
Pop the tray into the freezer for at least 1 hour. Freezing thoroughly ensures the clusters hold their shape when you dip them later. Trust me, this step is worth the wait!

Melting Chocolate and Dipping
Once the clusters are firm, it’s time to melt chocolate. Place 1.5 cups of chocolate chips and 1 tablespoon of coconut oil in a microwave-safe bowl. Heat in 15-30 second intervals, stirring between each burst, until the chocolate is smooth and fully melted.
Now, take each frozen cluster and dip it into the melted chocolate. Use a fork to ensure even coating and let any excess drip off. Place them back on the parchment paper to set.
Pro tip: Work quickly but carefully to prevent the clusters from softening. A chilled baking sheet can help maintain their shape during the process.
Once coated, return the tray to the freezer for another 15-20 minutes to let the chocolate harden. And just like that, you’ve created a treat that’s as easy to make as it is delicious!
Chocolate Strawberry Yogurt Clusters Recipe: A Detailed Guide
Crafting the perfect bite-sized treat starts with understanding the right balance of ingredients. Getting the ratios just right ensures every bite is creamy, tangy, and indulgent. Let’s break down the technical side of this recipe so you can customize it with confidence.
Understanding Ingredient Ratios
The key to a great yogurt cluster lies in the harmony of its components. For every 1 cup of plain Greek yogurt, I use 2 cups of diced fresh fruit. This balance ensures a creamy base with a burst of natural sweetness. Adding 1 tablespoon of honey enhances the flavor without overpowering the tanginess of the yogurt.
For a touch of complexity, I include 1 teaspoon of vanilla extract. It elevates the flavor profile, making each bite more nuanced. If you’re a fan of stronger vanilla notes, you can increase this to 2 teaspoons.
When it comes to the coating, 1.5 cups of chocolate chips mixed with 1 tablespoon of coconut oil creates a smooth, glossy finish. This ratio ensures the chocolate melts evenly and adheres perfectly to the frozen clusters. For a richer chocolate taste, you can increase the chips to 2 cups.
Here’s a quick breakdown of the ratios:
- Plain Greek yogurt: 1 cup
- Fresh fruit: 2 cups
- Honey: 1 tablespoon
- Vanilla extract: 1 teaspoon
- Chocolate chips: 1.5 cups
- Coconut oil: 1 tablespoon
Timing is also crucial. Freeze the clusters for at least 1 hour before dipping to ensure they hold their shape. After coating, return them to the freezer for another 15-20 minutes to let the chocolate set. This ensures a satisfying crunch with every bite.
For more inspiration on using vanilla in your recipes, check out these 8 delicious ways to pair vanilla with seasonal. It’s a great way to explore new flavor combinations!
Expert Tips for Perfecting the Dipping Process
Mastering the art of dipping can make or break your frozen treats. It’s a delicate balance, but with a few tricks, you’ll achieve a flawless finish every time. Here’s what I’ve learned from my own kitchen trials.
Avoiding Chocolate Seizure
One of the biggest challenges is preventing the melted mixture from seizing. This happens when moisture or heat disrupts its smooth texture. To avoid this, always ensure your clusters are completely frozen before dipping. Any residual moisture can cause the coating to clump.
Another tip is to melt your chip mixture gradually. Use a microwave-safe bowl and heat in 15-second intervals, stirring in between. Adding a teaspoon of oil, like coconut, helps maintain a silky consistency. It’s a game-changer for smooth dipping!

Efficient Dipping Techniques
When it’s time to dip, work in small batches. This prevents the melted mixture from thickening too quickly. I like to use a fork to coat each cluster evenly, letting any excess drip off before placing it back on the baking sheet.
If you’re new to this, don’t worry—practice makes perfect. My “aha” moment came when I realized that chilling the tray beforehand helps maintain the shape of the treats. It’s a simple step that makes a big difference.
Remember, patience is key. Let the coated clusters set in the freezer for at least 15 minutes. This ensures a satisfying crunch with every bite. With these tips, even beginners can master the art of dipping!
Creative Variations and Adaptations
Ready to take your dessert game to the next level? Try these easy adaptations! One of the best things about this treat is how versatile it is. Whether you’re experimenting with flavors or catering to dietary needs, there’s always room to get creative.
Fruit and Yogurt Alternatives
If you’re looking to switch things up, try swapping out the fruit. Blueberries, bananas, or peaches can add a fresh twist to your snack. Each fruit brings its own unique sweetness and texture, making every bite exciting.
For the yogurt base, flavored options like vanilla or honey can add a new dimension. If you’re exploring dairy-free alternatives, coconut yogurt is a fantastic choice. It’s creamy, rich, and packed with probiotics. Plus, it’s perfect for those with lactose intolerance. Learn more about the benefits of coconut yogurt and how it can elevate your recipe.
Adjusting for Dietary Needs
This dessert is incredibly adaptable for different dietary preferences. For a vegan version, use maple syrup instead of honey and opt for dairy-free chocolate. Dark or sugar-free chocolate is also a great option for those watching their sugar intake.
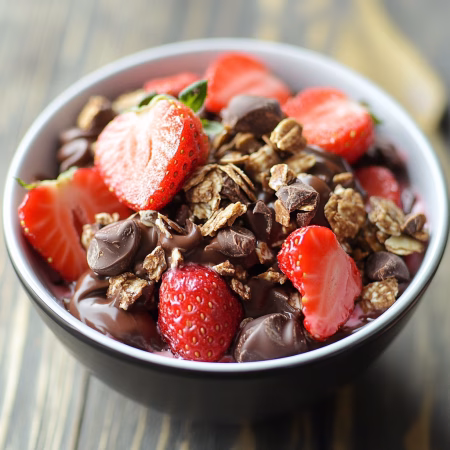
Want to add some crunch? Mix in nuts or granola for extra texture. These additions not only enhance the flavor but also make the treat more filling. The possibilities are endless, and each variation keeps the core elements of a delicious, healthy snack intact.
Experimenting with these adaptations is part of the fun. Whether you’re following a trend or creating your own, these ideas will inspire you to make this recipe your own. So, grab your ingredients and start mixing—your next favorite dessert is just a few steps away!
Serving, Storing, and Enjoying Your Treat
There’s nothing quite like enjoying a perfectly chilled treat on a warm day. Whether you’re serving these bites as a dessert or a refreshing snack, a few simple tips can elevate the experience. Let’s dive into the best ways to serve and store your creation for maximum freshness and flavor.
Best Serving Practices
For the best texture, remove the clusters from the freezer just a few minutes before serving. This allows them to soften slightly, enhancing their creamy, ice-cream-like consistency. A sprinkle of sea salt can add a delightful contrast to the sweetness, making every bite even more satisfying.
If you’re using dark chocolate for the coating, let the clusters sit at room temperature for about 5 minutes. This helps the flavors meld together beautifully. Serve them on a chilled plate to keep them firm while you enjoy them.
Storage Tips for Maximum Freshness
To keep your treats fresh, store them in an airtight container in the freezer. This prevents freezer burn and maintains their texture. Avoid the refrigerator, as it can cause the clusters to melt and lose their shape.
For optimal results, freeze the clusters for at least 1 hour before transferring them to the container. They can last up to 2 weeks this way, making them a convenient snack for any day. If you’re planning to serve them later, portion them into smaller batches for easy access.
| Storage Method | Duration | Tips |
|---|---|---|
| Freezer | Up to 2 weeks | Use an airtight container to prevent freezer burn. |
| Room Temperature | 5 minutes | Let clusters soften slightly before serving. |
| Refrigerator | Not recommended | Can cause melting and loss of shape. |
For more tips on keeping your ingredients fresh, check out this guide on the best way to store strawberries. It’s a great resource for ensuring your treats stay delicious from the first bite to the last!
Indulge in These Chocolate Strawberry Yogurt Clusters: A Perfect Blend of Decadence and Freshness
Creating these delightful bites has been such a rewarding experience for me. This treat is not only simple to make but also a healthier option that feels indulgent. Using plain ingredients and a touch of coconut adds a unique twist that’s both refreshing and satisfying.
I encourage you to experiment with flavors and make this recipe your own. It’s a fun project that’s perfect for any occasion. I’d love to see your creations—share your photos and feedback on social media to inspire others!
If you’re looking for more creative ideas, check out these beautiful layered coconut treats. They’re perfect for adding variety to your dessert repertoire. With the right tips, anyone can master this delicious treat. Happy baking!
FAQ
Can I use regular yogurt instead of Greek yogurt?
Yes, you can! While Greek yogurt adds a thicker texture and extra protein, regular yogurt works just fine. Just be aware that the clusters might be slightly softer.
How long do these clusters need to freeze?
They typically need about 1-2 hours in the freezer to set properly. For best results, let them chill until firm before dipping in melted chocolate.
Can I use milk chocolate instead of dark chocolate?
Absolutely! Milk chocolate is a great alternative if you prefer a sweeter flavor. Just melt it gently with a bit of coconut oil for a smooth dip.
Are these clusters a healthy snack option?
They can be! Made with fresh fruit, Greek yogurt, and a touch of chocolate, they’re a balanced treat. For an even healthier version, use dark chocolate and skip added sweeteners.
How should I store these clusters?
Keep them in an airtight container in the freezer. They’ll stay fresh for up to 2 weeks, making them a perfect grab-and-go snack.
Can I use other fruits besides strawberries?
Definitely! Blueberries, raspberries, or even diced mango work wonderfully. Experiment with your favorite fruits for a personalized twist.
What’s the best way to melt the chocolate?
Use a double boiler or microwave in short bursts, stirring frequently. Adding a teaspoon of coconut oil helps achieve a smooth, glossy finish.
Can I make these clusters vegan?
Yes! Swap Greek yogurt for a plant-based alternative and use dairy-free chocolate. The result is just as delicious and cruelty-free.
So good, so simple