
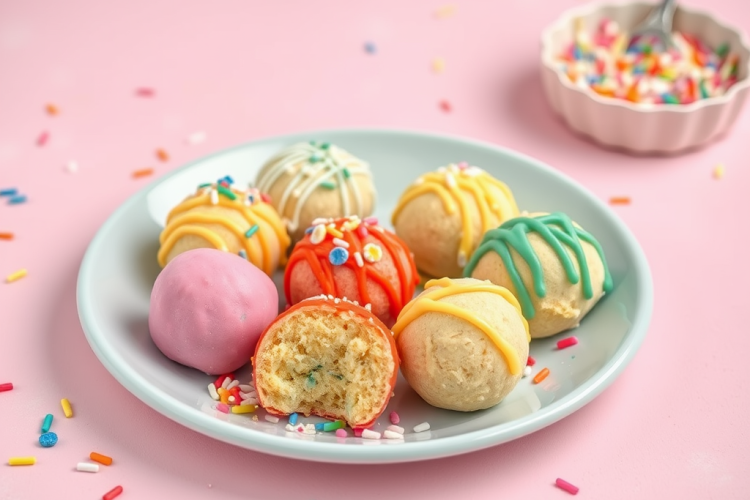
Birthday celebrations should always come with a touch of magic – and what could be more magical than bite-sized, sprinkle-covered treats that don’t require turning on the oven? No-Bake Birthday Cake Truffles have transformed the party dessert scene in 2025, combining the nostalgic flavor of classic birthday cake with modern convenience. These colorful, festive bite-sized desserts feature a smooth white chocolate coating and vibrant rainbow sprinkles that instantly signal it’s time to celebrate.
The genius behind these party favorites lies in their simplicity. Using yellow cake mix as a base ingredient, these truffles capture the essence of birthday cake flavor without the hassle of baking. Party hosts across the country have embraced these quick yet impressive desserts for everything from children’s birthday parties to sophisticated adult celebrations. Their portability and eye-catching appearance make them perfect for dessert tables or as special treats to send home with guests.

No-Bake Birthday Cake Truffles
Equipment
- Microwave-safe bowl
- Fork
Ingredients
- 2 cups vanilla cake crumbs or crushed vanilla cookies
- 1/2 cup cream cheese softened
- 1 tsp vanilla extract
- 1/4 cup rainbow sprinkles plus more for decoration
- 2 cups white chocolate chips melted
Instructions
- In a mixing bowl, combine the cake crumbs, softened cream cheese, vanilla extract, and sprinkles. Mix until a dough forms.
- Scoop tablespoon-sized portions and roll into smooth balls.
- Place the truffles on a parchment-lined baking sheet and freeze for 15 minutes.
- Melt the white chocolate chips in a microwave-safe bowl in 30-second intervals, stirring between each, until smooth.
- Using a fork, dip each chilled truffle into the melted white chocolate, coating evenly.
- Place the coated truffles back on the parchment-lined sheet and sprinkle with extra rainbow sprinkles before the chocolate sets.
- Chill in the refrigerator for 15 minutes or until the chocolate is firm.
- Enjoy immediately or store in an airtight container in the fridge for up to 5 days.
Notes
- Storage: Store in an airtight container in the refrigerator for up to 5 days or freeze for up to 2 months.
- Customization: Swap white chocolate for dark or milk chocolate for a different flavor.
- Serving Tip: Let truffles sit at room temperature for 5 minutes before serving for the best texture.
Nutrition
The Sweet Story Behind No-Bake Birthday Cake Truffles
The rise of No-Bake Birthday Cake Truffles reflects a broader trend toward simple, accessible desserts that don’t sacrifice flavor or visual appeal. In recent years, home bakers have increasingly sought out time-saving dessert options that still deliver that homemade touch. These truffles perfectly answer that call, offering the taste of birthday cake in a convenient, no-oven-required package.
The concept draws inspiration from traditional cake pops and cake truffles, but eliminates the need to bake a cake first. Instead, dry cake mix becomes the star ingredient, creating that distinct birthday cake flavor we all know and love. This innovation has made these treats especially popular for easy no-bake desserts for celebrations of all kinds.
What makes these truffles particularly appealing in 2025 is their perfect balance of nostalgia and modernity. The familiar taste of birthday cake connects us to childhood celebrations, while the convenient preparation method fits seamlessly into our busy lives. As one fan put it, “No-Bake Birthday Cake Truffles are the perfect blend of nostalgia and ease, making them a must-have for any celebration in 2025.”
Everything You Need for Birthday Cake Truffle Success
Creating these delightful party treats requires just a handful of simple ingredients and basic kitchen tools. You’ll need these ingredients to make approximately 24 truffles:
- ½ cup (62 g) all-purpose flour
- 1 ½ cups (188 g) yellow cake mix
- ½ cup (100 g) granulated sugar
- ½ cup (113 g or 1 stick) unsalted butter, softened
- 2 teaspoons vanilla extract
- ⅓ cup rainbow sprinkles (plus extra for decoration)
- 3 cups (16 oz) white chocolate melting wafers
- Rainbow nonpareils for topping
You’ll also need these basic kitchen tools to complete the recipe:
- Food processor (or mixing bowl with hand mixer)
- Microwave-safe bowl
- Baking sheet lined with parchment paper
- Cookie scoop or measuring spoon
- Toothpicks or fork for dipping
- Food thermometer (optional but recommended)
- Airtight container for storage
If you enjoy hassle-free dessert preparation, you’ll love how these ingredients come together to create something special. The beauty of this recipe lies in its simplicity – most ingredients are pantry staples you likely already have on hand. For those who enjoy cake mix cookies recipes, you’ll find similar convenience and delicious results with these truffles.
How to Make No-Bake Birthday Cake Truffles
Follow these simple steps to create perfectly delightful No-Bake Birthday Cake Truffles that will impress at any celebration:
Step 1: Pasteurize the Flour
Since this is a no-bake recipe, it’s important to heat treat the flour to eliminate any potential bacteria. Place your ½ cup all-purpose flour in a microwave-safe bowl and heat it in 30-second intervals, stirring between each, until it reaches 160°F (about 1 minute total). Allow the flour to cool completely before using it in your dough.
Step 2: Prepare the Dough
In your food processor, combine the cooled flour, yellow cake mix, granulated sugar, softened butter, and vanilla extract. Pulse until the ingredients form a smooth, slightly sticky dough that resembles cookie dough. If you don’t have a food processor, you can mix these ingredients in a large bowl using a hand mixer.
Step 3: Add Sprinkles
Transfer the dough to a bowl if you used a food processor. Gently fold in ⅓ cup of rainbow sprinkles by hand until they’re evenly distributed throughout the dough. Be careful not to overmix, as this can cause the sprinkle colors to bleed.
Step 4: Form the Truffles
Using a cookie scoop or measuring spoon, portion out the dough and roll between your palms to form 1-inch balls. Place the balls on a parchment-lined baking sheet. Once all the dough has been formed into balls, place the baking sheet in the freezer for 10 minutes to firm up the truffles.
Step 5: Dip in Chocolate
While the truffle centers are chilling, melt your white chocolate melting wafers according to package instructions. Using a toothpick or fork, dip each chilled truffle ball into the smooth melted white chocolate, allowing excess to drip off. Return the coated truffles to the parchment-lined baking sheet.
Step 6: Add Decorative Sprinkles
While the chocolate coating is still wet, sprinkle a few rainbow nonpareils on top of each truffle for decoration. Work quickly as the chocolate will begin to set, especially since the truffle centers are cold.
Step 7: Chill and Serve
Allow the chocolate coating to set completely by refrigerating the truffles for at least 20 minutes. Once set, these festive treats are ready to serve at your celebration!
The entire preparation process takes approximately 45 minutes (plus chilling time), making these perfect for last-minute gatherings. Many fans of cookie dough truffles find this birthday cake version just as addictive but with a unique festive twist.

Full No-Bake Birthday Cake Truffles Recipe
Prep Time: 30 minutes
Chill Time: 30 minutes
Total Time: 1 hour
Servings: 24 truffles
Calories: 162 calories per truffle
Nutritional Information (per truffle):
Calories: 162
Fat: 8.5g
Saturated Fat: 5.1g
Carbohydrates: 19.7g
Sugar: 14.3g
Protein: 1.2g
Sodium: 65mg
Ingredients:
- ½ cup (62 g) all-purpose flour
- 1 ½ cups (188 g) yellow cake mix
- ½ cup (100 g) granulated sugar
- ½ cup (113 g) unsalted butter, softened
- 2 teaspoons vanilla extract
- ⅓ cup rainbow sprinkles (plus extra for decoration)
- 3 cups (16 oz) white chocolate melting wafers
- Rainbow nonpareils for topping
Equipment:
- Food processor or mixing bowl with hand mixer
- Microwave-safe bowl
- Parchment paper
- Baking sheet
- Cookie scoop or measuring spoon
- Toothpicks or fork
- Food thermometer (optional)
Instructions:
- Heat treat the flour by microwaving in 30-second intervals, stirring between each, until it reaches 160°F. Let cool completely.
- In a food processor, combine cooled flour, cake mix, sugar, butter, and vanilla. Pulse until a smooth dough forms.
- Transfer dough to a bowl and fold in rainbow sprinkles by hand.
- Scoop dough and roll into 1-inch balls. Place on parchment-lined baking sheet.
- Freeze truffle balls for 10 minutes.
- Melt white chocolate according to package directions.
- Using a toothpick or fork, dip each chilled truffle into melted white chocolate, allowing excess to drip off.
- While chocolate is still wet, sprinkle with nonpareils.
- Refrigerate for at least 20 minutes until chocolate is completely set.
Recipe Notes:
- Heat treating the flour is crucial for food safety in no-bake recipes.
- If the dough seems too sticky, refrigerate for 15 minutes before rolling into balls.
- For best results, use high-quality white chocolate melting wafers rather than chips, which may not melt as smoothly.
- Keep truffles refrigerated until ready to serve, especially in warm weather.
Creative Variations and Helpful Tips
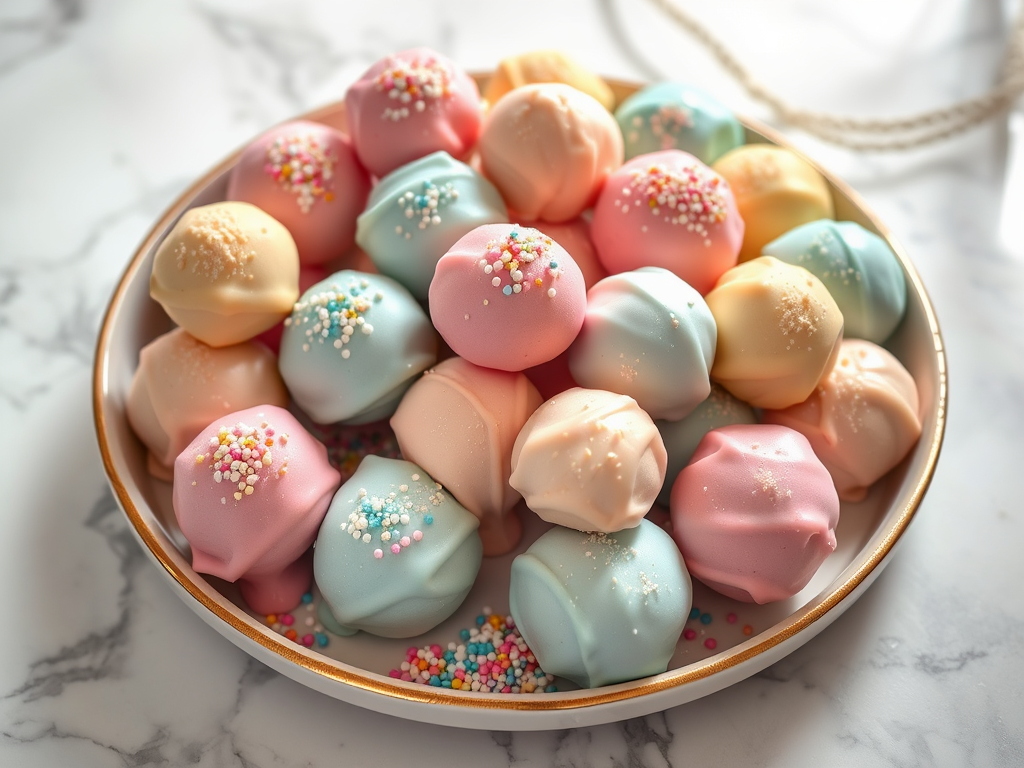
The basic No-Bake Birthday Cake Truffle recipe is just the beginning! You can customize these treats in countless ways to fit different themes or taste preferences. Here are some popular flavor variations that can take your truffles to the next level:
- Chocolate Lover’s Version: Substitute chocolate cake mix for yellow cake mix and use milk chocolate for coating. For extra indulgence, add mini chocolate chips to the dough.
- Red Velvet: Use red velvet cake mix with cream cheese added to the dough and coat with white chocolate.
- Lemon Burst: Use lemon cake mix, add a teaspoon of lemon zest to the dough, and coat with white chocolate.
- Funfetti Explosion: Double the amount of rainbow sprinkles in the dough and mix different types of sprinkles for coating.
- Cookies & Cream: Add crushed chocolate sandwich cookies to vanilla cake mix dough and coat with white chocolate.
If you’ve mastered chocolate cream cheese truffles, you’ll find these cake mix variations just as simple to prepare but with a different flavor profile that’s perfect for birthdays.
For consistently perfect truffles, keep these professional tips in mind:
- Temperature Control: Always freeze the truffle centers before dipping in chocolate. This prevents them from falling apart and helps the chocolate coating set more evenly.
- Chocolate Melting: If your white chocolate seems too thick for dipping, add a teaspoon of coconut oil or shortening to thin it out.
- Double Coating: For an extra-smooth finish, allow the first chocolate coating to set completely, then dip the truffles a second time.
- Flavor Boost: Add a pinch of salt to the dough to enhance the birthday cake flavor and create a more balanced taste.
- Decoration Timing: Add sprinkles immediately after dipping each truffle; if you wait too long, the chocolate will set and the sprinkles won’t stick.
Looking for other quick dessert options? Fans of these truffles also love easy cake mix cookies for another simple treat that starts with the same convenient ingredient.
How to Store No-Bake Birthday Cake Truffles
Proper storage is crucial to maintaining the fresh taste and appealing texture of your No-Bake Birthday Cake Truffles. Whether you’re making them ahead for a party or saving leftovers, these storage guidelines will help keep your truffles in perfect condition.
For short-term storage of No-Bake Birthday Cake Truffles, place them in an airtight container with parchment paper between layers to prevent sticking. Store in the refrigerator, where they’ll maintain optimal freshness for up to one week. The cool temperature helps the chocolate coating stay firm and prevents any dairy ingredients from spoiling.
When storing No-Bake Birthday Cake Truffles at room temperature, they’ll last for about 2-3 days. However, this is only recommended if your home is relatively cool (below 70°F). Place them in a sealed container away from direct sunlight or heat sources which could cause the chocolate to melt or lose its sheen.
For longer-term storage, No-Bake Birthday Cake Truffles freeze beautifully for up to 3 months. Place the completely set truffles on a baking sheet and freeze until solid (about 1 hour), then transfer to a freezer-safe container or zip-top bag, placing parchment between layers. When ready to enjoy, thaw frozen truffles overnight in the refrigerator rather than at room temperature for the best texture results.
If you plan to make these truffles well in advance, consider freezing the uncoated truffle centers instead. Then, thaw them in the refrigerator and dip in fresh melted chocolate before serving. This method ensures the chocolate coating looks pristine and glossy for your special event.

Bite-Sized Celebrations: Why These Truffles Win Every Time
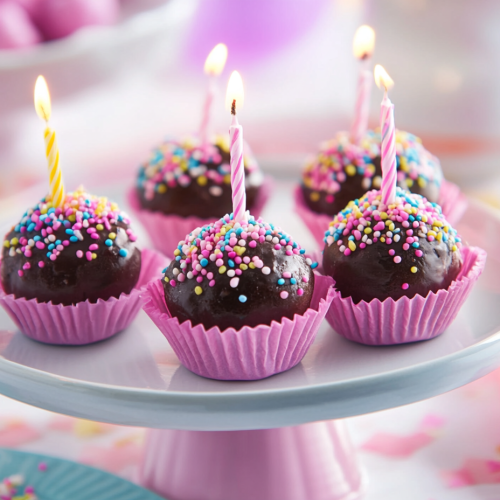
No-Bake Birthday Cake Truffles have captured hearts in 2025 for good reason – they transform ordinary gatherings into memorable celebration moments with minimal effort. Their portable nature makes them perfect for modern parties where guests might be mingling rather than sitting for a formal dessert course. Each bite delivers that unmistakable birthday cake flavor without the need for plates, forks, or serving utensils.
The versatility of these truffles extends beyond birthdays. They make wonderful additions to baby showers, graduation parties, holiday gatherings, or even as thoughtful homemade gifts. Their cheerful appearance instantly signals celebration, while their make-ahead potential reduces day-of party stress for hosts.
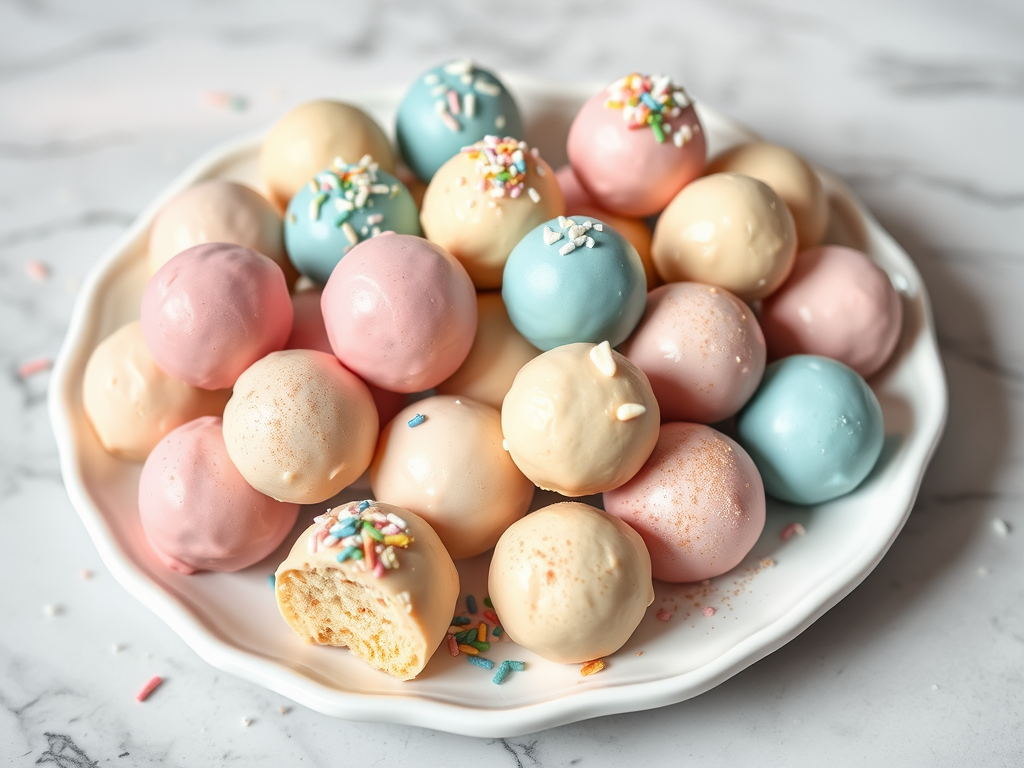
Perhaps the most compelling reason for their popularity is the perfect balance they strike between homemade charm and professional appearance. Even novice bakers can create these impressive treats that look like they came from a boutique bakery. In a world where social media-worthy food presentations are increasingly valued, these photogenic truffles deliver without demanding professional pastry skills.
So the next time you’re planning any celebration, consider skipping the traditional cake and serving these delightful No-Bake Birthday Cake Truffles instead. Your guests will appreciate the nostalgic flavor, festive presentation, and perfectly portioned indulgence – all created without ever turning on your oven. That’s a true win for hosts and guests alike in 2025!