

There’s something undeniably satisfying about making homemade fudge, and this Vanilla Fudge Recipe is one you’ll find yourself coming back to again and again. It’s luxuriously creamy, rich in flavor, and melts in your mouth with every bite. Whether you’re making it for a holiday gift, a special occasion, or just to satisfy your sweet tooth, this classic fudge recipe is as simple as it is indulgent.
What makes this vanilla fudge stand out? It’s all about high-quality ingredients and the right technique. This recipe embraces traditional candy-making methods, using real butter, pure vanilla extract, and a touch of patience to create that perfectly smooth, velvety texture. Unlike store-bought versions, this homemade fudge is free from artificial flavors and preservatives—just pure, sweet goodness made from scratch.
Even if you’ve never made fudge before, don’t worry! This guide walks you through every step, ensuring you get the perfect consistency without the frustration. From melting the ingredients just right to knowing when your fudge is set, I’ll share all the tips and tricks to make this the best vanilla fudge you’ve ever tasted.
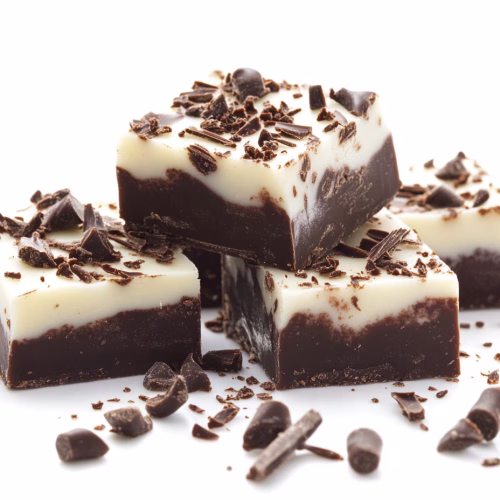
Vanilla Fudge
Equipment
- Saucepan for heating ingredients
- 8×8-inch baking pan lined with parchment paper
- Spatula for spreading fudge evenly
- Refrigerator for chilling fudge
Ingredients
- 3 cups white chocolate chips
- 1 can sweetened condensed milk (14 oz)
- 0.5 cup unsalted butter cut into pieces
- 1 tsp vanilla extract
- 0.25 tsp salt
Instructions
- Line an 8×8 inch baking pan with parchment paper, leaving an overhang for easy removal.
- In a saucepan over low heat, combine the white chocolate chips, sweetened condensed milk, and butter. Stir continuously until melted and smooth.
- Remove from heat and stir in the vanilla extract and salt until fully incorporated.
- Pour the fudge mixture into the prepared baking pan and smooth the top with a spatula.
- Refrigerate for at least 2 hours, or until firm.
- Once fully set, lift the fudge out of the pan using the parchment paper overhang. Cut into small squares and serve.
Notes
- Optional Equipment: A double boiler can be used instead of a saucepan for melting ingredients.
- Customization: Add chopped nuts or sprinkles for extra texture.
- Storage: Store in an airtight container in the refrigerator for up to 1 week.
- Serving Tip: Let the fudge sit at room temperature for 5 minutes before serving for the best texture.
Nutrition
Ingredients and Equipment Essentials
The secret to a smooth, creamy texture lies in the quality of your ingredients and equipment. Whether you’re a beginner or a seasoned baker, having the right tools and high-quality components ensures success. Let’s dive into what you’ll need to create this irresistible treat.
Key Ingredients and Pantry Staples
Every great creation starts with the basics. Here’s what you’ll need:
- 3 cups granulated sugar: The foundation of sweetness and texture.
- 1.5 cups heavy cream: Adds richness and creaminess.
- 1/4 cup corn syrup: Prevents crystallization for a smooth finish.
- 1/4 teaspoon salt: Balances the sweetness.
- 3 tablespoons high-quality butter: Enhances flavor and texture.
- 1 tablespoon pure vanilla extract: Adds depth and aroma.
Using high-quality butter and pure vanilla extract is non-negotiable. They elevate the flavor and ensure a professional result.
Kitchen Tools and Equipment Recommendations
Having the right tools makes the process smoother and more enjoyable. Here’s what I recommend:
- Large heavy-bottom saucepan: Distributes heat evenly and prevents burning.
- Digital or candy thermometer: Essential for monitoring temperature accurately.
- Wooden spoon: Perfect for stirring without scratching your pan.
- Parchment-lined baking pan: Ensures easy removal and clean cuts.
Preparing your workstation is just as important. Keep everything within reach to avoid last-minute scrambling. For more tips on baking essentials, check out this guide on healthy sweet potato brownies.
| Ingredient | Measurement | Purpose |
|---|---|---|
| Granulated Sugar | 3 cups | Sweetness and texture |
| Heavy Cream | 1.5 cups | Richness and creaminess |
| Corn Syrup | 1/4 cup | Prevents crystallization |
| Salt | 1/4 teaspoon | Balances sweetness |
| Butter | 3 tablespoons | Flavor and texture |
| Vanilla Extract | 1 tablespoon | Depth and aroma |
Step-by-Step Vanilla Fudge Recipe
Creating a perfect batch of homemade candy is all about precision and patience. With the right tools and techniques, you’ll achieve a smooth, creamy texture every time. Let’s walk through the process step by step.
Preparing Your Workstation
Start by organizing your workspace. Gather all your ingredients and tools within reach. This includes a heavy-bottom saucepan, a digital thermometer, and a wooden spoon. Pre-grease your baking pan with butter or line it with parchment paper for easy removal later.
Having everything ready ensures a smooth workflow. Trust me, it’s worth the extra minute to set up properly.
Cooking Process and Temperature Control
Combine sugar, cream, corn syrup, and salt in your saucepan. Heat the mixture over medium heat, stirring gently until the sugar dissolves. Once it reaches a gentle simmer, stop stirring and let it cook undisturbed.
Use your thermometer to monitor the temperature. The goal is to reach the soft ball stage at 238°F. This is crucial for the perfect texture. Remove the pan from heat as soon as it hits this mark.
Add butter and vanilla extract, then let the mixture cool to about 110°F. This takes roughly an hour. Patience here is key—don’t rush it!
After cooling, stir the mixture vigorously for 10-15 minutes with a spatula. This step develops the smooth, creamy texture we’re aiming for. Pour it into your prepared pan and let it set completely before cutting.
Follow these steps, and you’ll have a batch of delicious candy that’s sure to impress. Happy cooking!
Mastering the Temperature and Stirring Techniques
Mastering the art of candy-making hinges on two critical skills: temperature control and stirring techniques. These elements are the backbone of achieving that smooth, glossy texture we all love. Let’s dive into the science and methods behind these essential steps.
Understanding the Soft Ball Stage
Reaching the soft ball stage at 238°F is crucial for the perfect texture. This is when the sugar mixture forms a soft ball when dropped into cold water. Use a candy thermometer to monitor the temperature accurately. If it goes beyond 240°F, the candy can become too hard. Below 235°F, it may stay too soft.
Here’s a tip: Test your thermometer’s accuracy by checking if water boils at 212°F. Adjust your cooking temperature accordingly if needed. For more insights, check out this guide on understanding baking temperatures.
Proper Stirring Methods for Smooth Texture
Once the mixture reaches the soft ball stage, remove it from heat and let it cool to about 110°F. This step is vital for achieving the right consistency. Avoid stirring during this cooling period to prevent crystallization.
When it’s time to stir, use a wooden spoon and maintain a consistent motion. Stir vigorously for 10-15 minutes until the mixture loses its sheen and becomes thick. This process encourages the formation of long sugar crystals, resulting in a smooth, creamy texture.
Warning signs of improper stirring include a grainy texture or uneven consistency. If this happens, don’t worry—practice makes perfect. With patience and attention to detail, you’ll master these techniques and create candy that’s both beautiful and delicious.
Tips for Preventing Crystallization and Grainy Fudge
Grainy candy is often the result of sugar crystallization, but it’s easy to avoid with the right techniques. Even a single stray sugar crystal can ruin the smooth texture we’re aiming for. Let’s dive into some simple yet effective methods to keep your treat silky and perfect.
Why Crystallization Happens
When sugar crystals form on the sides of your pan, they can trigger a chain reaction, leading to a gritty texture. This is why it’s crucial to make sure no stray crystals remain. The good news? A few proactive steps can prevent this entirely.
Washing and Buttering the Pan
One of the best ways to prevent crystallization is to wash down or butter the sides of your pan immediately after the mixture boils. Here’s how to do it:
- Use a damp pastry brush to gently wash down the sides of the pan. This dissolves any sugar crystals that may have formed.
- Alternatively, lightly butter the sides of the pan. This creates a barrier that prevents crystals from sticking.
Timing is key here. Make sure to do this as soon as the mixture starts boiling. Waiting too long can allow crystals to form.
Proactive Methods for Smooth Results
Here are a few additional tips to keep in mind:
- Always use a clean pan and utensils. Even a small residue can lead to crystallization.
- Avoid stirring the mixture once it starts boiling. This can introduce crystals into the mix.
- Use parchment paper to line your pan. This ensures easy removal and prevents sticking.
By following these steps, you’ll make sure your candy stays smooth and creamy. It’s all about being proactive and paying attention to the details.
Remember, even a small sugar crystal can ruin the texture. But with these tips, you’ll master the art of preventing crystallization and create a treat that’s as smooth as it is delicious.
Common Mistakes and Troubleshooting in Fudge Making
Even the most experienced bakers can run into challenges when making candy, but with the right tips, you can avoid common pitfalls. From overheating to under-stirring, small mistakes can lead to big disappointments. Let’s explore how to troubleshoot these issues and ensure your treat turns out perfectly every time.
Overheating and Under-Stirring
One of the most common mistakes is overheating the mixture. This can happen if your candy thermometer is inaccurate or if you’re not paying close attention to the temperature. Overheating can cause the candy to become too hard or even burn. Always test your thermometer’s accuracy by checking if water boils at 212°F.
Under-stirring is another issue. If you don’t stir enough, small sugar crystals can form, leading to a grainy texture. Stir vigorously for 10-15 minutes after cooling to achieve that smooth, creamy consistency we all love.
Timing and Equipment
Timing is everything in candy making. If you don’t allow enough cooling time, the mixture won’t set properly. Aim for a cooling period of about an hour before stirring. This ensures the right consistency and prevents crystallization.
Using the right equipment is also crucial. A heavy-bottom saucepan and a reliable thermometer are essential. If you’re unsure about your tools, consider upgrading to ensure accuracy. For more tips on using high-quality ingredients, check out this vanilla bean ganache recipe.
Humidity and High-Altitude Adjustments
High humidity can affect the texture of your candy. If you’re baking in a humid environment, consider reducing the cooking temperature slightly and increasing the cooling time. This helps prevent excess moisture from ruining the texture.
For those at high altitudes, adjustments are necessary. Reduce the cooking temperature by 1-2°F for every 1,000 feet above sea level. This compensates for the lower boiling point of water at higher elevations.
| Issue | Solution |
|---|---|
| Overheating | Test thermometer accuracy and monitor temperature closely. |
| Under-stirring | Stir vigorously for 10-15 minutes after cooling. |
| High Humidity | Reduce cooking temperature and increase cooling time. |
| High Altitude | Lower cooking temperature by 1-2°F per 1,000 feet. |
Remember, mistakes are part of the learning process. Each batch teaches you something new, so don’t be discouraged. With these tips, you’ll be well on your way to mastering the art of candy making!
Variations and Creative Mix-ins for Your Fudge
One of the best parts of making candy is the chance to get creative! Adding mix-ins and experimenting with flavors can transform your treat into something uniquely yours. Whether you’re craving something sweet, salty, or festive, there’s a world of possibilities to explore.
Nuts, Chocolates, and Flavor Enhancements
Start by thinking about your favorite flavors. Crushed nuts like walnuts or pecans add a satisfying crunch. For a richer taste, swirl in melted dark or white chocolate. A dash of peppermint or almond extract can also elevate the flavor profile.
When adding mix-ins, gently fold them into the mixture after it has cooled slightly. This ensures they blend evenly without disrupting the smooth texture. For a festive touch, sprinkle colorful toppings like crushed candy canes or edible glitter.
Holiday and Seasonal Variations
For holiday gatherings, try a peppermint swirl or gingerbread-inspired version. These variations are perfect for gifting or serving at parties. Add a cup of crushed cookies or candy bars for a fun twist that everyone will love.
Don’t be afraid to experiment! Sweet and salty combinations, like pretzel pieces or caramel swirls, can create a delightful contrast. Just remember to balance the flavors so one doesn’t overpower the other.
Tips for Perfect Mix-ins
- Measure your add-ins carefully—about 1 cup per batch works well.
- Use high-quality ingredients to ensure the best taste and texture.
- Stir gently to avoid breaking down the mix-ins or creating air pockets.
With these ideas, you can make each batch of candy a new adventure. The key is to have fun and let your creativity shine!
Storing and Serving Your Delicious Vanilla Fudge
Once your treat is ready, proper storage and presentation can make all the difference in preserving its quality and appeal. Whether you’re planning to enjoy it now or save it for later, these tips will ensure it stays fresh and looks stunning on any table.
Best Practices for Refrigeration and Freezing
To keep your creation fresh, transfer it to a lined pan and let it set in the refrigerator for at least 8 hours. Use parchment paper to line the pan—this makes removal effortless and keeps the texture intact.
For longer storage, place the treat in an airtight container. It can stay fresh in the refrigerator for up to 3 weeks or in the freezer for up to 3 months. When freezing, wrap it tightly in plastic wrap before placing it in the container to prevent freezer burn.
Presentation and Cutting Tips
When it’s time to serve, let the treat sit at room temperature for about 15 minutes. This softens it slightly, making it easier to cut into neat squares or pieces. Use a sharp knife dipped in hot water for clean, even cuts.
For a decorative touch, sprinkle a topping like crushed nuts or edible glitter. If you’re serving it at a gathering, arrange the pieces on a platter with parchment paper for a polished look.
| Storage Method | Duration | Tips |
|---|---|---|
| Refrigerator | Up to 3 weeks | Use an airtight container |
| Freezer | Up to 3 months | Wrap tightly in plastic wrap |
For more creative dessert ideas, check out this vanilla bean syrup recipe. It’s a versatile addition to your kitchen repertoire!
How to Turn Your Kitchen into a Vanilla Fudge Paradise
Making this creamy treat at home is a rewarding experience that combines tradition with creativity. By following the step-by-step process, you’ll achieve a smooth texture every time. Paying attention to details like temperature control and proper stirring ensures perfection.
This treat is not only delicious but also versatile. Feel free to experiment with mix-ins like nuts or chocolate to make it your own. The joy of creating something from scratch is unmatched, and sharing it with loved ones makes it even better.
Remember, using the right tools, like a reliable thermometer, and high-quality ingredients makes all the difference. I encourage you to try it out and share your results. Let’s build a community of passionate bakers who love creating and sharing sweet moments!
FAQ
What’s the best way to store this treat?
Keep it in an airtight container at room temperature for up to a week. For longer storage, refrigerate for up to a month or freeze for up to three months.
Can I use a different flavor extract?
Absolutely! Almond, peppermint, or even coconut extract can add a unique twist. Just swap it in equal amounts for the vanilla.
How do I know when the mixture reaches the soft ball stage?
Use a candy thermometer to check for 235°F to 240°F. If you don’t have one, drop a small amount into cold water—it should form a soft, pliable ball.
Why is my batch grainy?
Graininess often happens if sugar crystals form. Make sure to wash down the sides of the pan with a wet pastry brush and avoid stirring once the mixture starts boiling.
Can I add mix-ins like nuts or chocolate?
Yes! Stir in chopped nuts, chocolate chips, or even dried fruit after removing the mixture from the heat for added texture and flavor.
What’s the best way to cut it into squares?
Use a sharp knife dipped in hot water and wiped dry. This helps create clean, even pieces without sticking.
Can I make this without a candy thermometer?
Yes, you can rely on the cold water test. Just be patient and watch the mixture closely to avoid overcooking.
How do I prevent it from sticking to the pan?
Line your pan with parchment paper or lightly grease it with butter before pouring in the mixture. This makes removal a breeze.
Vanilla fudge? Yes please